


5
BLENDER SERVICE MANUAL
3.
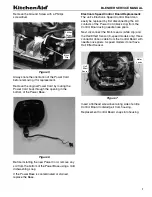
Power Base:
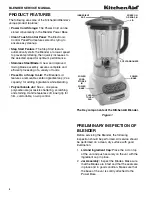
Inspect the Blender Power Base.
Make sure the Coupling at the end of the Motor
Shaft moves freely. Make sure the four Rubber
Feet are level.
Make sure that all of the Base assembly screws
under the Rubber Feet are intact and secure.
4.
Clean Touch Pad:
Make sure the Blender’s
Clean Touch Pad is clean and not distorted.
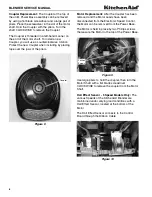
5.
Power Cord (Stored in Base):
Before any
operation of the Blender is performed, check
the Power Cord for cuts or tears.
If any damage to the Power Cord is found,
replace the entire Power Cord before attempting
operation.
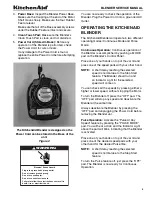
The KitchenAid Blender is designed so the
Power Cord can be stored in the Base of the
unit.
Figure 2
You are now ready to check the operation of the
Blender. Plug the Power Cord into a grounded AC
Outlet.
OPERATING THE KITCHENAID
BLENDER
The KitchenAid Blender will operate in two different
operating modes
:
Continuous Mode and Pulse
Mode.
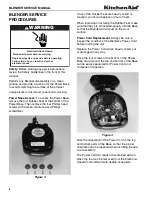
Continuous Operation:
Continuous operation of
the Blender is accomplished by pushing a MODE
pad on the Blender’s Control Panel.
Place one of your hands on top of the Jar lid and
press one of the speed pads with your other hand.
NOTE:
A short delay reaching the selected
speed is normal due to the Step Start
feature. The Blender should run and
an Indicator Light for the selected
speed will come on.
You can check all the speeds by pressing either a
higher or lower speed, without stopping the Motor.
To turn the Blender off, press the “OFF” pad. The
“OFF” pad will stop any speed and deactivate the
Blender at the same time.
Always deactivate the Blender by pressing the
“OFF” pad and unplugging the Power Cord before
removing the Blender Jar.
Pulse Operation:
Activate the “Pulse At Any
Speed” feature by pressing the “PULSE MODE”
pad. You will hear a click, and the Indicator Light
above the pad will blink, indicating that the Blender
is activated.
Place one of your hands on top of the Jar lid and
press one of the desired speed pads with your
other hand for the desired Pulse time.
NOTE:
A short delay reaching the selected
speed is normal due to the Step Start
feature.
To turn the Pulse feature off, just press the “OFF”
pad. The Blender is now ready for Continuous
Operation.
WARNING
Electrical Shock Hazard
Plug into a grounded 3 prong outlet.
Failure to follow these instructions can result in
death, fire, or electrical shock.
Do not use an extension cord.
Do not use an adapter.
Do not remove ground prong.


