KITCHENAID
Stand Mixer Service Manual LIT4177310-C 2005 KitchenAid
SECTION 3
REPAIRS TO MOTOR AND CONTROL UNIT
A.
Clean the brush holder with solvent and
wipe them dry with a clean dry cloth.
Install the brush holder into the gearcase-
motor housing so that the rim on the holder seats
against the bore step in the motor housing.
B.
Clean the brush holder inserts with solvent and
wipe them dry with a clean dry cloth. Install the
inserts into the brush holder.
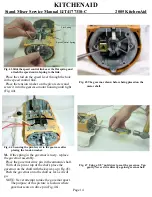
They must be oriented, viewing the motor housing
from the rear, as shown below in (Fig. 34).
Fig. 34 The orientation of the brush holder inserts viewing
from the rear of the motor housing.
Lock the brush holder with inset in place
with the #10-24x1/4” cup point setscrews.
EARLY PRODUCTION SOLID STATE
STAND MIXERS
The early production solid state stand mixers
utilized a square brush and brush holder. Square
brushes are no longer available.
Brushes with chamfered edges will fit into square
brush holders.
C.
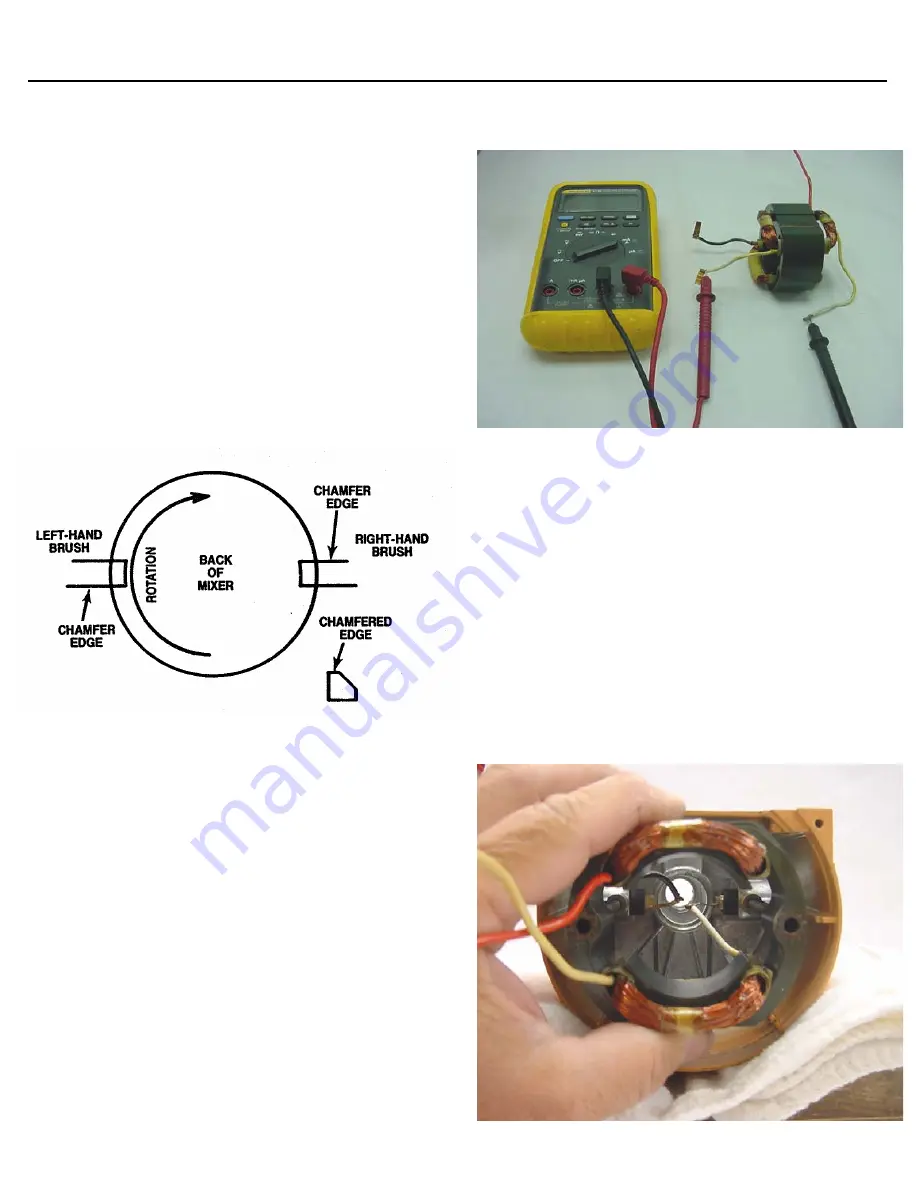
Test the stator with an ohmmeter (Fig. 35).
Set the ohmmeter on the 1X scale and be sure it is
set at zero ohms when shorting the test leads.
Fig. 35 Test the two stator coils with an ohmmeter set on
low scale.
In upper coil, connect one ohmmeter lead to the red
wire and the other to the black wire of the coil.
If the ohmmeter shows a low resistance reading, the
coil is good. Check the other coil in the same way.
If the needle on the ohmmeter deflects to zero or
there is no deflection, the coil is bad and the stator
must be replaced.
D.
Assemble the two stator studs and tighten them
by using long nose pliers.
Be sure the nose of the pliers is placed on the stator
stud in the area that the stator seats so the threads
will not be deformed.
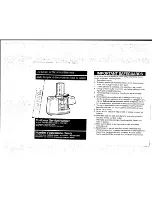
Start the stator on the two stator studs and into the
ribs of the motor housing (Fig. 36).
Fig. 36 Positioning the stator on the two stator studs and
into the ribs of the motor housing.
Page 11


