KITCHENAID
Stand Mixer Service Manual LIT4177310-C 2005 KitchenAid
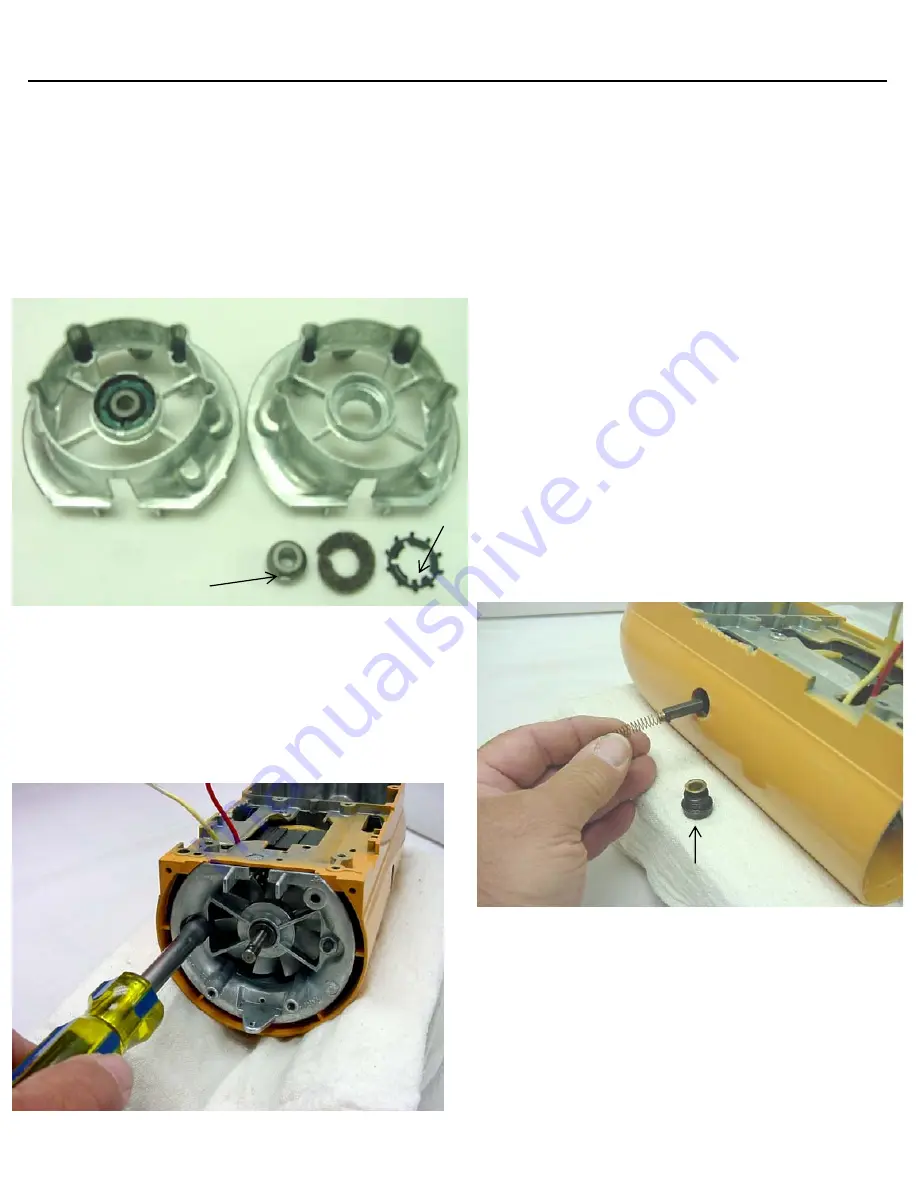
On older models, to replace the bearing, remove the
three #4-40x1/2 pan head screws and lift off the
bearing retainer.
Take out the old bearing and felt washer.
Place new bearing in cavity with the square notch
toward the top of the bracket.
Soak the felt washer in bearing cap with oil.
Place the retainer on the bearing and screw in place
with the three #4-40x1/2” screws.
.
Fig. 40 Bearing bracket assembled & unassembled
I.
Install the bearing bracket. Start bracket onto the
two stator studs.
Push the bracket back until the stator studs are
through the bracket and it seats into the ribs of the
gear case.
Start the two nuts on the stator studs and turn them
until the bearing bracket is seated (Fig. 41).
Fig. 41 Tighten the two nuts on the stator studs to seat the
bearing bracket.
J.
The armature should always be checked for end
play. Armature should turn freely with minimal
end play.
On older models - after the thrust bearing
assembly has been seated properly and proper
amount of spacing washers placed at the rear, there
should only be a perceptible amount of end play to
assure free operation of the armature.
If there is too much end play, add another thin
washer.
To do this, remove the bearing bracket and add
the washer to the armature shaft, then reassemble
the bearing bracket into the gear case-motor
housing.
K.
If the old brushes are more than 5/16” long,
assemble them in the brush holders.
From the back of the unit, put the brush marked
“right” in the right side of brush holder. Be sure the
side marked “up” is at the top.
Push the brush in and lock it in place with a brush
holder screw cap (Fig. 42).
Put left hand brush in the mixer in the same way.
Fig. 42 Placing one of the brushes into the mixer brush
holder.
L.
Place the speed control link and cam assembly
through the slot in the bearing bracket with the cam
portion of the speed control link and cam assembly
toward the top of the gearcase-motor housing.
Place the flat spring in position and slide the
mixer speed link and cam assembly over the flat
spring; attach the speed control spring on the speed
control link and cam assembly (Fig. 43).
Page 13
Square Notch
Tongue
Brush holder screw cap assembly


