background image

6

Rinse aid setting

The amount of rinse aid released into the final wash can be 
adjusted. The factory setting is at 2. For most water conditions, 
set the adjuster to 1 or 2. If there are rings or calcium (hard water) 
spots on dishes, try a higher setting.

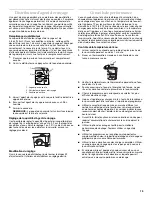
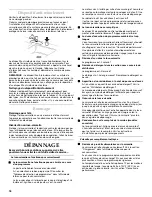
To adjust the setting

Open the dispenser cover. Turn the adjuster inside the dispenser 
to the desired setting.

Performance Tips

Hot water dissolves and activates the dishwashing detergent. Hot 
water also dissolves grease on dishes and helps glasses dry spot-
free. Is the water temperature too low? For best dishwashing 
results, water should be 120°F (49°C) as it enters the dishwasher. 
Loads may not wash as well if the water temperature is too low. 
Water that is too hot can make some soils harder to remove and 
cause certain detergent ingredients not to function. If your water 
heater is located far from the dishwasher, it may be necessary to 
run the hot water at the faucet closest to the dishwasher to 
minimize the amount of cold water in the water line.

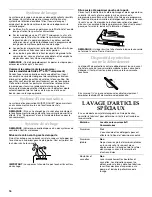
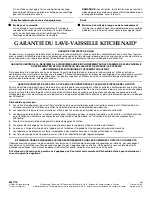
To check water temperature

1. Run hot water at the faucet closest to your dishwasher for at 

least 1 minute.

2. Place a candy or meat thermometer in a glass measuring cup.

3. Check the temperature on the thermometer as the water is 

running into the cup.

To save water, energy and time, do not rinse dishes before 
putting them into the dishwasher.

Choose the cycle that describes the most difficult soil in your 
dish load.

Do not worry about mixed loads. Any item that is dishwasher 
safe can be washed using any cycle.

Use a delay feature (on some models) to run your dishwasher 
during off-peak hours. Local utilities recommend avoiding 
heavy usage of energy at certain times of day.

During the summer, run your dishwasher at night. This 
reduces daytime heat buildup in the kitchen.

Use the heated dry option for best drying performance. 
Always use rinse aid.

Use cycles or options that add extra heat to the wash or rinse 
portion of the cycle for better performance.

Run your dishwasher with full loads. Run a rinse cycle after 
meals until the dishwasher is full.

If your home is equipped with a water softener, you may want 
to avoid starting the dishwasher during the regeneration of the 
softener, as this may contribute to poor wash performance.

Wash System

The five-level wash system provides excellent cleaning results. 
Four levels of filtration and a soil collector system filter the wash 
water and prevent food particles from redepositing on the clean 
dishes.

The wash water continuously flows through the Ultra-Fine 
filter, trapping food particles. 

On P SERIES™ and S SERIES™ models, as the Ultra-Fine 
Filter traps food particles, the pressure in the pump increases. 
The sensor monitors this pressure and automatically adjusts 
the wash cycle for the best wash performance.

Two water jets, located under the spray arm, remove the food 
particles from the Ultra-Fine filter.

A coarse strainer prevents bones, pits, and other large objects 
from entering the pump system.

NOTE: Periodically check the coarse strainer and remove any 
objects on the strainer.

How the sensor adjusts the cycle:
(on P SERIES™ and S SERIES™ models)

While the dishwasher is “sensing,” it may perform a series of short 
drains and fills skimming off small amounts of soils and dirty 
water. These are simultaneously replaced with clean water. This 
removes trapped food particles from the pump for improved wash 
performance. Once soil level is determined, the sensor 
automatically adds heat, time, or water as needed for proper 
cleaning.

Sound System

The WHISPER QUIET

®

 sound insulation system helps to maintain 

a quiet home environment during dishwasher operation.
NOTE: If you do not load dishes properly, the quiet operation of 
your dishwasher could be affected. (See “Loading” in the 
Consumer Reference Guide.)
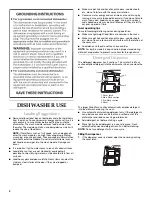
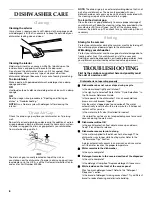
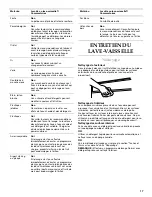
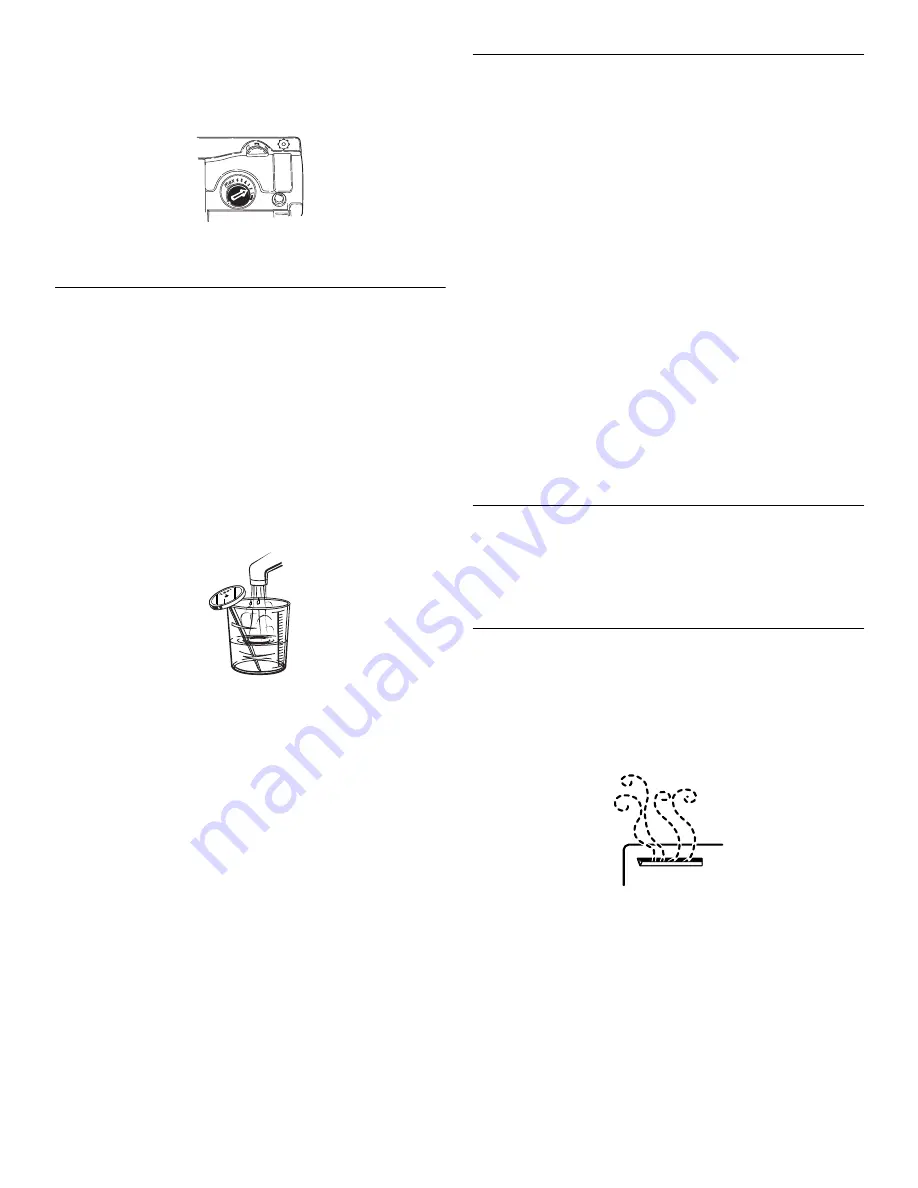
Drying System

NOTE: Your dishwasher has one of the vent systems shown 
below.

Located on the front left side of the door

During drying, you can see steam escaping through the vent at 
the upper left corner of the door. This is normal as the heat dries 
your dishes.

IMPORTANT: The vapor is hot. Do not touch the vent 
during drying.

Summary of Contents for KUDS01FLSS

Page 1: ...l utilisateur Au Canada pour assistance composez le 1 800 461 5681 pour installation ou service composez le 1 800 807 6777 ou visitez notre site web à www KitchenAid ca 8531778 TableofContents Tabledesmatières ASSISTANCE OR SERVICE 2 DISHWASHER SAFETY 2 DISHWASHER USE 4 WASHING SPECIAL ITEMS 7 DISHWASHER CARE 8 TROUBLESHOOTING 8 WARRANTY 10 ASSISTANCE OU SERVICE 11 LA SÉCURITÉ DU LAVE VAISSELLE 11...

Page 2: ...te model number and serial number You can find this information on the model and serial number label located under the washer lid Dealer name____________________________________________________ Serial number __________________________________________________ Address ________________________________________________________ Phone number__________________________________________________ Model number ...

Page 3: ...able for its size and use Remove all shipping plugs from hoses and connectors such as the cap on the drain outlet before installing See Installation Instructions for complete information Tip Over Hazard Do not use dishwasher until completely installed Do not push down on open door Doing so can result in serious injury or cuts Electrical Shock Hazard Electrically ground dishwasher Connect ground wi...

Page 4: ...t if you do not plan to wash them soon Foods such as eggs rice pasta spinach and cooked cereals may be hard to remove if they are left to dry over a period of time Quiet operating tips To avoid thumping clattering noises during operation Make sure lightweight load items are secured in the racks Make sure pot lids and handles pizza pans cookie sheets etc do not touch interior walls or interfere wit...

Page 5: ... rinse aid Do not use a solid or bar type Filling the dispenser The rinse aid dispenser holds 4 8 oz 145 mL of rinse aid Under normal conditions this will last for about 1 to 3 months Rinse aid is released through an opening in the dispenser When latched properly the cover remains closed The cover should be opened only when refilling the dispenser You do not have to wait until the dispenser is emp...

Page 6: ...for better performance Run your dishwasher with full loads Run a rinse cycle after meals until the dishwasher is full If your home is equipped with a water softener you may want to avoid starting the dishwasher during the regeneration of the softener as this may contribute to poor wash performance Wash System The five level wash system provides excellent cleaning results Four levels of filtration ...

Page 7: ...washing performance Cast Iron No Seasoning will be removed and iron will rust China Stoneware Yes Always check manufacturer s recommendations before washing Antique hand painted or over the glaze patterns may fade Gold leaf can discolor or fade Crystal Yes Check manufacturer s recommendations before washing Some types of leaded crystal can etch with repeated washing Gold No Gold colored flatware w...

Page 8: ...ou lift off the chrome cover Unscrew the plastic cap Then check for any soil buildup Clean if necessary Storing Storing for the summer Protect your dishwasher during the summer months by turning off the water supply and power supply to the dishwasher Winterizing your dishwasher Protect your dishwasher and home against water damage due to freezing water lines If your dishwasher is left in a seasona...

Page 9: ...tore detergent in a cool dry area Heavy soil and or hard water generally require extra detergent Is the home water pressure high enough for proper dishwasher filling Home water pressure should be 20 to 120 psi 138 to 828 kPa for proper dishwasher fill A booster pump on the water supply can be added if pressure is too low NOTE To remove spots and film from dishes try a white vinegar rinse This proc...

Page 10: ...cording to instructions attached to or furnished with the product KitchenAid will pay for replacement parts and repair labor costs for the stainless steel tub and or inner door if the tub and or inner door develops a water leak caused by rust through resulting from defective materials or workmanship Service must be provided by a KitchenAid designated service company KitchenAid will not pay for 1 S...

Page 11: ...odèle et le numéro de série au complet Vous pouvez trouver cette information sur la plaque signalétique située sous le couvercle de la laveuse Nom du marchand ______________________________________________ Numéro de série ________________________________________________ Adresse ________________________________________________________ Numéro de téléphone ___________________________________________ ...

Page 12: ...vaisselle si tous les panneaux de l enceinte ne sont pas en place Ne pas jouer avec les commandes Ne pas abuser vous asseoir ni monter sur la porte le couvercle ou les paniers du lave vaisselle Pour éviter tout risque d accident ne pas laisser les enfants jouer dans ou sur le lave vaisselle Sous certaines conditions de l hydrogène peut se former dans un réseau d eau chaude inutilisé depuis deux se...

Page 13: ...s encastrés boucher les orifices d évacuation des éviers avec leurs bondes pendant les opérations de lavage pour éviter le transfert des bruits par les canalisations Distributeurdedétergent Le distributeur de détergent comporte 2 sections La section plus petite du prélavage vide le détergent dans le lave vaisselle lors de la fermeture de la porte La partie plus grande pour le lavage principal vide...

Page 14: ...e un détergent en poudre concentré ou un détergent liquide Lors de l utilisation d un détergent en poudre concentré ou d un détergent liquide procéder conformément aux instructions indiquées sur l emballage Si on utilise des blocs de détergent mettre un bloc complet dans la section de lavage principal seulement pour toutes les charges et tous les niveaux de dureté de l eau 20 30 Dureté de l eau Qu...

Page 15: ... les meilleurs résultats de lavage l eau devrait être à 120 F 49 C à son entrée dans le lave vaisselle Les charges peuvent ne pas être lavées aussi bien si la température de l eau est trop basse L eau trop chaude peut rendre certaines saletés plus difficiles à enlever et empêcher certains ingrédients du détergent de faire effet Si le chauffe eau se trouve loin du lave vaisselle il peut être nécess...

Page 16: ...oir Chargement dans le Guide de référence pour le consommateur Systèmedeséchage REMARQUE Votre lave vaisselle dispose d un des systèmes de ventilation illustrés ci dessous Situé sur le côté avant à gauche de la porte Durant le séchage vous pouvez voir de la vapeur s échapper par l évent du coin supérieur gauche de la porte Ceci est normal car la chaleur sèche la vaisselle IMPORTANT La vapeur est c...

Page 17: ...ons du fabricant avant le lavage Après plusieurs lavages la solution de détergent peut attaquer certains types de cristal au plomb Or Non Les couverts dorés subiront un changement de couleur Verre Oui Le verre opaque jaunit après de nombreux lavages au lave vaisselle Coutellerie à manche creux Non Les manches de certains couteaux sont fixés à la lame au moyen d un adhésif qui peut se dégager lors ...

Page 18: ...joncteur s est il ouvert Le moteur s est il arrêté par suite d une surcharge Le moteur se réactive automatiquement après quelques minutes S il ne se remet pas en marche contacter le service de dépannage Le robinet d arrêt le cas échéant est il ouvert Il est normal pour certains programmes de faire des pauses répétées pendant quelques secondes lors du lavage principal Le lave vaisselle ne se rempli...

Page 19: ...urrait endommager le lave vaisselle 1 Laver et rincer la vaisselle Utiliser le séchage à l air ou une option de séchage économique Enlever tous les couverts ou articles métalliques 2 Ajouter 2 tasses 500 mL de vinaigre blanc dans une tasse à mesurer lavable au lave vaisselle dans le panier inférieur 3 Faire exécuter au lave vaisselle un programme de lavage complet et un séchage à l air ou une opti...

Page 20: ...ange et lles frais de main d oeuvre pour la cuve en acier inoxydable et ou la surface interne de la porte si cette cuve et ou surface interne comporte une fuite d eau causée par une percée de rouille attribuable à des vices de matériaux ou de fabrication Les réparations doivent être effectuées par un établissement de service désigné par KitchenAid KitchenAid ne paiera pas 1 Les visites d un dépann...

Reviews: