background image

The kitchen is my family’s happy 
place. It’s where we cook and eat 
and bake and laugh and share our 
most beautiful moments together. 
That’s what inspired the creation 
of Beautiful, my new collection  
of easy-to-use kitchenware that 
you’ll want to keep out on your 
kitchen counter. So whether  
your kitchen has flour all over  
the place from a kid's baking 
session or you’re throwing an adult 
dinner party, I hope every step will 
be simple, delicious and beautiful!

www.cookwithbeautiful.com

Summary of Contents for 19085

Page 1: ...12 x 22 Extra Large Electric Griddle Instruction Manual 12 x 22 Extra Grande Plancha Manual de instrucciones...

Page 2: ...at inspired the creation of Beautiful my new collection of easy to use kitchenware that you ll want to keep out on your kitchen counter So whether your kitchen has flour all over the place from a kid...

Page 3: ...Electric Power 10 Section 2 Instructions Getting to Know Your XL Griddle 12 Temperature Control Probe 13 Before Using for the First Time 13 14 Operation 14 16 XL Griddle Cooking Chart 17 USDA Cooking...

Page 4: ...icados 28 Potencia el ctrica 28 Secci n 2 Instrucciones Conozca mejor su plancha XG 30 Sonda de control de temperatura 31 Antes del primer uso 32 33 Funcionamiento 33 35 Tabla de cocci n para la planc...

Page 5: ...Section 1 Safety 1...

Page 6: ...ental capabilities or lack of experience and knowledge unless they have been given supervision or instruction concerning use of the appliance by a person responsible for their safety 5 Close supervisi...

Page 7: ...ol probe supplied with this XL Griddle only The use of any other temperature control probe may cause fire electric shock or injury 13 Turn the temperature control dial to the OFF position before inser...

Page 8: ...t materials and allow metal parts to cool before cleaning Do not place anything on top of the XL Griddle while it is operating or while it is hot 1 All users of this appliance must read and understand...

Page 9: ...from becoming entangled in or tripping over a longer cord b Longer detachable power supply cords or extension cords are available and may be used if care is exercised in their use c If a long detacha...

Page 10: ...ce mats between the appliance and the finish of the counter top or table top Failure to do so may cause the finish to darken permanent blemishes may occur or stains can appear ELECTRIC POWER If the el...

Page 11: ...Section 2 Instructions 2...

Page 12: ...slightly from illustrations 1 Detachable Stainless Steel Backsplash 2 Non Stick XL Cooking Surface 3 Probe Socket 4 Removable Temperature Control Probe 5 Polarized Plug 6 Cool Touch Handles 7 Non Ski...

Page 13: ...in the recipe Use the WARM setting for serving 3 The indicator light on the temperature control probe will illuminate as soon as the dial is rotated The indicator light will turn OFF once the selected...

Page 14: ...OFF position Insert probe into the socket on the side of the XL Griddle Figure 3 Check to make sure probe is securely in place 8 Coat the non stick XL Griddle surface with vegetable shortening 9 Plug...

Page 15: ...or wooden utensils to prevent damage to the XL Griddle s non stick surface NOTE During cooking the indicator light will turn on and off as the proper temperature is maintained CAUTION XL Griddle surfa...

Page 16: ...16 Figure 1 Figure 3 Figure 2 Figure 4...

Page 17: ...ch Toast 350 F 6 10 minutes Flip French Toast when browned halfway into cooking time Hamburger 350 F 3 14 minutes Flip burgers halfway into cooking time Ham Slices 350 F 14 18 minutes Flip ham halfway...

Page 18: ...SPRAYS CAN CAUSE BUILD UP THAT MAY AFFECT THE NON STICK PERFORMANCE OF THE GRIDDLE SURFACE WARNING To avoid electric shock turn the temperature control dial to the OFF position Then unplug temperature...

Page 19: ...to clean the backsplash and XL Griddle surface Rinse sponge and wipe non stick XL Griddle surface dry 9 For stubborn food particles sprinkle baking soda directly on stained areas Moisten the baking s...

Page 20: ...are clean and dry before storing Slide the drip tray into the front of the XL Griddle for storage Remove the backsplash and store for later use 2 Never store the XL Griddle while it is hot or wet 3 St...

Page 21: ...rts or damage resulting from any of the following negligent use of the product use of improper voltage or current improper routine maintenance use contrary to the operating instructions disassembly re...

Page 22: ...e product to Sensio Inc dba Made by Gather Attach a tag to the product that includes your name address daytime contact telephone number case number and description of the problem Also include a copy o...

Page 23: ...23 Secci n 1 Seguridad 1...

Page 24: ...be ser utilizado por personas incluidos ni os con capacidades f sicas sensoriales o mentales reducidas o con falta de experiencia y conocimientos salvo que una persona responsable por su seguridad los...

Page 25: ...electrodom stico que contiene aceite caliente u otros l quidos calientes PRECAUCI N Utilice nicamente la sonda de control de temperatura suministrada con esta plancha XG El uso de cualquier otra sond...

Page 26: ...adecuadas para evitar el riesgo de quemaduras incendios u otras lesiones a personas o da os materiales ATENCI N Este electrodom stico se calienta durante su funcionamiento y retiene calor durante un t...

Page 27: ...so NOTAS SOBRE EL ENCHUFE Este electrodom stico tiene un enchufe polarizado una pata es m s ancha que la otra Para reducir el riesgo de descargas el ctricas este enchufe encaja de una sola manera en u...

Page 28: ...a ya que puede ser jalado por ni os o cualquier persona podr a tropezarse ADVERTENCIA SOBRE PLASTIFICADOS ATENCI N A fin de evitar que los plastificados se adhieran al acabado de la encimera la mesa u...

Page 29: ...Secci n 2 Instrucciones 2...

Page 30: ...traciones 1 Placa desmontable de acero inoxidable para salpicaduras 2 Superficie de cocci n XG antiadherente 3 Enchufe de la sonda 4 Sonda de control de temperatura extra ble 5 Enchufe polarizado 6 As...

Page 31: ...jar caer o golpear la sonda podr a cambiar su calibraci n y hacer que los ajustes de temperatura sean incorrectos 2 Gire el selector de control para seleccionar cualquier temperatura de 200 F a 400 F...

Page 32: ...ligeramente la superficie de la plancha XG Enjuague con una esponja limpia y seque la superficie antiadherente 5 Coloque el protector contra salpicaduras Hay 3 pesta as en la parte inferior del prote...

Page 33: ...G Figura 3 Verifique que la sonda est bien colocada 4 Enchufe el cable en un tomacorriente de 120 V CA IMPORTANTE SIEMPRE INSERTE LA SONDA EN EL ENCHUFE DE PLANCHA PRIMERO luego enchufe el cable en un...

Page 34: ...est llena tenga cuidado al sacar la bandeja de goteo desde el frente de la plancha XG y deseche la grasa Limpie la bandeja de goteo y reempl cela Figura 4 9 Cuando termine de cocinar gire el selector...

Page 35: ...35 Figura 1 Figura 3 Figura 2 Figura 4...

Page 36: ...sea necesario Gire las salchichas para lograr un color dorado Pan franc s 350 F 6 10 minutos Voltee los panes cuando est n doradas a la mitad del tiempo de cocci n Hamburguesa 350 F 3 14 minutos Volt...

Page 37: ...er servicio en el que la unidad deba desarmarse con la excepci n de la limpieza debe realizarlo un t cnico de reparaci n de aparatos el ctricos calificado PRECAUCI N NO USE AEROSOLES PARA COCINAR LOS...

Page 38: ...a Ap rtela para usarla m s tarde PRECAUCI N La sonda de control de temperatura no es sumergible PRECAUCI N La sonda y el enchufe de la sonda deben estar completamente secos antes de su uso 6 Retire la...

Page 39: ...to del revestimiento antiadherente no se ver afectado por las manchas Instrucciones de almacenamiento 1 Aseg rese de que la sonda de control de temperatura de la plancha XG est desenchufada y de que t...

Page 40: ...causas uso negligente del producto uso de un voltaje o corriente incorrectos mantenimiento de rutina inadecuado uso contrario al de las instrucciones de funcionamiento desarmado reparaci n o alteraci...

Page 41: ...o Inc dba Made by Gather Adhiera una etiqueta al producto que incluya su nombre direcci n n mero telef nico de contacto durante el d a n mero de caso y descripci n del problema Adem s incluya una copi...

Page 42: ......
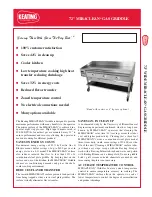
Page 43: ...12 x 22 Extra Large Electric Griddle Instruction Manual 12 x 22 Extra Grande Plancha Manual de instrucciones...

Reviews: