Kitvision Edge HD10, User Manual
The Kitvision Edge HD10 is a high-definition action camera that captures stunning footage in various outdoor adventures. This versatile device enables users to relive their experiences in exceptional detail. Enhance your experience with our comprehensive User Manual, available for free download at 88.208.23.73:8080. Easily access the manual and unlock the full potential of your Kitvision Edge HD10.
Share
Download


Reviews:
No comments
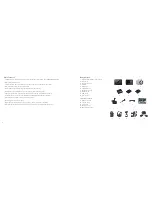
Related manuals for Edge HD10

625
Brand: Manfrotto Pages: 2

CH-300
Brand: CammSys Pages: 37

GRV43SKT
Brand: Gator Pages: 16

RideCam
Brand: Zone defense Pages: 8

LFP Battery S Series
Brand: RAYSTECH Pages: 10

Wisenet HCO-6070RN
Brand: Hanwa Security Pages: 36

QCW4MP1PT-AU
Brand: Q-See Pages: 22

ZXM-AC2
Brand: ZERO-X Pages: 44

0E-VDIR700V
Brand: W Box Technologies Pages: 26

P5110
Brand: Zavio Pages: 13

Hunting Edition
Brand: XCEL Pages: 17

ACT-5040W
Brand: Denver Pages: 3

EN-EL7
Brand: Nikon Pages: 2

ME200S-SH
Brand: Canon Pages: 80

7V
Brand: Volt Pages: 10

WX-SB100E
Brand: Panasonic Pages: 2

WVPS104C - CAMERA DRIVE UNIT
Brand: Panasonic Pages: 9

WVPS11B - CAMERA DRIVE UNIT
Brand: Panasonic Pages: 12


