24
25
[...continued]
Using the camera
7. Managing your files
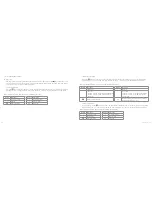
In recall mode, select a file and then press the “M” key to execute operations like delete/protect etc:
• Delete one: Delete the current photo file
Press the “OK” key twice, follow the interface prompt to select “Yes” or “No” and select “Yes” to delete
• Delete all: Delete all photo files that aren’t protected
Press the “OK” key once, follow the interface prompt to select “Yes” or “No” and select “Yes” to delete
• Protect: Lock files to protect them
To do this, whilst selecting your videos or photos to view, press the ‘M’ button then select ‘protect’. Once you
have selected the file you want to protect, press ‘OK’ and the icon will appear in the upper left corner.
Repeat this operation to unprotect the protected files. No operation can delete the protected files, except
for formatting
• Auto play: Auto plays photo files with an interval of 5s. This option is only applicable for photo files
• DPOF: When viewing a photo file, press the “M” key to enter the setup interface, select the menu “DPOF
and the icon will appear in the upper left corner of this file. This option is only applicable for photo files
About DPOF
– As a standard for recording the print orders sent to the micro SD card, DPOF (Digital Print Order Format) is
applicable to the photos shot by digital cameras. You can designate the photos to be printed and the number
of their copies. The following operations can be executed if your digital camera is DPOF compatible:
– Insert the micro SD card into a DPOF compatible printer to output the photos as ordered
– The printer compatible with your camera can follow the DPOF orders to print the photos
Note:
The DPOF printing requires a micro SD card with preset DPOF information. It will fail if you simply select the
photos from the micro SD card and try to print them
Note:
Some DPOF compatible printers and digital photo developing shops may fail to print the photos based on the
specific settings. If this is the case with your printer, please refer to its user manual. Otherwise, please check the
DPOF compatibility with the digital photo developing shop
8. Remote control
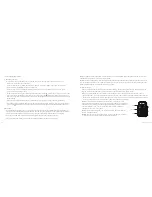
You can purchase a remote control to control video recording, photo shooting and stopping. The red indicator on
the remote control will flash once when you press any of the keys on the diagram below.
Before use, please follow the steps below to ensure that the remote control corresponds with the camera:
• Turn off the camera, press and hold the “Record” key, turn the power switch to the “ON” position and release the
“Record” key. Press both the “Record” and “Stop” keys on the remote control once within 3s to finish the remote
control pairing process. The camera will beep twice when pairing is successful
Note:
To check whether pairing was successful, you can use the wireless
remote control to control the camera. The control functions include: Starting/
stopping video recording, photo shooting and waking up from standby mode.
The camera will beep once for each operation. When video recording is
stopped, the camera will beep twice
Note:
Remote control range: The remote control should be used within 15
metres, with no obstacles
Note:
When the camera is in standby mode, pressing the “Record”, “Shutter”
or “Stop” key on the remote control can wake the system up
Record
Shutter
Stop
[continued...]


