


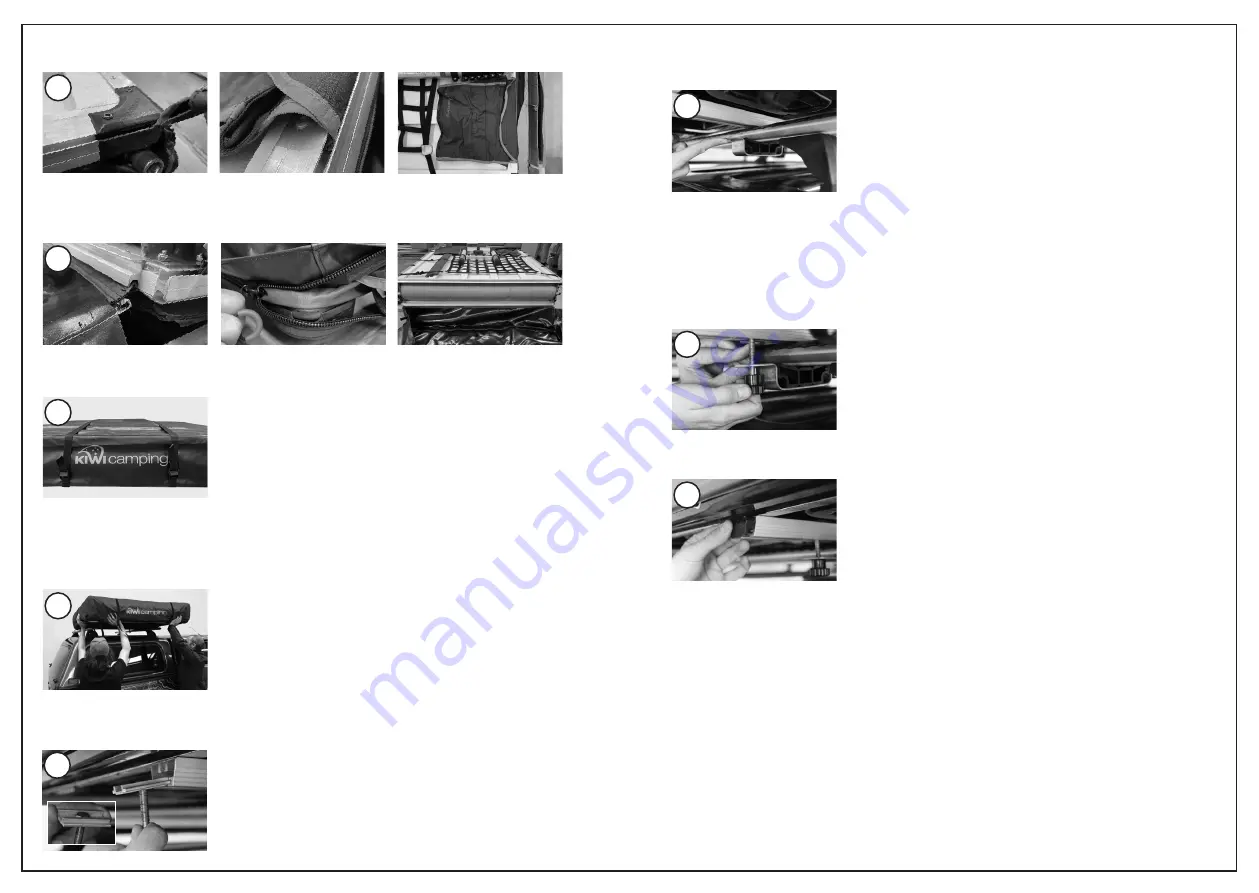
5. Attach the storage bags by sliding into the track on each side of the ladder.
6. Attach the travel cover by feeding the zipper through the track on the base (mounting
rail) of the tent. Ensure the zipper cover is put through the mattress side of the tent.
7. Close the Rooftop Tent and secure it with the compression straps.
8. Position the tent onto your vehicle. Ensure the roof racks are evenly spread under the
Rooftop Tent. Carefully lift the Rooftop Tent onto the roof rack. This will require two
people.
9. Insert the supplied bolts through the holes on the grooved side of the eight slide plates.
10. To help fit the mounting brackets onto smaller roof racks, they are supplied with
spacers. Use these to make your Rooftop tent more secure.
11. Attach the Rooftop Tent at the four points where the roof rack and the frame meet.
Slide two slide plates and bolts into both ends of each mounting rail. Position so one
bolt is on either side of each roof rack. Loosely hand tighten.
12. Check the alignment and balance of the Rooftop Tent before fully tightening all bolts.
Ensure all eight points are tightened evenly using the screw caps.
13. Place the end caps over each end of the frame to prevent wind noise.
12
13
9
8
10
7
5
6


