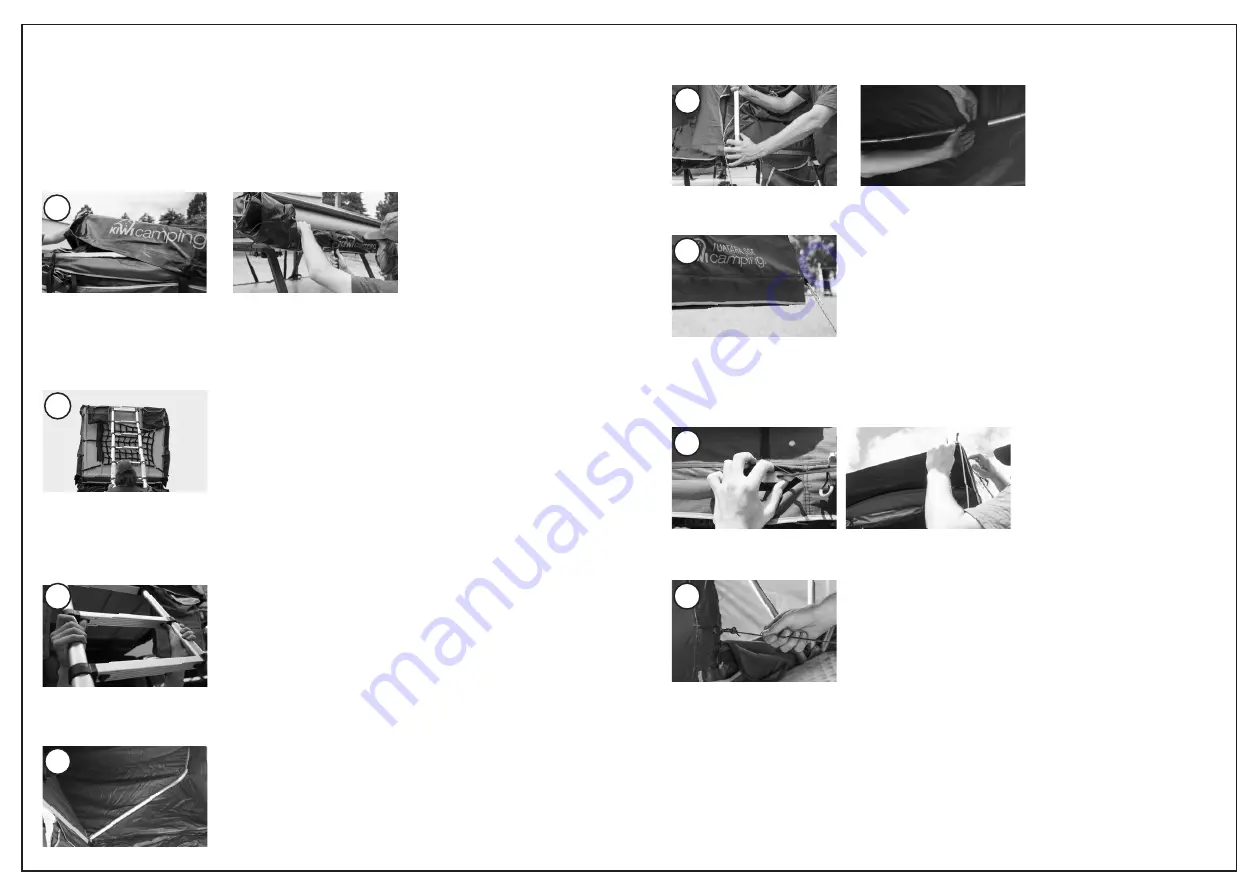
7. Attach the other end of the porch extension pole into the pole slots on the outer edges
of the frame, this stretches out the front porch. Secure with hook and loop tabs.
8. Pitch out the porch with the attached guy ropes. Ensure the pegs are at a 45° angle so
they remain secure. Adjust the tri-tensioners so the ropes remain taut.
9. To extend the windows, insert two spring poles through the canvas slits and into the
pre-drilled holes on the frame underneath each window. Insert the opposite end into
the two eyelets on the window flap. Ensure the hook end faces the ground. Repeat with
the other window and to extend the rear porch.
10. Once inside the Rooftop Tent, undo the internal bungees that help to pull in the inner
when packing down.
11. Partly open the windows to allow for airflow, this will help to reduce condensation
build-up. Ensure all rain flaps are pulled down to prevent water from penetrating the
frame.
12. Attach the annex if required (sold separately).
PITCHING INSTRUCTIONS
1. Before opening your Tuatara SSE Rooftop Tent, ensure that all eight bolts are fastened
tight so that the tent does not move when opening.
2. Release the straps and unzip the Travel Cover. Remove towards the opening section.
Secure the cover underneath the fold-out section of the Rooftop tent using the attached
D-clips.
3. Unclip the ladder’s travel strap and fully extend the ladder until the telescopic rungs on
both sides click into place.
4. Once the ladder is fully extended, use the ladder as leverage to fold out the extension
section on the Rooftop Tent.
5. Once unfolded, adjust the height of your ladder starting at the top by pushing both
buttons at the same time. Shorten the ladder rungs to the desired length so that it is
at a 75° angle and the extension is sitting level with your vehicle. Adjust the ladder to
ensure it is firm and that it does not bounce or move.
6. To extend the entrance area, pull out the porch extension pole from the Rooftop Tent.
The pre-shaped corners fit into the front porch corners.
9
6
5
2
4
10
7
8