37
4) Connect the DVM to TP3 marked. Press and release the MIDICH button. This sets the output MUX to zero volts.
Pressing any Bank Button will cancel this.
Adjust
VR33 for 0v.
5) Connect the DVM to TP7 and adjust VR34 to read in the range +0.25v to +0.27v.
6) Press Bank 1 to cancel the output MUX override.
7)
VCA OFFSET
. Connect an oscilloscope to TP8. Press and Release BANK 1 to set the correct Patch
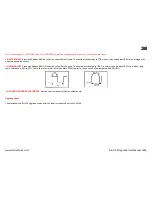
Sound. Using TP8 for Voice 1 through to TP13 for Voice 6 adjust the VR in the diagram to get minimum
thump as keys are pressed.
8) Press and Release BANK 3 to set the correct Patch Sound.
9)
VCF RESONANCE
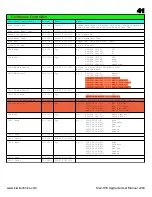
. Using the oscilloscope on TP19 for Voice 1 through to TP14 for Voice 6 press and
hold C4 (middle C) and adjust the trimmer to get a 4.8v peak to peak for each voice.
VR #
26
21
16
11
6
1
CH # 1
2
3
4
5
6
10)
VCA GAIN
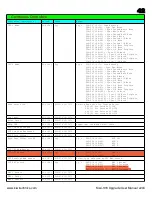
. Connect an oscilloscope to TP8. Using TP8 for Voice 1 through to TP13 for Voice 6 adjust the VR in the diagram to get 6v peak to peak as C4
(middle C) is pressed.
VR #
27
22
17
12
7
2
CH # 1
2
3
4
5
6
8) Press and Release BANK 4 to set the correct Patch Sound.
11)
VCF FREQUENCY
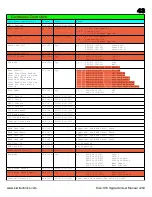
. Using the oscilloscope on TP8 for Voice 1 through to TP13 for Voice 6 press and hold C4 (middle C) and adjust the trimmer to get a 248Hz
(B3 pitch) for each voice. Each press of C4 will rotate the voice and the voice number that is sounding will display on the right digit. A suitable tuner for PC is
APTuner from
www.aptuner.com
or the ClearTune App for smartphones.
VR #
29
24
19
14
9
4
CH # 1
2
3
4
5
6
12)
VCF WIDTH
. Using a tuner attached to the output the oscilloscope on TP8 for Voice 1 through to TP13 for Voice 6 press and hold C6 and adjust the trimmer to
get a 992Hz (B5 pitch) for each voice.
VR #
28
23
18
13
8
3
CH # 1
2
3
4
5
6
www.kiwitechnics.com
Kiwi-106 Upgrade User Manual v204

