32
EN
ASSEMBLY
Note:
The device is designed to be put together by two physically fit adults.
Persons involved in the assembly should wear protective footwear, gloves
and sturdy clothing.
NOTE: The following pictures show the assembly. The equipment and
appearance of the trampoline may vary slightly depending on the trampoline
model.
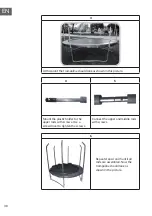
1
2
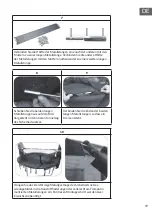
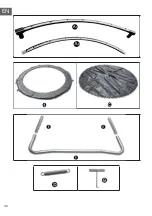
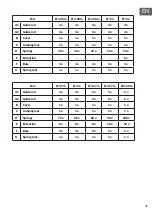
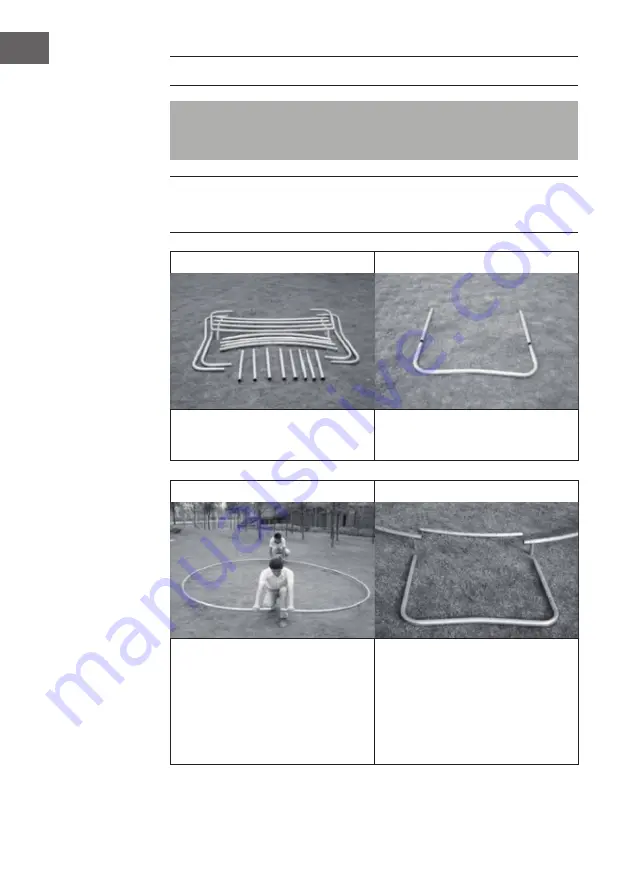
Place all trampoline parts in groups
in front of you, as shown in picture 1.
Attach the leg extensions to a leg
base and secure together with the
screws. Repeat for all leg supports.
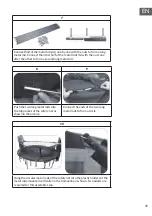
3
4
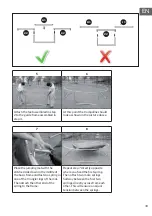
Slide the guide rails together to form
a circle. To close the circle, 2 persons
may be required, one person using
the last guide rail and the other
person holding the linkage on the
opposite side.
(Make sure the guide rails (A1/A2)
are correctly positioned, see step 4.)
Assemble the circle and the
previously mounted feet as shown
above to form a trampoline frame.
Make sure that each stand is
connected to two guide rails (A1), as
shown in the picture (4) and in the
figure below.
Summary of Contents for 10034798
Page 1: ...10034798 10034799 Jumpstarter Trampolin Trampoline Trampolín Trampoline Trampolino ...
Page 2: ......
Page 10: ...10 DE ...
Page 15: ...15 DE EINZELTEILE DES SICHERHEITSNETZES ...
Page 22: ......
Page 30: ...30 EN ...
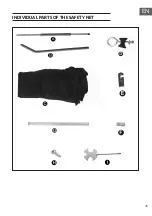
Page 35: ...35 EN INDIVIDUAL PARTS OF THE SAFETY NET ...
Page 42: ......
Page 50: ...50 FR ...
Page 55: ...55 FR PIÈCES DÉTACHÉES DU FILET DE SÉCURITÉ ...
Page 62: ......
Page 69: ...69 ES PARTES INDIVIDUALES Trampolín 3 pies Trampolín 4 pies Trampolín 5 pies Trampolín 6 pies ...
Page 70: ...70 ES ...
Page 75: ...75 ES PARTES INDIVIDUALES DE LA RED DE SEGURIDAD ...
Page 82: ......
Page 90: ...90 IT ...
Page 95: ...95 IT SINGOLI PEZZI DELLA RETE DI PROTEZIONE ...
Page 102: ......
Page 103: ......
Page 104: ......


