33
EN
5
6
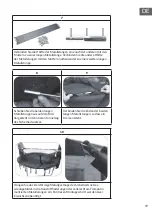
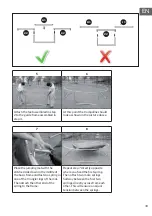
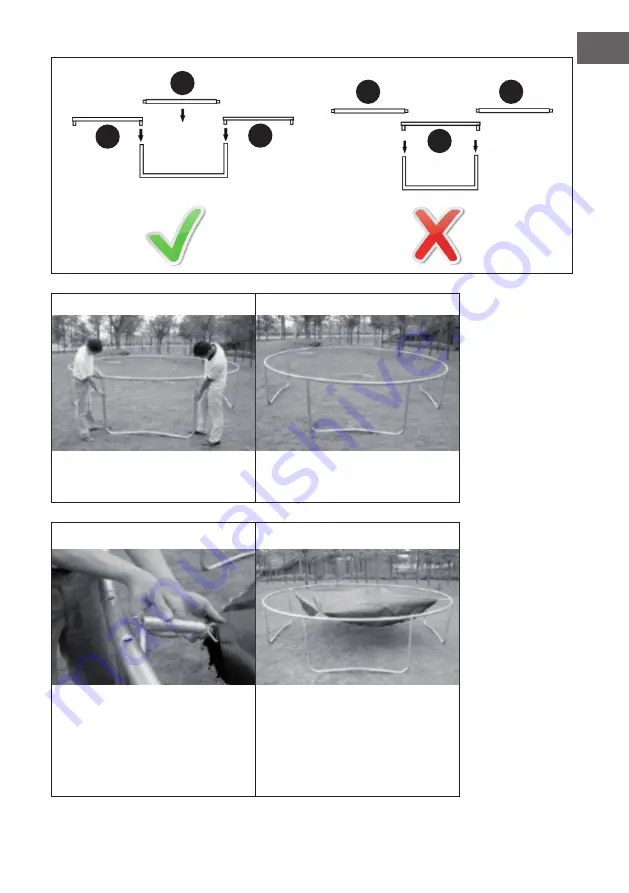
Attach the feet assembled in step
2 to the guide frame assembled in
step 3.
At this point the trampoline should
look as shown in the picture above.
7
8
Place the jumping mat with the
stitched side down in the middle of
the basic frame and fasten a spring in
one of the triangle rings of the mat.
Then attach the other end of the
spring to the frame.
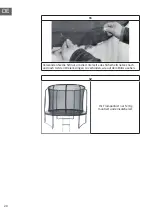
Repeat step 7 directly opposite
where you fixed the first spring.
Then attach two more springs
halfway between the first two
springs, directly across from each
other. This will ensure an equal
tension between the springs.
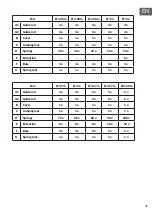
A
1
A
2
A
2
A
2
A
1
A
1
Summary of Contents for 10034798
Page 1: ...10034798 10034799 Jumpstarter Trampolin Trampoline Trampolín Trampoline Trampolino ...
Page 2: ......
Page 10: ...10 DE ...
Page 15: ...15 DE EINZELTEILE DES SICHERHEITSNETZES ...
Page 22: ......
Page 30: ...30 EN ...
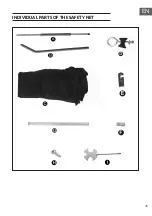
Page 35: ...35 EN INDIVIDUAL PARTS OF THE SAFETY NET ...
Page 42: ......
Page 50: ...50 FR ...
Page 55: ...55 FR PIÈCES DÉTACHÉES DU FILET DE SÉCURITÉ ...
Page 62: ......
Page 69: ...69 ES PARTES INDIVIDUALES Trampolín 3 pies Trampolín 4 pies Trampolín 5 pies Trampolín 6 pies ...
Page 70: ...70 ES ...
Page 75: ...75 ES PARTES INDIVIDUALES DE LA RED DE SEGURIDAD ...
Page 82: ......
Page 90: ...90 IT ...
Page 95: ...95 IT SINGOLI PEZZI DELLA RETE DI PROTEZIONE ...
Page 102: ......
Page 103: ......
Page 104: ......

