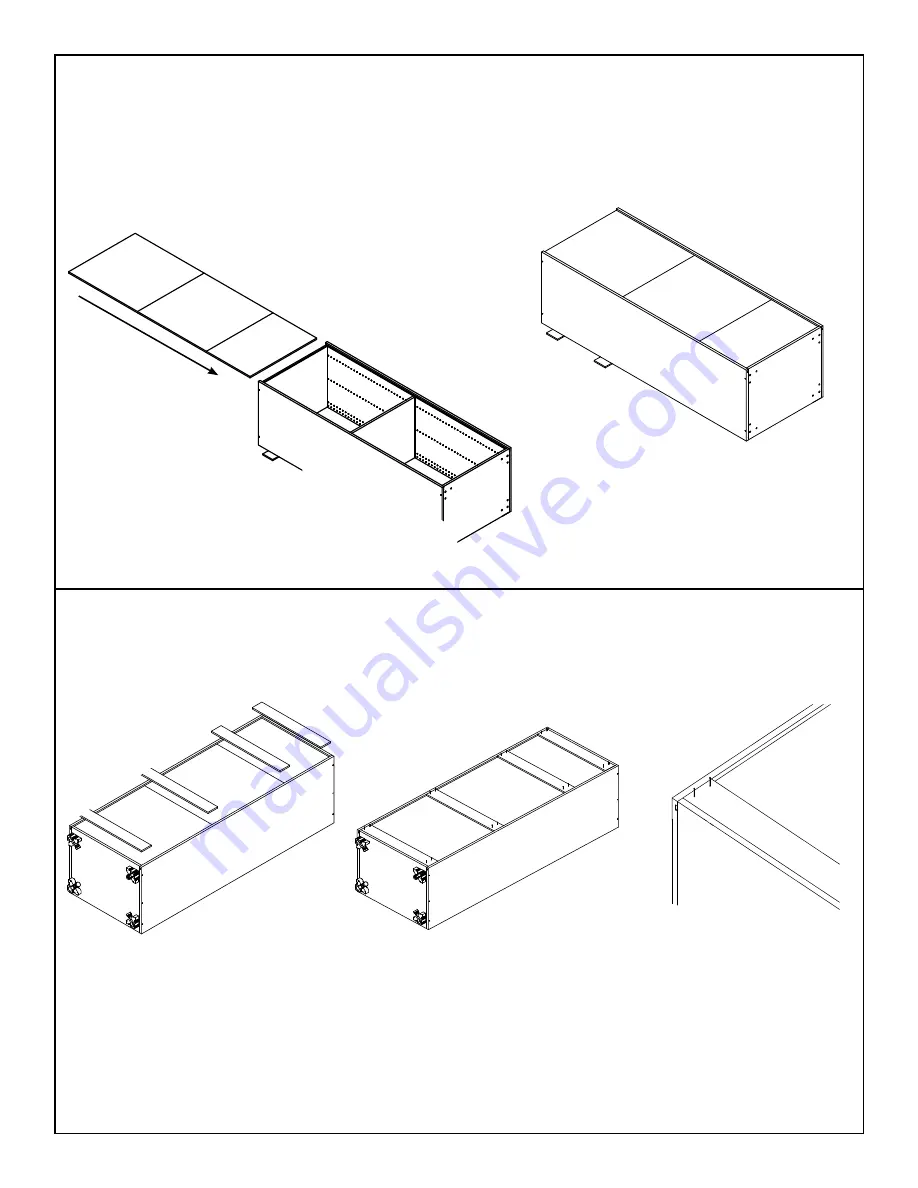
STEP 5:
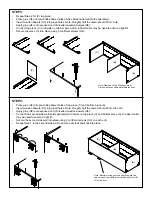
• Begin to insert back panels. The below solutions are for a full back. If assembling for a built-in appliance, follow
cut outs on page XX.
• Slide the two 30”H backers (D) into place on the assembled cabinet first.
• Next slide the 19.5”H backer (D).
• If you are assembling a 90” tall cabinet, insert the 10”H backer (D) last. If you are assembling an 80” tall cabinet,
you will not need this piece.
STEP 6:
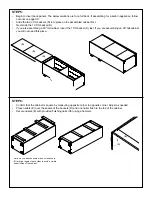
• Confirm that the cabinet is square by measuring opposite corner to opposite corner. Adjust as needed.
• Place nailers (E) over the seams of the backers (D) and one nailer flush to the top of the cabinet.
• Secure nailers (E) with provided finishing nails (H5) using a hammer.
(D)
Note: As you attach nailers, make sure backers
(D) are tight against each other to avoid a visible
seam inside of the cabinet.
(D)
(D)
(C)
(E)
(E)
(E)
(E)
(E)


