RPTR-OBA/734
Installation Manual
REV: B (04/25/2022)
25
7.4
Tank Installation
The following components & hardware are used in the step:
•
Item 5 = Air Tank
•
Item H1, H7, H9 – Qty: 2 each
Use the following stacking order for installation of the tank.
Figure 25- Lower Tank Strap Hardware Stacking Order
1.
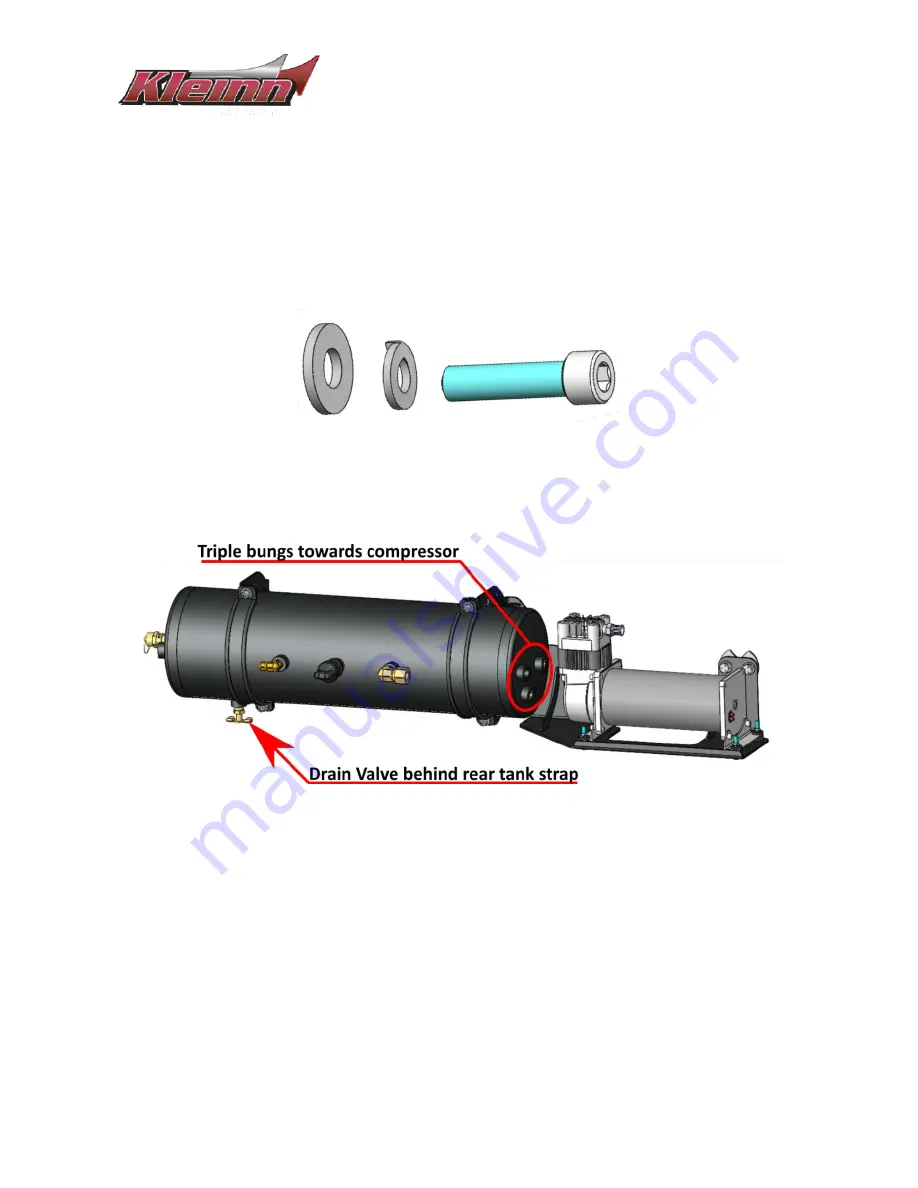
Using the below figure to ensure tank orientation is correct; guide the air tank into position onto
the tank brackets RAPTOR-210 & -211 beginning from the rear bracket & maneuvering it
towards the compressor.
Figure 26- Air Tank Install Orientation
2.
Align the drain valve towards the ground to facilitate draining the tank (periodic maintenance).
3.
Use the hardware H1, H7, H9 to fasten the tank via the tank straps (RAPTOR-202’s) lower slotted
hole.
4.
Attach the Compressor leader hose to the unused bung on the tank (triple bungs). Hand tighten
the fitting then snug ¼ turn more. Reference the following figures.


