FIRE DAMPERS
360
361
Design changes reserved
80
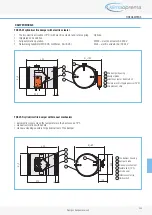
•
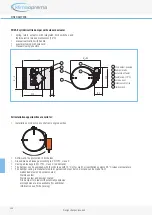
Recommended wall opening for fire damper installation
is Øn+ 160mm, but openings from Øn +80*…200 mm
can also be used
(*decrease under specified value in
opening size is allowed if there is sufficient room for
seal installation)
•
Insert fire damper into wall and secure on wall face with
two hinges that are placed on the top of fire damper
casing. Hinges are used to hold only damper during
installation! (for max. distance from wall 80 mm)
•
Damper blade must be closed during installation
•
Space between casing and wall must be filled with
mortar, gypsum or concrete
•
Test the fire damper after the installation
•
During installation, manual or motorized mechanism
must be protected from mortar, gypsum or concrete.
After installation check for damper
blade mobility, preform an opening and
closing test.
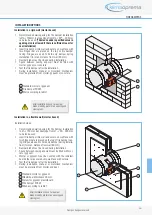
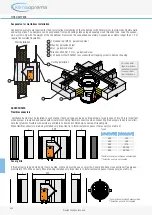
Standard mortar or gypsum
1
2
3
Fire damper FDC25
Wall, according to table 1
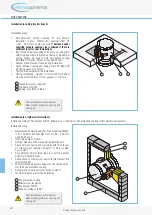
Installation steps:
•
Recommended wall opening for fire damper installation
is
Ø
+ 160mm, but openings from
Ø
+ 80…200 mm
can also be used
•
Insert fire damper into wall and secure on wall face with
two hinges that are placed on the top of fire damper cas-
ing. Hinges are used to hold only damper during installa-
tion! (for max. distance from wall 80 mm)
•
Damper blade must be closed during installation
•
Space between casing and wall must be filled with mor-
tar or gypsum
•
Mortar or gypsum must be covered with fire resistant
boards that are secured onto wall face with screws
•
Test the fire damper after the installation
•
During installation, manual or motorized mechanism
must be protected from mortar and dust.
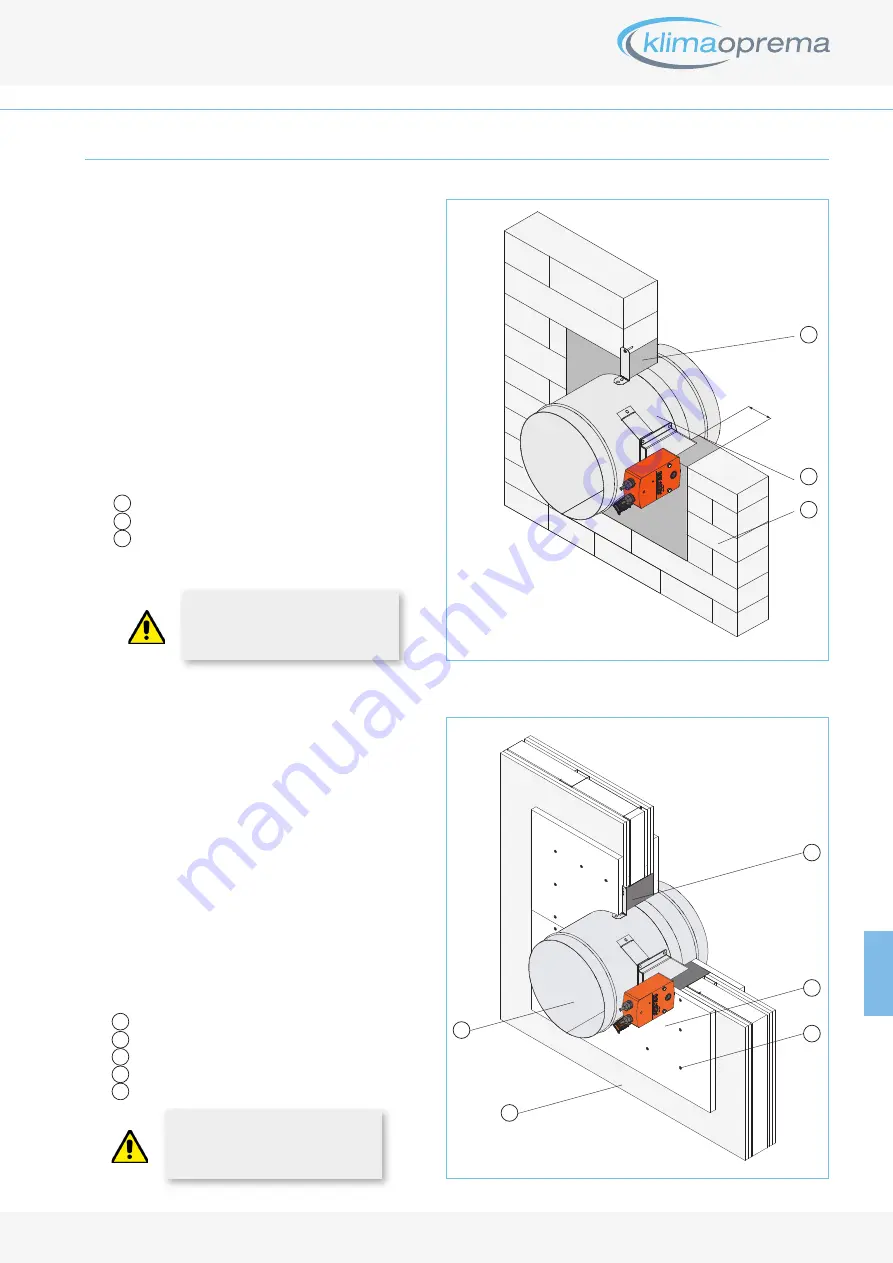
Standard mortar or gypsum
Masterboard thickness 20mm
Screw for gypsum plasterboard
1
2
3
After installation check for damper
blade mobility, preform an opening and
closing test.
4
5
Fire damper FDC25
Wall, according to table 1
INSTALLATION OPTIONS
Installation in a rigid wall (mortar based)
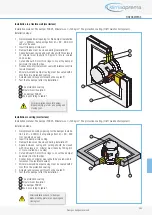
Installation in a flexible wall (mortar based)
1
2
3
1
2
3
4
5


