FIRE DAMPERS
362
363
Design changes reserved
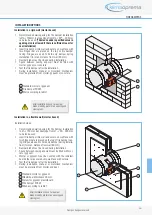
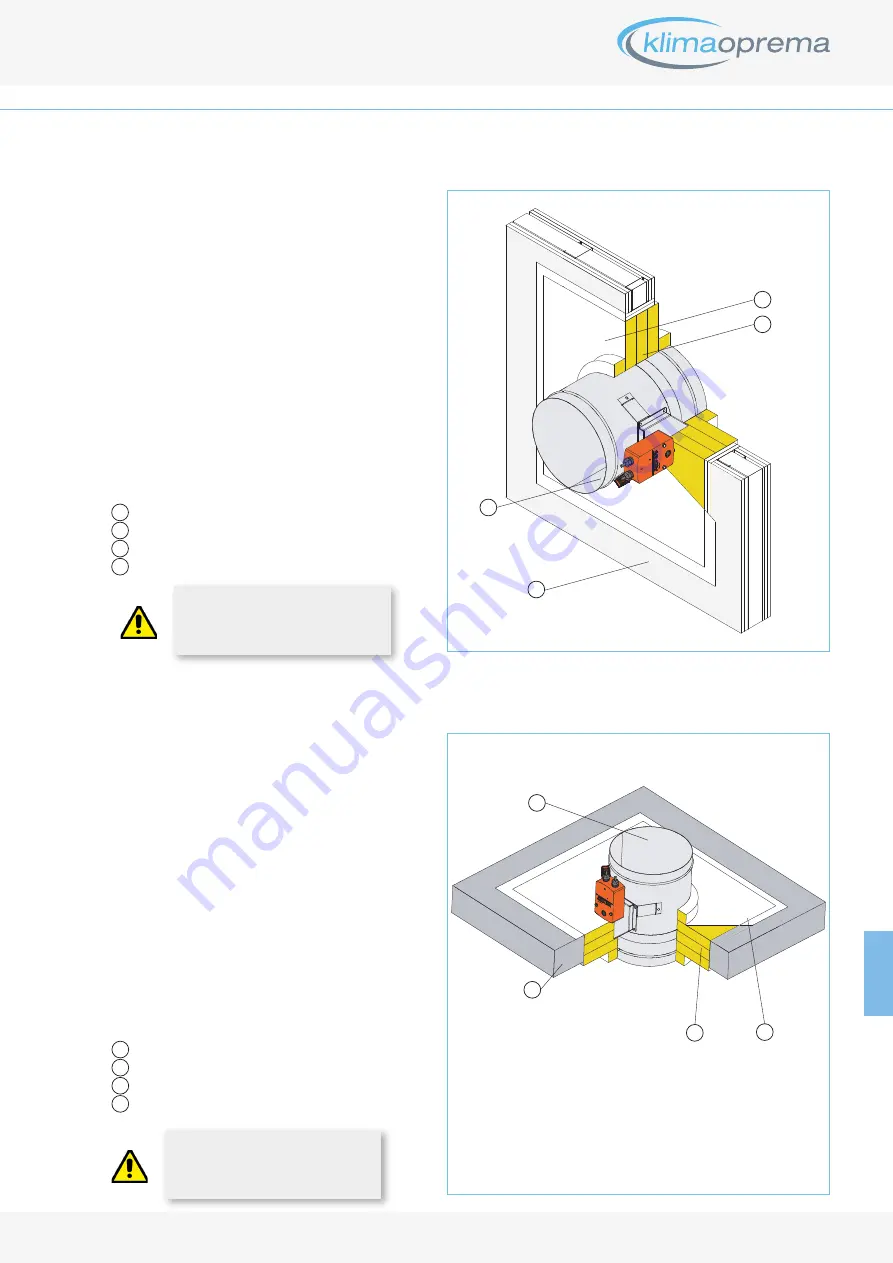
Installation material: Fire damper FDC25, Mineral wool >140kg/m
3
, Fire protection coating, (HILTI weichschott system)
Installation steps:
•
Recommended wall opening for fire damper installation
is
Ø
+ 400mm, but openings from
Ø
+ 80…600 mm
can also be used
•
Insert fire damper into wall
•
Damper blade must be closed during installation!!!
•
Space between casing and wall close with three layers
of mineral wool (density 140 kg/m
3
or more, coated
on one side)
•
Cut additional 50 mm thick rings to cover fire damper
perimeter from both sides
•
Connections of mineral wool seal with intumescent fire
resistant sealant
•
Mineral wool and damper casing must be coated with 2
mm thick fire protection coating
•
Actuator and release unit must not be coated!!!
•
Test the fire damper after the installation
Fire protection coating
Mineral wool insulation
1
2
After installation check for damper
blade mobility, preform an opening and
closing test.
3
4
Fire damper FDC25
Wall, according to table 1
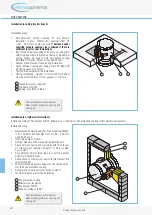
Installation material: Fire damper FDC25, Mineral wool >140kg/m
3
, Fire protection coating, (HILTI weichschott system)
Installation steps:
•
Recommended ceiling opening for fire damper installa-
tion is
Ø
+ 400mm, but openings from
Ø
+80…600
mm can also be used
•
Insert fire damper into ceiling
•
Damper blade must be closed during installation!!!
•
Space between casing and ceiling should be closed
with three layers of mineral wool (density 140 kg/m3
or more, coated on one side)
•
Cut additional 50 mm thick rings to cover fire damper
perimeter from both sides
•
Connections of mineral wool should be sealed with in-
tumescent fire resistant sealant
•
Mineral wool and damper casing must be coated with 2
mm thick fire protection coating
•
Actuator and release unit must not be coated!!!
•
Test the fire damper after the installation
1
2
After installation check for damper
blade mobility, preform an opening and
closing test.
Fire protection coating
Mineral wool insulation
1
2
3
4
Fire damper FDC25
Wall, according to table 1
3
4
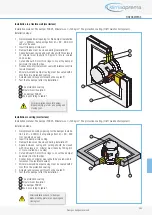
Installation in a flexible wall (mortarless)
Installation in ceiling (mortarless)
1
2
3
4


