background image

29
EN

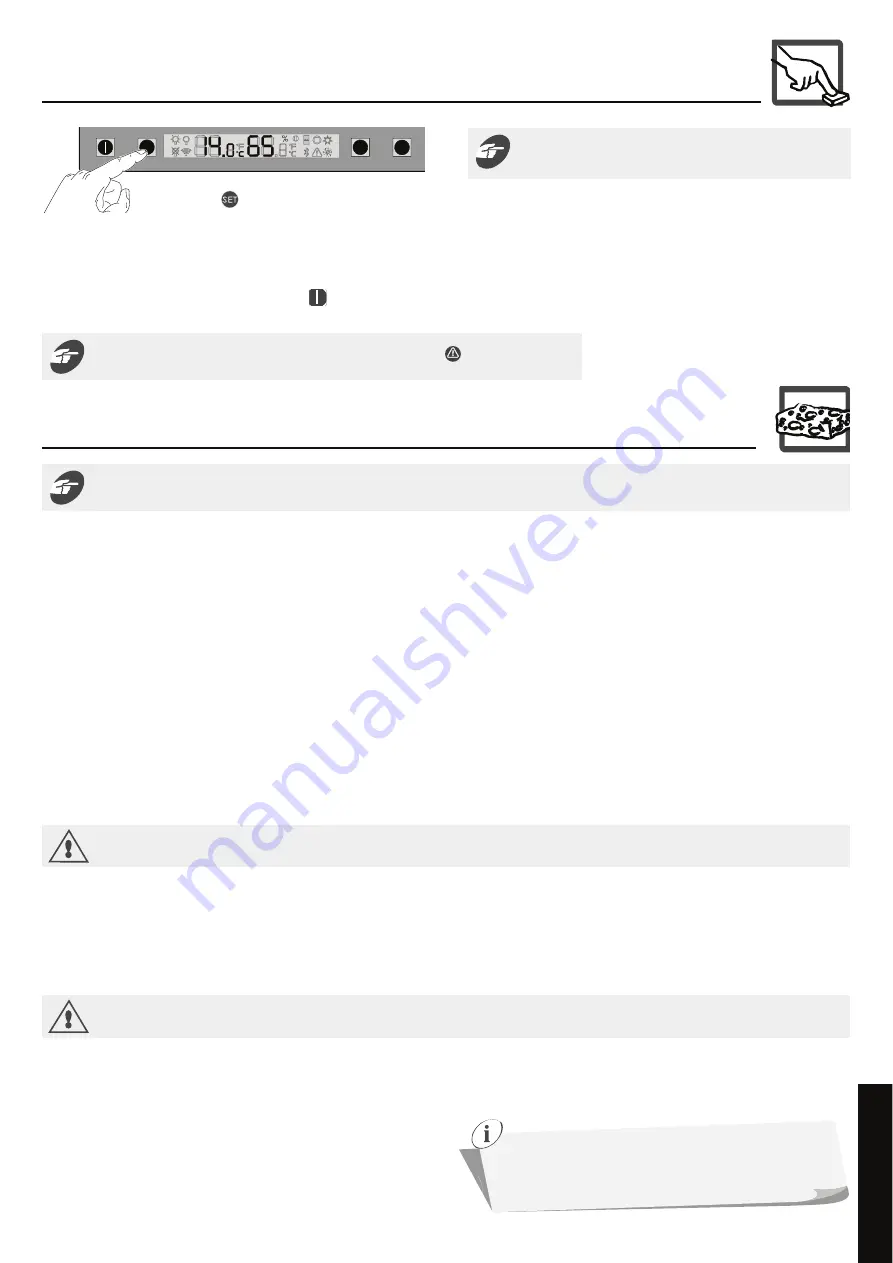
VIII. Placing the screen on standby

5  

Press the 

 button to confirm.

+

-

SET

Disabling  the  audible  warning  signal  of  the  alarms  does  not 
disable the visual alarms.

It is not possible to activate standby mode whilst the warning light 

 remains on.

7 - E

VERYDAY


MAINTENANCE

Your EuroCave wine cabinet is a tried and tested appliance.

Maintenance tasks about once a year


Unplug and unload the appliance.


Remove any particles that may block the drainage pipe located 
inside the cabinet, at the bottom on the ledge.


Clean  inside  the  compartments  with  water  and  a  gentle 
cleaning product.


Rinse well. Dry with the EuroCave microfibre cloth, supplied.


Glass parts must be cleaned with the non-abrasive microfibre 
cloth  provided,  first  dampened  with  a  product  suitable  for 
cleaning glass.


Replace the active charcoal filter located in the upper breather 
hole of your cabinet (see chapter 6,§ VI). Remove the charcoal 
filter manually. It is available from your usual stockist. It must 
be replaced by an original manufacturer’s part.


Check  that  the  door  seal  is  in  a  good  condition.  It  is  often 
necessary to clean the seal. Cleaning with unsuitable products 
will cause the seals to wear prematurely. You should therefore 
observe certain rules: Whenever the seal is cleaned you must 

afterwards  rinse  the  seal  with  clean  water.  No  traces  of 
cleaning  product  must  remain  on  the  seal.  EuroCave 
recommends only using a mild soapy solution. If cleaning with 
this  type  of  solution  proves  insufficient,  it  is  possible  to 
ocasionally  use  an  ethanol-based  solution,  but  with  a 
concentration  of  less  than  10%,  and  taking  care  to  rinse  the 
seal well with clean water.


Carefully  vacuum  the  lower  and  upper  ventilation  strips  of 
your cabinet


Clean the light strip using the microfibre cloth supplied. Never 
use alcohol-based detergents.


To  remove  text  written  using  the  white  marker  pen  on  our 
bottle identification labels, use a damp cloth.


To clean the fronts of the shelves:

YWIXLIQMGVSJMFVIGPSXLTVSZMHIH
SRP]YWI[EXIVSVEKPEWWGPIERMRKTVSHYGX


To  clean  the  glass  or  plastic  parts  of  your  cabinet,  use  the 
EuroCave microfibre cloth.

Never use a cleaning product containing acetone, petrol, alcohol, white spirit or synthetic thinners which will damage the front.

Caring for stainless steel:


To clean stainless steel surfaces, we recommend that you use water and 
a mild liquid soap.


Ensure that the soap does not contain grains which could scratch the 
surface.


The solution must be applied with a soft cloth.


The cloth used must not have buttons or zips, which could scratch the 
stainless steel.


6YFXLIWYVJEGIJSPPS[MRKXLIHMVIGXMSRSJXLIWXEMRPIWWWXIIPFVYWLMRK


Dry  the  surface  with  a  clean  soft  cloth  following  the  direction  of 
brushing.

Cleaning the condenser every two years:


6IQSZIXLIETTPMERGIJVSQXLIOMXGLIRYRMXMRSVHIVXSKEMREGGIWWXS
XLI GSRHIRWIV PSGEXIH EX XLI FEGO SJ XLI GEFMRIX WII WXITW   

Chapter 4, § III).


Unload and unplug the appliance.


Unscrew the 2 rear steel plates using a T25 Torx screwdriver.


Carefully vacuum the condenser in order to remove any dust that may 
have accumulated.


Carefully  screw  back  on  the  two  rear  steel  plates  using  a T25 Torx 
screwdriver, to prevent vibration.


6IXYVRXLIETTPMERGIXSMXWPSGEXMSR


Put the bottles back in the cabinet. 

Do not pour liquid directly onto the stainless steel. Likewise, never use solvents, harsh, granular or abrasive products, petrol or alcohol which 

GSYPHHEQEKIXLIWYVJEGISJ]SYVGEFMRIX2SGLPSVMRIFEWIHTVSHYGXW

Regular  monitoring  of  y

our  wine  cabinet  and  repor

ting 

any faults to your stockist 

will ensure that your appliance 

provides you with many 

years of faithful service.


To place the screen on standby, briefly press the 


OI]6ITIEXXLITVSGIWWXSPIEZIWXERHF]QSHI


The cabinet remains in operation when the screen is in standby mode.

6 - C

OMMISSIONING


YOUR


WINE


CABINET

Summary of Contents for EuroCave Collection

Page 1: ...User Manual Gebrauchsanweisung...

Page 2: ......

Page 3: ...IW VIWIVZIH JSV WXEJJ SJ WLSTW SJ GIW SV SXLIV TVSJIWWMSREP IRZMVSRQIRXW Gites and guests of hotels motels and other environments which are residential in nature RZMVSRQIRXW WYGL EW LSXIP VSSQW The ca...

Page 4: ...wines Acting as a protective casing the Main du Sommelier supports mould to the shape of each bottle and prevent the wine from being disturbed antivibration technology Air circulation A constant suppl...

Page 5: ...E WPMHMRK WLIPJ HNYWXMRK XLI 1EMR HY 7SQQIPMIV WYTTSVX EX XLI JVSRX SJ XLI WPMHMRK WLIPJ HHMRK SV GLERKMRK XLI TSWMXMSR SJ E WXSVEKI WLIPJ WWIQFPMRK ERH YWMRK XLI WLIPJ PEFIPW 6 Commissioning your wi...

Page 6: ...6EGO humidity cartridge J Lower strip air outlet K Upper strip air inlet L Upper hinge M Setting and controlpanel N Door stop O Magnetic door seal P Sliding shelf Q Lock YPP KPEWW ERH KPEWW MXL WXEMR...

Page 7: ...ntact your EuroCave stockist Disable unusable appliances by unplugging them and removing the power lead 3 PROTECTING THE ENVIRONMENT AND ENERGY SAVING 4 INSTALLING YOUR WINE CABINET Unpacking When you...

Page 8: ...e your cabinet to the desired location This must not be too damp linen room utility room bathroom Have a flat stable floor Wait 48 hrs before switching on the cabinet When the appliance comes into use...

Page 9: ...e an integral part of the cabinet body and ensure that it functions correctly A Small model foot 89 125 mm already assembled on the cabinet when delivered B 1IHMYQ WM IH QSHIP JSSX QQ C 0EVKI QSHIP JS...

Page 10: ...ilt in version 1 2 1 Unscrewing the filler strips 2 Adjusting the lower front 3 Assembling the filler strips 1 1 1 2 2 Version encastrable Flush fitted version 3 2 4 INSTALLING YOUR WINE CABINET pz1 n...

Page 11: ...QQ GLSSWI SRI SJ XLI SXLIV two packages of feet supplied with the cabinet The other two packages of feet are not supplied for the XS model SV SYV WEJIX ERH XS IRWYVI XLEX SYV ETTPMERGI JYRGXMSRW GSVV...

Page 12: ...1X 1X F 6X D 4X B 4X C 4X E H G 2X J 2X 4X A Small model foot 89 125 mn B 1IHMYQ WM IH QSHIP JSSX QR C 0EVKI QSHIP JSSX QR D SYRXIVWYRO WGVI E Countersunk screw 3x25 F ERHPI PPIV WXVMT G MRKI PPIV WX...

Page 13: ...t body and ensure that it functions correctly 1 2 557 597 1270 594 1320 89 125 Int 560 600 mini 1270 mini 1320 mini 557 597 1770 594 1820 89 125 Int 560 600 mini 1770 mini 1820 mini with filler strips...

Page 14: ...Assembling the filler strips Particularity of built in cabinet installation with a technical glass door or technical solid door finish WWIQFP MW RSX XLI WEQI HITIRHMRK SR XLI X TI SJ HSSV WIPIGXIH 7TI...

Page 15: ...ning to the kitchen unit carcass ush fitted and built in version 4 INSTALLING YOUR WINE CABINET MXL E QE MQYQ LIMKLX SJ QQ VIXEMR XLI JIIX EPVIEH MRWXEPPIH SR XLI GEFMRIX J XLI LIMKLX MW KVIEXIV XLER...

Page 16: ...etic part is to be fitted by the kitchen designer III Door reversibility 4 INSTALLING YOUR WINE CABINET A Door B 9WIV W WXIQ MRXIVJEGI TERIP C Curved glass panel D PEX KPEWW TERIP E Door stop F SYRXIV...

Page 17: ...that you remove the bottles before moving the cabinet 3 3 5 6 4 4 We strongly recommended that you grasp the cabinet by its feet to remove it from its location Then unplug the cabinet 4 INSTALLING YOU...

Page 18: ...18 EN 8 7 1 2 3 4 x2 7 7 8 4 INSTALLING YOUR WINE CABINET 5 6 6ITIEX XLMW TVSGIWW SR XLI WIGSRH YTTIV KPEWW TERIP pz1 not supplied 2 not supplied...

Page 19: ...19 EN 1 180 2 x2 M4 3 x2 M4 3 1 2 2 3 x2 3 x2 4 INSTALLING YOUR WINE CABINET 2 not supplied 2 5 not supplied T25 not supplied...

Page 20: ...EWXMG GET MR GEWI SY ERX XS VIZIVWI SYV HSSV EKEMR MR XLI JYXYVI We recommended that you carry out the following procedure with 2 people Carry out the procedure in an environment which will not cause...

Page 21: ...justing the hinges If the door is not level it is possible to adjust it using the upper hinge J EHNYWXMRK YWMRK XLI YTTIV LMRKI MW RSX WYJJMGMIRX TVSGIIH MR XLI WEQI E MXL XLI PS IV LMRKI SV QSVI EGGY...

Page 22: ...I GIIH OK Position the cabinet level under the work top or inside the unit 3TIR XLI HSSV SJ XLI GEFMRIX XS Secure the facing of the kitchen unit on the aluminium strip around the glass in the case of...

Page 23: ...ly replace bottles as they are drunk When using your wine cabinet never pull out more than one sliding shelf at a time Observe the loading instructions according to the type of storage equipment your...

Page 24: ...nserting the left lug The VMKLX LERH SRI MPP XLIR REXYVEPP WPSX MRWMHI XLI SFPSRK LSPI Slide the shelf until the rear shelf fasteners are fully locked into the spaces provided in the runners N B to pr...

Page 25: ...g or changing the position of a storage shelf 1 2 a Comment To install a storage shelf the back of which rests on the ledge located at the bottom of the cabinet place two support pins at the front to...

Page 26: ...orrect serving temperature temperature setting range possible from 5 20 C For white wines recommended temperature range 6 10 C For red wines recommended temperature range 15 18 C This cabinet can ther...

Page 27: ...y Your wine cabinet has a function to measure humidity allowing you to see the relative humidity level inside the appliance when the temperature WIXXMRK MW 8LI MHIEP LYQMHMX PIZIP MW EFSZI MHIEPP not...

Page 28: ...sing a filter for the first time 2 Select the charcoal filter pictogram with the or keys 3 Press the button to see the charcoal filter countdown 5 Press the button to confirm The charcoal filter must...

Page 29: ...ext written using the white marker pen on our bottle identification labels use a damp cloth To clean the fronts of the shelves YWI XLI QMGVSJMFVI GPSXL TVSZMHIH SRP YWI EXIV SV E KPEWW GPIERMRK TVSHYG...

Page 30: ...as displayed After a few hours the pictogram goes out The humidity level is above the desired value Empty the cabinet remove the humidity cartridge and clean the tray Contact your EuroCave stockist if...

Page 31: ...ass Annual energy consumption AEc1 Kwh year Useful volume litres Sound emission dB A Single temperature XS YPP KPEWW A 139 38 S YPP KPEWW A 125 38 S Glass and stainless steel A 125 38 S Technical glas...

Page 32: ..._______________________________________________________________ ______________________________________________________________________________ _________________________________________________________...

Page 33: ...ch und hnliche Zwecke bestimmt wie f r Kochnischen f r Personal in Gesch ften B ros und hnlichem auf landwirtschaftlichen Anwesen und f r Kunden von Hotels Motels und anderen Gastunterk nften auf Hote...

Page 34: ...nd des Sommeliers jede Flasche einzeln und sch tzen sie vor etwaigen Einfl ssen von au en Anti Vibrations Technologie Luftzirkulation Die st ndige Lufterneuerung verhindert Schimmel in Ihrem Klimaschr...

Page 35: ...llung der Hand des Sommeliers an der Vorderseite des Gleitregals 24 III Hinzuf gen oder Versetzen eines Lagerregals 25 IV Montage und Verwendung der Schilder 25 6 Inbetriebnahme Ihres Klimaschranks 26...

Page 36: ...euchtigkeitskassette J Unteres Band Luftauslass K Oberes Band Lufteinlass L Oberes Scharnier M Kontroll und Regelpanel N T ranschlag O Magnetische T rdichtung P Gleitregal Q Schloss nur Vollglast ren...

Page 37: ...eeigneten Ort auf siehe n chste Seite und beachten Sie dabei die vorgegebenen Temperaturbereiche Lassen Sie die T r nur m glichst kurz offen Stellen Sie sicher dass die Dichtung gut greift und dass si...

Page 38: ...w hlten Aufstellungsort Dieser Ort darf nicht zu feucht sein W schekammer Waschk che Badezimmer muss einen festen und ebenen Boden besitzen Warten Sie 48 Stunden bevor Sie den Klimaschrank anschalten...

Page 39: ...d fester Bestandteil des Geh uses des Klimaschranks und gew hrleisten einen einwandfreien Betrieb A Fu kleines Modell 89 125 mm montiert auf dem Klimaschrank bei Erhalt B Fu mittleres Modell 100 160 m...

Page 40: ...sion 1 2 1 Abschrauben der Passt cke 2 Einstellung der Innenwand 3 Montage der Passst cke 1 1 1 2 2 Version encastrable Flush fitted version 3 2 4 AUFSTELLEN IHRES WEINKLIMASCHRANKS pz1 nicht mitgelie...

Page 41: ...dem Klimaschrank geliefert werden Die beiden anderen S tze F e werden f r das Modell XS nicht geliefert Um Ihre Sicherheit sowie einen einwandfreien Betrieb Ihres Ger ts zu gew hrleisten ist eine Befe...

Page 42: ...X J 2X 4X A Fu kleines Modell 89 125 mm B Fu mittleres Modell 100 160 mm C Fu gro es Modell 138 175 mm D Senkkopfschraube 3x16 E Senkkopfschraube 3x25 F Passst ck Handgriff G Passst ck Scharnier H Dis...

Page 43: ...s und gew hrleisten einen einwandfreien Betrieb 1 2 557 597 1270 594 1320 89 125 Int 560 600 mini 1270 mini 1320 mini 557 597 1770 594 1820 89 125 Int 560 600 mini 1770 mini 1820 mini mit Passst cken...

Page 44: ...ig 3 Montage der Passst cke Besonderheit Integration eines Klimaschranks mit verkleideter Vollt r oder verkleideter Rahmenglast r Je nach gew hlter T rart erfolgt die Montage unterschiedlich Sonderfal...

Page 45: ...m belelement ush fitted and built in version 4 AUFSTELLEN IHRES WEINKLIMASCHRANKS Behalten Sie bei einer maximalen H he von 36 mm die am Klimaschrank installierten F e Bei einer H he ber 36 mm m ssen...

Page 46: ...n einem K chenfachmann gemacht werden III Wechselbarer T ranschlag 4 AUFSTELLEN IHRES WEINKLIMASCHRANKS A T r B HMI Leiste C Gebogene Glasleiste D Flache Glasleiste E T ranschlag F Senkkopfschraube M5...

Page 47: ...zu nehmen bevor er an einen anderen Ort gebracht wird 3 3 5 6 4 4 Es wird sehr empfohlen den Schrank an den F en zu nehmen um ihn aus seinem Stellplatz zu entfernen Stecken Sie den Klimaschrank dann...

Page 48: ...18 DE 8 7 1 2 3 4 x2 7 7 8 4 AUFSTELLEN IHRES WEINKLIMASCHRANKS 5 6 Wiederholen Sie dies am zweiten Glas der oberen Leiste pz1 nicht mitgeliefert 2 nicht mitgeliefert...

Page 49: ...19 DE 1 180 2 x2 M4 3 x2 M4 3 1 2 2 3 x2 3 x2 4 AUFSTELLEN IHRES WEINKLIMASCHRANKS 2 nicht mitgeliefert 2 5 nicht mitgeliefert T25 nicht mitgeliefert...

Page 50: ...den Kunststoffstopfen f r den Fall auf dass Sie Ihren T ranschlag wieder wechseln m chten Wir empfehlen folgenden Schritt mit 2 Personen durchzuf hren Eine Umgebung vorsehen in der Besch digungen ver...

Page 51: ...Wenn die T r nicht waagrecht ist ist es m glich sie mit Hilfe des oberen Scharniers einzustellen Wenn die Einstellung mit dem oberen Scharnier nicht ausreicht verfahren Sie ebenso mit dem unteren Scha...

Page 52: ...n Klimaschrank waagrecht unter der Arbeitsplatte oder im M belst ck ffnen Sie die T r des Klimaschranks um 90 Befestigen Sie bei einer verkleidbaren Rahmenglast r die Verkleidung des K chenm belelemen...

Page 53: ...llen Sie den Schrank zu mehr als 75 seines Fassungsverm gens um eine homogene Temperatur zu gew hrleisten Die Konfiguration Ihres Klimaschranks kann Ihren Bed rfnissen angepasst werden Auf den Seiten...

Page 54: ...linken Zapfen Der rechte schl pft dann von allein in das l ngliche Loch Lassen Sie das Regal gleiten bis die hinteren Haken des Regals in die hierf r vorgesehenen Aussparungen in den Schienen einraste...

Page 55: ...inzuf gen oder Versetzen eines Lagerregals 1 2 a Anmerkung Um ein Lagerregal zu installieren dessen hinterer Teil auf dem Absatz am Boden des Klimaschrankgeh uses liegt platzieren 7MI IM 7XSTTIV ZSVRI...

Page 56: ...10 C f r Rotweine empfohlener Regelbereich von 15 C bis 18 C Dieser Klimaschrank kann also auch als Servierschrank speziell f r Wei weine oder Rotweine verwendet werden Der angezeigte Wert ist die ta...

Page 57: ...nklimaschrank besitzt eine Luftfeuchtigkeitsmessfunktion mit Hilfe derer die relative Luftfeuchtigkeit im Innern des Ger ts angezeigt werden kann wenn die Einstellung der Solltemperatur zwischen 9 und...

Page 58: ...Kohlefilterz hlers Bei der Inbetriebnahme oder dem Filterwechsel 2 W hlen Sie das Piktogramm Kohlefilter mit den Tasten oder 3 Dr cken Sie auf den Knopf um den Kohlefilterz hler anzuzeigen 5 Dr cken...

Page 59: ...ie Beschriftung Ihrer Flaschenschilder mit dem wei en Marker zu entfernen Um die Fronten Ihrer Regale zu reinigen verwenden Sie das mitgelieferte Mikrofasertuch verwenden Sie nur Wasser oder ein Reini...

Page 60: ...em Tag an dem das Piktogramm erscheint Nach einigen Stunden erlischt das Piktogramm Die Feuchtigkeit liegt oberhalb des erw nschten Werts Leeren Sie den Klimaschrank entfernen Sie die Feuchtigkeitskas...

Page 61: ...Nutzvolumen Liter L rmpegel dB A 1 Temperatur Modell XS Vollglast r A 139 65 38 S Vollglast r A 125 100 38 S Glast r mit Edelstahlrahmen A 125 100 38 S Glast r mit verkleidetem Rahmen A 125 100 38 S...

Page 62: ..._______________________________________________________________ ______________________________________________________________________________ _________________________________________________________...

Page 63: ...Kapazit ten der Schr nke werden mit Bordeauxflaschen Tradition in Fabrik Konfigurationen berechnet Las capacidades de las bodegas est n calculadas en config uraciones de f brica con botellas Burdeos T...

Page 64: ...s bodegas est n calculadas en configuraciones de f brica con botellas Burdeos Tradici n De capaciteit van de wijnkasten is berekend in de fabrieksconfiguratie met traditionele Bordeaux flessen Le capa...

Page 65: ...as bodegas est n calculadas en configuraciones de f brica con botellas Burdeos Tradici n De capaciteit van de wijnkasten is berekend in de fabrieksconfiguratie met traditionele Bordeaux flessen Le cap...

Page 66: ...as bodegas est n calculadas en configuraciones de f brica con botellas Burdeos Tradici n De capaciteit van de wijnkasten is berekend in de fabrieksconfiguratie met traditionele Bordeaux flessen Le cap...

Page 67: ...usschank Weinkeller Regalsysteme Z gern Sie nicht l nger setzen Sie sich mit Ihren EuroCave H ndler in Verbindung wenn Sie noch irgendwelche Fragen haben L der en el campo de la conservaci n presentac...

Reviews: