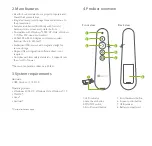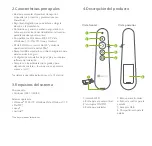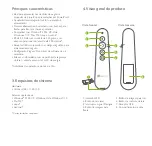
1. LED indicator:
The LED light turns red to indicate a
key is being pressed and functioning.
2. Laser beam button:
Press it to activate the beam and
direct the audience’s attention to the portion you want it
to focus on.
3. ON/OFF switch:
Use it to turn the presenter on or
off.
4. Scroll forward button:
Use this button to go to the
next slide.
5. Scroll backward button:
Press this button to go to the
previous slide.
6. Screen control button (presentation):
Press this
button briefly to enter the full screen mode (first slide),
and press it again to exit this mode. Once in the full
screen mode (end of slide show), press and hold this
button to enter the black screen mode, press and hold it
again to exit this mode.
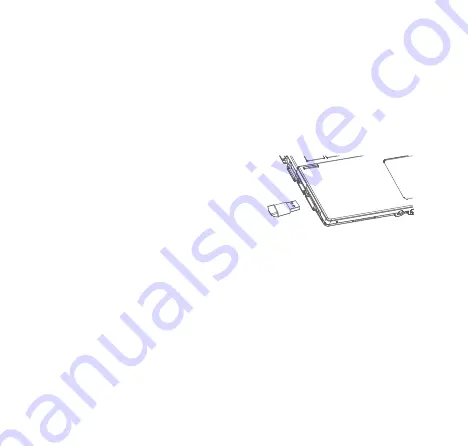
7. USB receiver:
Connect the USB receiver to your
computer to start using the pointer. It can be stowed in
the presenter's bottom compartment or left connected
into the USB port of your PC or laptop.
8. Battery compartment:
Insert a AAA battery in this
compartment for the presenter to start working.
5. Description of functions
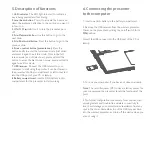
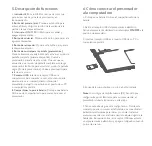
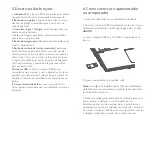
1. Insert one AAA battery in the battery compartment.
2. Remove the USB receiver from the wireless presenter.
Power on the presenter by sliding the on/off switch to its
ON
position.
3.Insert the USB receiver into the USB port of the PC or
laptop.
4. Turn on your computer, if you have not done so already.
Note:
The radio frequency (RF) codes are factory preset for
your convenience; the presenter should be functional at this
point.
5. No further configuration is necessary. Now you can start
enjoying instant and trouble-free wireless connectivity to
launch and manage your presentations seamlessly, from any
spot in the room. Remember to put the USB receiver back
into the wireless presenter, and turn off the device when you
are not using it.
6. Connecting the presenter
to the computer
Summary of Contents for KPP-001
Page 1: ...KPP 001 Wireless presenter...

