1. Cover the speakers to prevent plastic from entering them.
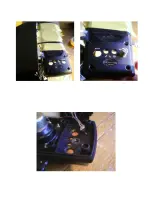
2. Start with the bass and volume holes. Find the drill bit the size of the holes, then use the next larger bit to
enlarge them. Gradually step up the bit size until the holes are large enough to accommodate the new knobs.
The bits will generally self-centre, and the plastic is thin enough to hand drill.
3. To prepare the old LED hole for the switch, use an electric drill and a bit the size of the hole to widen the
hole downwards. The idea is to enlarge the hole away from the two above it, to allow enough space for the
new switch.
4. Unlike the bass and volume holes, the LED hole is surrounded by thicker plastic. To get the switch as close
to flush at the front as possible, countersink the hole using a spade bit. In the above picture a regular large
drill bit was used to start.
5. Lightly sand the outside edges of the new holes as necessary.
6. Secure the switch the the faceplate by applying hot glue around the bushing then position the switch on


