F
T
U
V
K
L
G
G
E
N
E
A
3-in-1 PROGRESS TRIKE MANUAL
WARNING
:
Please read this Owner’s Manual completely before assembling
or operating this product.
Assembly of this product should be carried out by and adult.
Always wear an approved safety helmet when riding.
Never leave your child unattended on this product.
Not Permitted for use on public roads or highways.
Please ensure you follow the assembly instructions, as some parts
must be installed before others.
When adult is pushing the trike, please ensure child is wearing the
seat belt and it is adjusted properly by adult first.
When letting the child ride trike by themselves, remove the push bar
and remove the set belt for you children’s safety.
This product is suitable for baby over 10 months and Max.
weight is 20kg
WARNING!
This product is not a stroller and does not meet the safety requirements for strollers.
Do not use as a means of transport.
Do not use on or near the road.
Toy should be used with caution since skill is required to avoid falls or collisions causing
injury to the user or third parties.
A
G
L
M
N
O
W
I,J
H
K
1
1
1
1
1
1
1
2
P
Q
T
U
V
2
2
1
1
1
1
1
1
B
B1
C
D
E
F
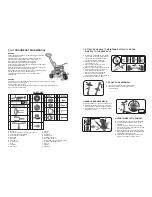
PARTS LIST
A. Main Body
B. Rear Axle + plastic pin + plastic spacer (B1) x 2
C. Parental push handle (bottom)
D. Parental push handle (top)
E. Front fork
F. Handlebar
G. Front wheel
H. Rear wheel x 2
I. Seat
J. Seat Belt
K. Wheel lock
L. Pedal x 2
M. Bucket
N. Mud guard
O. Protection ring
P. 8 x 45mm Allen Bolt
Q. 4.2 x 14mm Screw x 6
(2pcs of them were pre-installed in step 1)
T. 8 x 38mm Allen Bolt and Nut
U. Allen key
V. Spanner
W. Head Rest
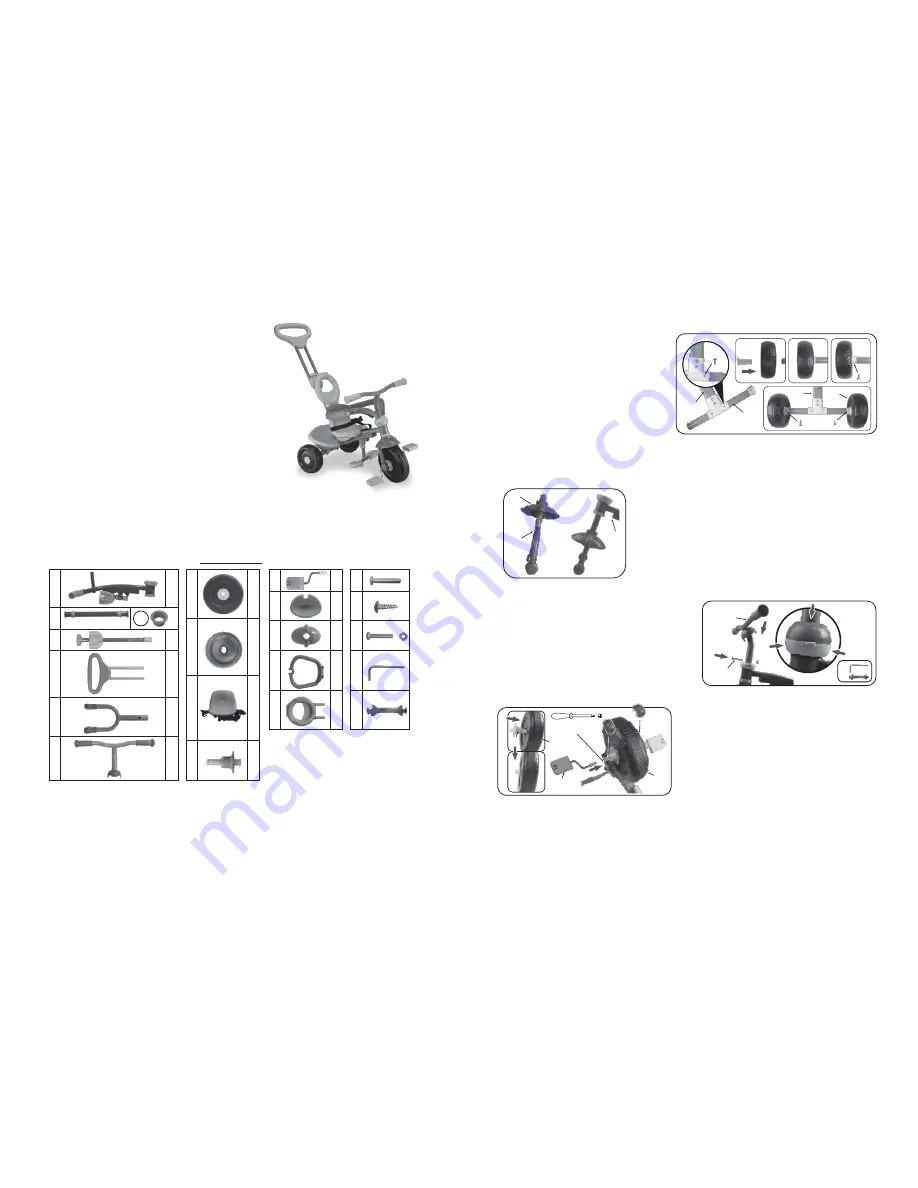
1. ATTACH REAR AXLE TO MAIN FRAME ATTACH THE REAR
WHEELS TO THE REAR AXLE
A. Remove and retain screws Q from spacers
(B1) on axle (B). Remove wheel pins and
spacers from each end.Slide the rear
axle (B) through the main body (A).
B. Align the holes and secure with two
4.2x14mm Screw (Q).
C. Slide one wheel plastic spacer onto
each side of the rear axle (B).
D. Slide one rear wheel (H) onto rear axle (B).
E. Insert the plastic pin through the rear
wheel and then into the rear axle.
F. Ensure all holes in the plastic spacer,
rear axle and plastic pin all align.
Then secure with one 4.2x14mm Screw (Q).
G. Repeat steps for other rear wheel.
A
A
H
Q
B
Q
Q
Q
A. Insert the mud guard (N) onto the front fork (E).
B. Insert the front fork (E) into the head stem of
the main body (A).
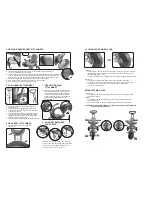
2. FRONT FORK ASSEMBLY:
A. Push the plastic cover up on the handle bars (F).
B. Install the handle bar onto the front head stem.
Secure with one 8x38mm Allen Bolt and nut(T).
C. Push down plastic cover, ensuring that it locks
into position correctly.
3. HANDLE BAR ASSEMBLE:
A. Insert the wheel lock (K) into the front wheel (G).
B. Turn the trike upside down and rest on the
handlebars.
C. Insert the pedals (L) into the front wheel (G).
Ensure that the groove on the pedal line up with
the slot in the wheel hub.
D. Place the front wheel (G) onto the front fork (E).
Ensure the wheel and pedals sit inside the white
plastic washer, as pictured above.
E. Place the front fork end caps over the pedals.
Secure each with two 3.5x15mm screws.
4. FRONT WHEEL ATTACHMENT


