18
Maintenance by the user
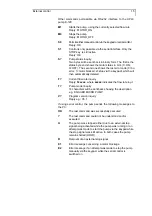
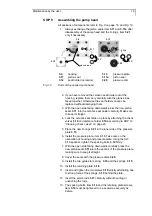
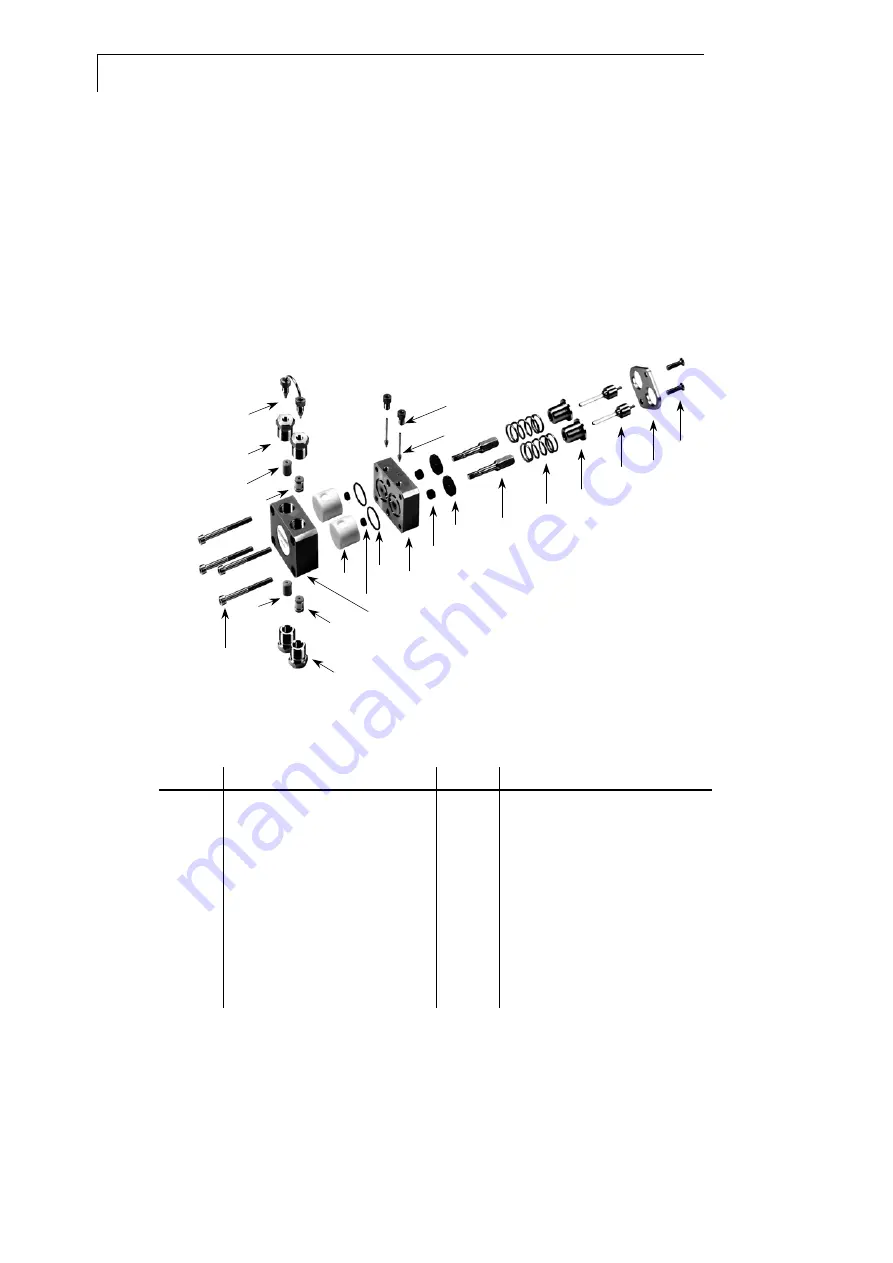
9. To remove the piston seals
3.11a
, the easiest way is to pull
them out using a 4mm gimlet or a screw of corresponding
diameter.
10. The piston seals
3.11
located in the ceramic seal holder
3.12
are to remove in the same manner.
11. To remove the ceramic seal holders from the housing (not
necessary for exchanging the seals), please follow SOP 12
“
Cleaning check valves
on page 20 to remove the check
valves
3.10
and the distance holders
3.10a
.
12. The ceramic seal holders
3.12
can be removed from the
housing
3.4
.
3.19
3.18
3.17
3.16
3.15
3.14
3.11a
3.20
3.13
3.21
3.11
3.4
3.12
3.3
3.10
3.10a
3.10a
3.5
3.6
3.22
3.10
3.24
3.23
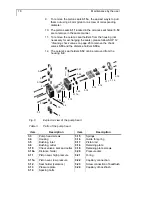
Fig. 9
Explosion view of the pump head
Table 3
Parts of the pump head
item Description item Description
3.3
Pump head screws
3.15
Springs
3.4
Housing
3.16
Guide for spring
3.5
Bushing, inlet
3.17
Piston rod
3.6
Bushing, outlet
3.18
Retaining plate
3.10
Check valves, inlet and outlet
3.19
Retaining plate screws
3.10a
Distance holder
3.20
Pressure disc
3.11
Piston seal, high pressure
3.21
O-ring
3.11a
Piston seal, low pressure
3.22
Capillary connection
3.12
Seal holder (ceramics)
3.23
Screw connection of backflush
3.13
Pressure plate
3.24
Capillary of backflush
3.14
Spacing bolts

