CONTENIDOS
Engranajes recto . . . . . . . . . . . . . . . . 4 - 5
Engranajes de bicicleta. . . . . . . . . . . . . . 6
Engranaje de corona . . . . . . . . . . . . . . . . 9
Cremallera y engranaje de piñón . . . . . 10
Gusano y engranaje sinfín . . . . . . . . . . 11
Engranajes planetarios . . . . . . . . . . . . . 12
Transmisión simple . . . . . . . . . . . . . . . . 15
Ventanilla de coche . . . . . . . . . . . . . . . . 18
Cortadora de césped . . . . . . . . . . . . . . . 21
Batidora de huevos . . . . . . . . . . . . . . . . 24
Mezclador de alimentos . . . . . . . . . . . . 25
Eje y eje con diferencial . . . . . . . . . . . . 28
Relo . . . . . . . . . . . . . . . . . . . . . . . . . . . . . 33
CONTENUS
Engrenages cylindrique. . . . . . . . . . . 4 - 5
Engrenages de bicyclette . . . . . . . . . . . . 6
Roues plates . . . . . . . . . . . . . . . . . . . . . . 9
Engrenage à crémaillère et à pignons . 10
Roue à vis . . . . . . . . . . . . . . . . . . . . . . . . 11
Engrenages planétaires . . . . . . . . . . . . 12
Transmission unique. . . . . . . . . . . . . . . 15
Fenêtre d’auto . . . . . . . . . . . . . . . . . . . . 18
Tondeuse à gazon . . . . . . . . . . . . . . . . . 21
Rétropédalage . . . . . . . . . . . . . . . . . . . . 24
Mélangeur. . . . . . . . . . . . . . . . . . . . . . . . 25
L’essieu et l’essieu avec différentiel . . 28
Horloge . . . . . . . . . . . . . . . . . . . . . . . . . . 33
FR
ES
• Never get your Motor wet; do not
use it in electrical outlets near
water.
• Never use steel wool or solvents
of any kind on any parts of your
Motor Pack.
• Do not use Motor or Adapter if
power cord is broken or worn.
• Examine your Motor Pack
components regularly, looking
for damaged parts or possible
overheating.
• Adapter must be plugged into
120 V AC outlet only.
• To stop the movement of your
motorized model, unplug the
Adapter from the outlet.
• Never attempt to stop any
moving piece; you may work
the Worm loose from the Motor.
Motor shaft does not spin
• Adapter is not plugged into outlet
• Motor Adapter is not plugged
into Motor.
• Housing is bent.
• Tan Locks not snapped in
correctly.
Motor shaft spins but does not
drive
• Worm is missing from motor
shaft.
• Tan Locks not snapped in
correctly, or are missing.
• Gears not properly aligned, or
are missing.
• Gears must spin freely; before
attaching motor, make sure
Gears move easily by hand.
Gears make a grinding noise
• Gears not properly aligned.
• Gear shaft(s) not secured.
• Housing is bent.
Worm Gear comes loose
• Unplug adapter from outlet;
press Worm back firmly on
Motor.
• When Worm Gear is first used, it
will shed fine particles. This is
normal, and will stop shortly.
Brush particles away with a dry
cloth or soft brush.
Do not wash
with water.
Troubleshooting
K’NEX Motor Pack Information
CONTENTS
Spur Gears . . . . . . . . . . . . . . . . . . . . . 4 - 5
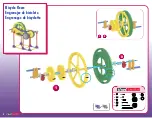
Bicycle Gears . . . . . . . . . . . . . . . . . . . . . . 6
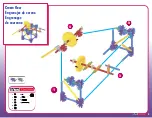
Crown Gear . . . . . . . . . . . . . . . . . . . . . . . 9
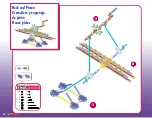
Rack and Pinion. . . . . . . . . . . . . . . . . . . 10
Worm and Worm Gear . . . . . . . . . . . . . . 11
Planetary Gear . . . . . . . . . . . . . . . . . . . . 12
Simple Transmission. . . . . . . . . . . . . . . 15
Car Window . . . . . . . . . . . . . . . . . . . . . . 18
Lawnmower . . . . . . . . . . . . . . . . . . . . . . 21
Eggbeater . . . . . . . . . . . . . . . . . . . . . . . . 24
Food Mixer . . . . . . . . . . . . . . . . . . . . . . . 25
Axle and Axle with Differential . . . . . . . 28
Clock . . . . . . . . . . . . . . . . . . . . . . . . . . . . 33
EN
CAUTION: – ELECTRIC TOY:
Not recommended for children under 8 years of age.
As with all electric products, precautions should be
observed during handling and use to prevent electric
shock. FOR INDOOR USE ONLY.
INPUT:
120 Volts AC 60 Hz 17 Watts
OUTPUT:
12 Volts DC 500 mA DC
!
ATENCIÓN: - JUGUETE ELÉCTRICO:
No se recomienda para niños menores de 8 años de
edad. Al igual que con todos los productos eléctricos,
es necesario tomar medidas preventivas durante el
manejo y el uso, para evitar descargas eléctricas.
SÓLO PARA USO BAJO TECHO.
ENTRADA:
120 Voltios CA 60 Hz 17 Vatios
SALIDA:
12 Voltios CC 500 mA CC
ATTENTION : - JOUET ÉLECTRIQUE :
N'est pas recommandé pour les enfants de moins de 8 ans.
Comme pour tous objets électriques, manipuler avec
précaution pour éviter tout danger d'électrocution.
NE PAS UTILISER DEHORS.
ALIMENTATION :
120 Volts c.a. 60 Hz 17 Watts
DÉBIT :
12 Volts c.c. 500 mA c.c.
!
!
WARNING:
CHOKING HAZARD - Small parts.
Not for children under 3 years.
CAUTION:
Keep hair, clothing and fingers away from
moving parts.
ADVERTENCIA:
PELIGRO DE ASFIXIA -
Piezas pequeñas. No es para niños menores de 3 años.
PRECAUCIÓN:
Mantén el pelo, la ropa y los dedos
alejados de las piezas móviles.
AVERTISSEMENT :
DANGER D'ÉTOUFFEMENT -
Petites pièces. Ne convient pas aux enfants de moins de
3 ans.
ATTENTION :
Gardez les pièces mobiles à l’écart des
doigts, des vêtements et des cheveux.
!
!
!
2
™
Summary of Contents for 79520
Page 1: ......
Page 7: ...7 1 4 1 2 3 4 12 4...
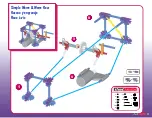
Page 9: ...9 4 2 3 1 Crown Gear Engranajes de corona Engrenages de couronne 4 12 1 2 4 3 2 8 9 4 2...
Page 11: ...11 Simple Worm Worm Gear Gusano y engranaje Roue vis 2 3 4 1 4 12 2 2 1 1 1 12 12 1 1 4 1 1...
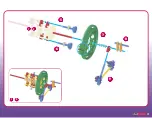
Page 13: ...13 5 6 7 8 9 1 9 1 4...
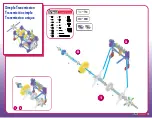
Page 16: ...16 4 5 1 5 1 3...
Page 17: ...17 6 7 1 7 1 5...
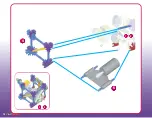
Page 19: ...19 4 6 5 3 6 3...
Page 20: ...20 1 8 1 2 3 6 7 8...
Page 22: ...22 1 4 1 2 3 4...
Page 23: ...23 5 1 6 6 1 4...
Page 24: ...24 Eggbeater Batidora de huevos Fouet oeufs 5 2 3 4 4 8 4 6 4 4 4 2 2 18 1 11 6 7 4 1...
Page 26: ...26 6 1 8 1 5 7 8...
Page 27: ...27 1 8 1 11 9 10 11...
Page 29: ...29 1 4 3 4 Axle Eje L essieu 1 2 A...
Page 31: ...31 5 4 6 4 6 7 7 7...
Page 32: ...32 7 1 7 4 6 1 3 B...
Page 34: ...34 6 7 8 6 8...
Page 35: ...35 9 1 10 6 8 1 5 10...
Page 36: ...GEARS Parts List ENGRANAJES Lista de Partes ENGRENAGES Liste de Pi ces...


