Spacers
There are places in your model where you need to use spacers. Be sure to use the
correct color and number of spacers shown in the instructions.
(FR)
Espaceurs
Il y a des endroits sur ton modèle ou tu auras besoin de te servir d’espaceurs.
Assure-toi d’utiliser la bonne couleur et le nombre d’espaceurs indiqué sur les
instructions.
(DE)
Abstandsstücke
An manchen Stellen in deinem Modell musst du Abstandsstücke einbauen. Achte darauf, die richtige Farbe und
Anzahl von Abstandsstücken wie in der Anleitung gezeigt zu verwenden.
(NL)
Afstandhouders
Op bepaalde plekken van je model moet je afstandhouders gebruiken. Zorg dat je het juiste aantal afstandhouders
gebruikt, zoals wordt getoond in de instructies.
2
Education
®
CONTENTS
/CONTENUS/INHALT/INHOUD
Roller Coaster Ramps/
Rampes de montagnes russes/
Achterbahn Rampen/Achtbaan hellingbanen
. . . . . . . . . . .3
Moving Truck/
Camion mobile/
Fahrender Lastwagen/Bewegende heftruck
. . . . . . . . . . . .6
Splitting Wedge/
Coin fendeur/Spaltkeil/Splitsing wig
. . . .9
Chisel/
Burin/Meißel/Beitel
. . . . . . . . . . . . . . . . . . . . . . . 10
Axe/
Hacha/Axt/Ax
. . . . . . . . . . . . . . . . . . . . . . . . . . . . . .11
Hand Drill/
Perceuse à main/
Handbohrmaschine/Handboor
. . . . . . . . . . . . . . . . . . . . . 12
Archimedes Screw/
Vis d’Archimède/
Archimedische Schraube/Archimedes schroef
. . . . . . . . . . 13
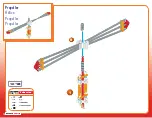
Propeller/
Hélice/Propeller/Propeller
. . . . . . . . . . . . . . . .16
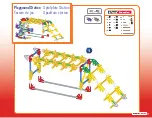
Playground Station/
Terrain de jeu/Spielplatz Station/
Speeltuin station
. . . . . . . . . . . . . . . . . . . . . . . . . . . . . . . . .17
CAUTION:
Rubber Bands can cause injury from snap-back, breaking, or loss of control. While assembling models shown in instructions,
hold Rubber Band tightly, and do not overstretch. Use Rubber Bands only as shown in these instructions.
DO NOT USE FRAYED OR
TORN RUBBER BANDS. CAUTION:
Keep Rubber Bands away from face and eyes.
ATTENTION :
Les élastiques peuvent causer des blessures en claquant, en se brisant ou quand on les manipule imprudemment.
Tenez fermement les élastiques lors de l’assemblage du modèle en veillant à ne pas trop les tendre. Utilisez les élastiques que selon
les instructions comme indique.
N’UTILISEZ PAS D’ÉLASTIQUES DISTENDUS OU ABIMÉS. ATTENTION :
Tenez les élastiques à
l’écart du visage et des yeux.
VORSICHT:
Gummibänder können Verletzungen hervorrufen, wenn sie reißen, zurückspringen oder wenn sie nicht vorsichtig
gehandhabt werden. Halten Sie die Gummibänder während des Zusammenbaus der Modelle fest, ohne sie jedoch zu überdehnen.
Verwenden Sie die Gummibänder gemäß den Anweisungen.
VERWENDEN SIE NIEMALS AUSGEFRANSTE ODER ZERRISSENE
GUMMIBÄNDER. VORSICHT:
Halten Sie Gummibänder weg von Gesicht und Augen.
LET OP:
Elastiekjes kunnen letsel veroorzaken als ze wegschieten, kapotgaan of als er achteloos mee wordt omgegaan. Houd
elastiekjes goed vast als je modellen bouwt volgens de instructies. Rek ze niet te ver uit. Gebruik elastiekjes uitsluitend zoals in de
instructies beschreven staat.
GEBRUIK GEEN GERAFELDE OF GESCHEURDE ELASTIEKJES.
LET OP:
houd elastiekjes uit de buurt van het gezicht en de ogen.
(EN)
WARNING:
Not suitable for children under 18 months. Long
cord/Long chain. Strangulation hazard.
(FR)
AVERTISSEMENT :
Ne convient pas aux enfants de moins
de 18 mois. Longue corde/Longue chaîne. Risque d’étranglement.
(DE)
ACHTUNG:
Nicht geeignet für Kinder unter 18 Monate.
Lange Schnur / Lange Kette. Strangulierungsgefahr.
(NL)
WAARSCHUWING:
Niet geschikt voor kinderen onder de
18 maanden. Lang snoer / lange keten. Gevaar voor worging.
K’NEX Building Basics
To begin your model, find the 1 and
follow the numbers. Each piece has
its own shape and color. Just look at
the pictures, find the pieces in your
set that match and then connect them
together. Try to face your model in
the same direction as the instructions
while you build. The arrows show you
where the parts connect, but not all
connection points have arrows. Faded
colors indicate sections previously built;
connecting points will be in full color.
(FR)
Notions De Base K’NEX Pour Le Montage
Pour commencer ton modèle, trouve l’étape numéro 1 et suis les numéros. Chaque pièce a sa propre forme et sa
propre coleur. Regarde les illustrations, trouve les pièces qui correspondent à ce que tu vois et assemble-les. Pour
t’aider pendant que tu construis, oriente ton modèle dans le même sens que les instructions. Les flèches t’indiquent
où les pièces s’assemblent, mais les points de raccordement n’ont pas tous des flèches. Les couleurs plus claires
indiquent les sections déjà construites. Les points de jonction sont indiqués en couleurs vives.
(DE)
Grundlegende Bauanleitungen Für K’NEX
Um mit dem Bauen deines Modells zu beginnen, suche die Nummer 1 und folge den laufenden Nummern. Jedes
Teil hat seine eigene Form und Farbe. Schau dir einfach die Abbildungen an, such die Teile in deinem Bausatz,
die so aussehen wie das, was du auf der Abbildung siehst und steck sie ineinander. Versuche, dein Modell beim
Zusammenbauen so zu orientieren, dass es in die gleiche Richtung weist, wie es in den Anleitungen beschrieben
und gezeigt wird. Teile zeigen bereits zusammengebaute Abschnitte an. Die Anbringungspunkte sind in kräftigen
Farben dargestellt.
(NL)
Bouwen met K’NEX
Om te starten met de bouw van je model begin je bij 1 en volg je de nummers. Elk onderdeel heeft een eigen
vorm en kleur. Kijk goed naar de plaatjes. Zoek de onderdelen in je set die overeenstemmen met de onderdelen
op de plaatjes en verbind ze met elkaar. Probeer tijdens het bouwen je model in dezelfde richting te laten wijzen
als in de instructies. De pijlen geven aan waar je onderdelen met elkaar moet verbinden, al worden niet alle
verbindingspunten aangeduid door pijlen. Verbleekte kleuren geven de eerder gebouwde gedeeltes aan; de
aansluitpunten worden in felle kleuren weergegeven.
Connectors
You can slide these special connectors together. Push tightly
until you hear a “click”. Pay close attention to the instructions
and position them horizontally or vertically exactly as they are
shown.
(FR)
Connecteurs
Tu peux assembler ces connecteurs tout à fait uniques en les
faisant glisser l’un avec l’autre. Pousse fort jusqu’à ce que
tu entendes un « clic ». Lis les instructions attentivement et
positionne les horizontalement ou verticalement, en suivant
exactement les illustrations.
(DE)
Verbindungsstücke
Diese besonderen Verbindungsstücke kannst du
zusammenschieben. Drücke sie fest, bis du ein Klicken
hörst. Achte genau auf die Anleitung und positioniere die
Verbindungsstücke genau wie in der Abbildung.
(NL)
Verbindingsstukken
Je kunt deze speciale verbindingsstukken in elkaar steken. Duw ze stevig tegen elkaar aan tot je een ‘klik’
hoort. Let goed op de instructies en plaats ze horizontaal en verticaal, precies zoals wordt getoond.
WARNING: CHOKING HAZARD – Small Parts. Not for children under 3 years.
ATTENTION : RISQUE D’ÉTOUFFEMENT – Pièces de petite taille. Ne convient pas aux enfants de
moins de 3 ans.
ACHTUNG: ERSTICKACHTUNG – Kleinteile. Nicht geeignet für Kinder unter 3 Jahren.
WAARSCHUWING: INSLIKKINGSGEVAAR – Kleine Onderdelen. Niet geschikt voor kinderen jonger
dan 3 jaar.
1
2
3
1
3
-
4
Summary of Contents for Education SIMPLE MACHINES DELUXE INCLINED PLANES
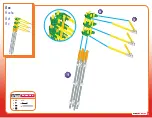
Page 4: ...3 4 3 4 4 Education...
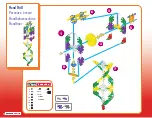
Page 7: ...5 6 7 8 1 8 1 4 7 Education...
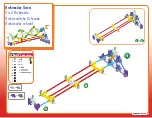
Page 8: ...1 8 11 10 9 1 11 8 Education...
Page 10: ...Chisel Burin Mei el Beitel 2 3 1 2 2 Education 10 Education 1...
Page 11: ...Axe Hacha Axt Ax 3 3 6 4 3 10 4 Education 1 2 3 11 Education...
Page 14: ...4 5 5 4 14 Education...
Page 15: ...1 3 4 5 1 6 6 15 Education...
Page 16: ...Propeller H lice Propeller Propeller 5 2 1 1 6 4 1 6 10 Education 1 2 16 Education...
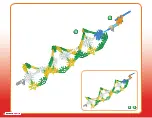
Page 18: ...2 3 4 2 4 18 Education...
Page 19: ...2 4 1 5 1 5 19 Education...


