1
2
3
20
3
Service Instructions
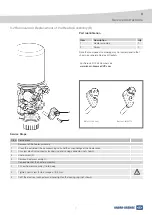
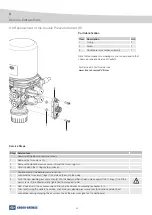
3 8 Replacement of the Double Pressure Sensor (H)
Step Service task
Removal of the double pressure sensor.
1
Remove the two screws (2).
2
Remove the double pressure sensor (3) and the two O-rings (1).
3
Carefully clean the O-ring sealing surfaces.
Replacement of the double pressure sensor
1
Lubricate the two new O-rings (1) and place them into the body.
2
Push the new double pressure sensor (3) into the body and firmly hold in place against the O-rings (1) until the
new screws (2) are fitted and fully tightened to a torque of 6 Nm.
3
Refit (if necessary) the air processing unit to vehicle and check according to chapter 3.10.
4
Prior to returning the vehicle to service, check the new double pressure sensor for function and electrical
connection: during charging the air system, check the pressure signal on the dashboard.
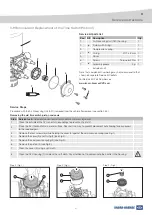
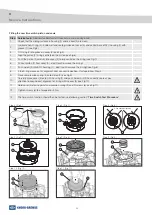
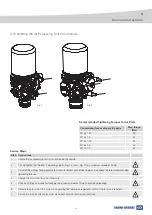
Service Steps
Part Identification
Item Description
Qty
1
O-ring
2
2
Screw
2
3
Double pressure sensor assembly
1
For Service Kit Part Number see
www.knorr-bremseCVS.com
Note that component numbering may not correspond to that
shown on separate Service Kit leaflets.


