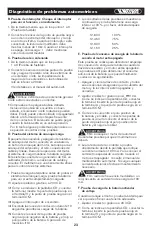
Diagnosis of automotive Troubles
(3) Connect the red and black test lead probes in
parallel to the two ends of the high-voltage
damper and observe the reading. The normal
resistance is generally in a range of 3 k
Ω
to
50 k
Ω
. In bending the lead, the reading should
remain unchanged.
The functions of a magnetic resistance sensor is
similar to those of a Hall sensor and the testing
methods of both sensors are also similar. Their
normal resistance is generally in a range of 150
Ω
to
1 k
Ω
. Refer to the ranges of resistance in various
kinds of automotive manuals for the details.
3. Hall Switch/Sensor Testing
(see figure 12)
5. RPMx10 Testing
(see figure 14)
4. Magnetic Resistance Sensor
(see figure 13)
figure 12
Red Signal Terminal
Hall Sensor
Iron
Plate
Hall Switch
Hall Switch
Ground
Ground
Black
Ground
Jumper
Ford Motor Fuel Dispenser
Chrysler Motor Fuel Dispenser
V+
V+
V+
Signal
Terminal
Signal
Terminal
When the tach and dwell are tested in the computer
of the automobile, a Hall sensor is used. The Hall
sensor is normally used in the ignition system to
detect the position of the camshaft so that the
computer of the automobile can set the optimal time
for the ignition and the opening of the fuel injector.
(1) Move the Hall sensor out of the automobile and
see the details of the operation in various kinds
of automotive manuals.
(2) Connect the positive pole of the 9 V battery to
the source end of the sensor and the negative
pole to the ground end of the sensor by referring
the details to the positions of the source and
ground ends of the sensor in various kinds of
automotive manuals.
(3) Set the rotary switch of the meter to 200W.
As prompted at the LCD connect terminal, insert
the red test lead into the W terminal and
the black one into the COM terminal.
(4) Connect the red and black test lead probes in
parallel to the signal connect terminal and ground
end of the sensor and the Meter should display
a small ohm value.
(5) When a metal plate (blade, steel tape, etc.) is
inserted into a concave magnetic pole of the
sensor, the display of the meter will be enlarged
or overloaded; if the metal plate is moved away,
the display will become smaller, which proves
that the sensor is satisfactory.
(1) Set the rotary switch to RPMx10 and select the
number of cylinders in the automobile to be tested.
(2) As prompted at the LCD connect terminal, insert
the red test lead into the terminal and the
black one into the COM terminal.
(3) Connect the black test lead probe to the ground
(i.e. ground strap connection) of the automobile
and the red one to: the appropriate testing test
terminal of the computer of the automobile if the
automobile is in a DIS type (Refer to the
servicing handbooks of various kinds of
automotive manuals for the detailed position);
or the negative pole of the ignition coil if the
automobile is equipped with a distributor board
(Refer to the servicing handbooks of various
kinds of automotive manuals for the detailed
position).
(4) The normal starting rotation speed of an engine
is about 50 RPM to 275 RPM. Refer the detailed
position to the servicing handbooks of various
kinds of automotive manuals because this value
relates to the current temperature, engine size,
battery size, etc.
6. Fuel System Testing
It is necessary to add more accurate engine fuel
control to a low injection automobile. Since 1980,
the automotive manufacturing industry has used
electronically-controlled carburetor and fue
injection so as to achieve lower fuel injection.
(1) GM (General Motor): Testing the dwell of the
C-3 mixed-control solenoid: Place the solenoid
in a cylinder, monitoring the ratio between the
air and the fuel, which should generally be 14.7
to 1 between the air and the fuel so as to
reduce the injection of surplus fuel. The
testing is used to see if the solenoid is installed
right in the position and the dwell of the meter
can also indirectly used for the testing.
figure 13
Magnet
Black
Red
Magnetic Resistance Sensor
Magnetic
Resistance
Distributor
figure 14
Red
Black
Ground
Ignition
Coil
• The displayed value of the meter becomes
the actual tach reading only after it is multiplied by
10.
WARNING
10
Summary of Contents for KN 8056
Page 1: ...KN 8056 Digital automotive multimeter Mult metro digital automotriz...
Page 33: ...Notes Notas...
Page 34: ...www knova com mx...


