16
ENGLISH
FRANÇAIS
DEUTSCH
by knürr
by knürr
Installation und
Inbetriebnahme
Installation and
commissioning
Installation et
mise en service
3.6
Inbetriebnahme
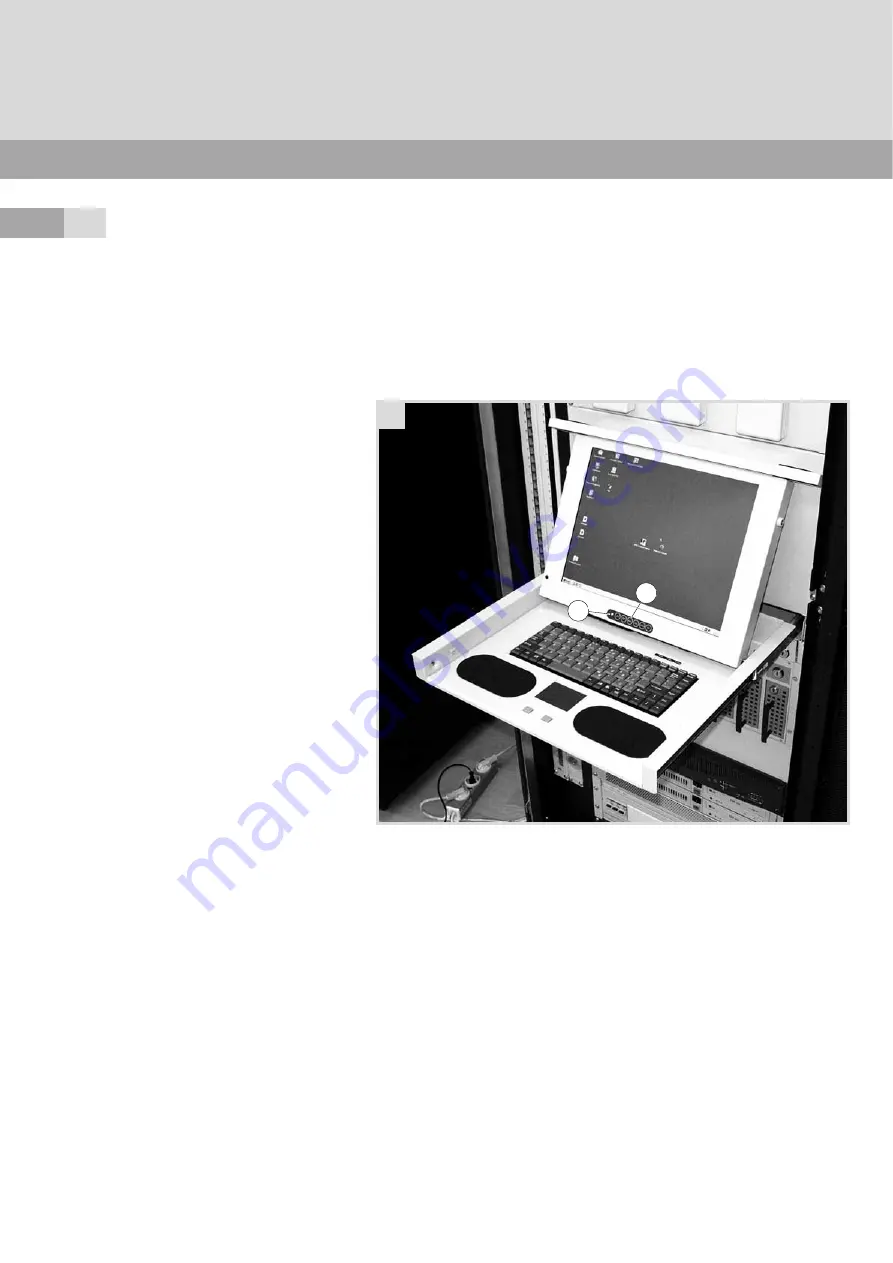
• Verschlüsse an der Frontplatte zur
Mitte schieben und entriegeln.
• Monitor nach vorn herausziehen und
aufklappen (mindestens 25°).
Der Monitor schaltet sich automatisch
ein, die grüne Betriebs-LED H1
leuchtet.
• Standard-Windows-Treiber für den
Monitor verwenden.
Commissioning
• Slide the fasteners on the front panel to
the middle and unlock.
• Pull the monitor to the front and fold
open (at least 25º).
The monitor will switch on auto-
matically and the green run LED (H1)
will illuminate.
• Use the standard windows driver for the
monitor.
Mise en service
• Faire coulisser vers le milieu les
fermetures en façade pour les
déverrouiller.
• Tirer le moniteur vers l'avant, puis le
relever (d'au moins 25°). Le moniteur
se connecte automatiquement, la LED
témoin verte H1 s'allume.
• Utiliser le pilote Windows standard pour
le moniteur.
Zeigt der Monitor nach dem Einschalten
kein Bild, folgende Ursachen prüfen:
– Videosignal korrekt angeschlossen?
– Synchronisationssignal vorhanden?
(VGA-Kabel eingesteckt, Grafikein-
stellungen: Auflösung max. 1024 x 768,
Bildschirmfrequenz 60 Hz)
– Monitor weit genug hochgezogen?
– Display über OSD-Menü ausgeschaltet
(OSD-Tasten H2, siehe 4)?
Zeigt der Monitor nach dem Einschalten
kein Bild und leuchtet die grüne Betriebs-
LED nicht:
• Service verständigen und Netzteil
wechseln lassen (integrierte
Feinsicherung defekt).
If there is no image on the monitor after
switching on, check the following causes:
– Is the video signal connected correctly?
– Is there a synchronisation signal?
(VGA cable plugged in, graphics
settings: maximum resolution
1024 x 768, picture refresh rate of
60 Hz).
– Is the monitor pulled up enough?
– Has the display been switched off with
the OSD menu (OSD buttons (H2),
page 4)?
If there is no image on the monitor after
switching it on and the green run LED is
not illuminated:
• Contact technical service and have the
power supply changed (integrated
micro-fuse is faulty).
Si aucune image n'apparaît sur le
moniteur après sa mise en marche,
vérifier les causes possibles suivantes :
– signal vidéo correctement raccordé ?
– signal de synchronisation disponible ?
(câble VGA branché, paramètres
graphiques : résolution maxim.
1024 x 768, fréquence de l'écran 60 Hz)
– moniteur suffisamment relevé ?
– écran éteint par l'intermédiaire du
menu de l'OSD (touches OSD H2,
voir 4)?
Si aucune image n'apparaît sur le
moniteur après sa mise en marche et si la
LED témoin verte ne s'allume pas :
• prévenir le SAV et faire changer le bloc
d'alimentation (fusible pour courant
faible intégré défectueux).
H
H1
H2


