18
CARE AND MAINTENANCE
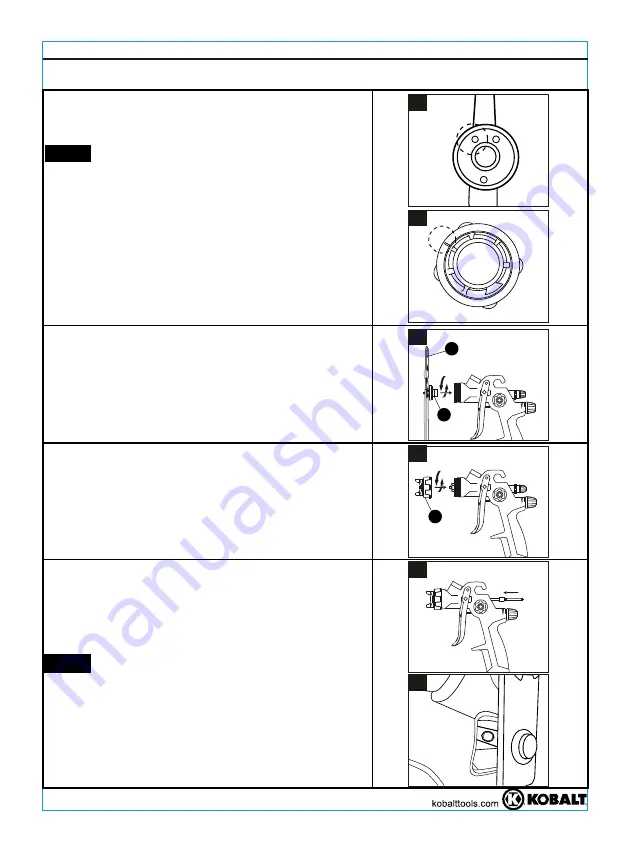
2. Screw the Fluid Nozzle (B) into the face of the
spray gun by turning it clockwise, using the
wrench (J) (13 mm) to tighten securely
(See Figure 3).
3. Screw the Air Cap Ring (A) onto the face of the
spray gun by turning it clockwise and hand
tighten. (See Figure 4)
4. Slide the Paint Needle through the back of the
Spray Gun. (See Figure 5-6)
Clockwise
3
Clockwise
4
5
6
NOTE:
Make sure the hole in the trigger is
properly aligned or the paint needle cannot be
inserted.
RE-ASSEMBLING SPRAY GUN
1. The Air Distribution Ring can only be inserted
correctly one way (See Figure 1 and 2)
NOTE:
The line on the Air Distribution Ring
(Figure 2) must be lined up to the hole shown
in Figure 1.
1
2
J
B
A


