13
ASSEMBLY INSTRUCTIONS
WARNING
Folding or unfolding the handle improperly can damage the cables, causing an unsafe operating
condition.
• Do not damage the cables when folding or unfolding the handle.
• If a cable is damaged, contact an Authorized Service Dealer.
WARNING
• If any parts are damaged or missing, do not operate this product until the parts are replaced. Us-
ing a product with damaged or missing parts could result in serious personal injury.
• Do not attempt to modify this product or create accessories not recommended for use with this
product. Any such alteration or modification is misuse and could result in a hazardous condition
leading to possible serious personal injury.
• Do not insert battery until assembly is complete and you are ready to mow. Failure to comply
could result in accidental starting and possible serious personal injury.
• To prevent accidental starting that could cause serious personal injury, always remove the battery
pack from the product when assembling parts.
• Never operate the mower without the proper safety devices in place and working. Never operate
the mower with damaged safety devices. Operation of this product with damaged or missing parts
could result in serious personal injury.
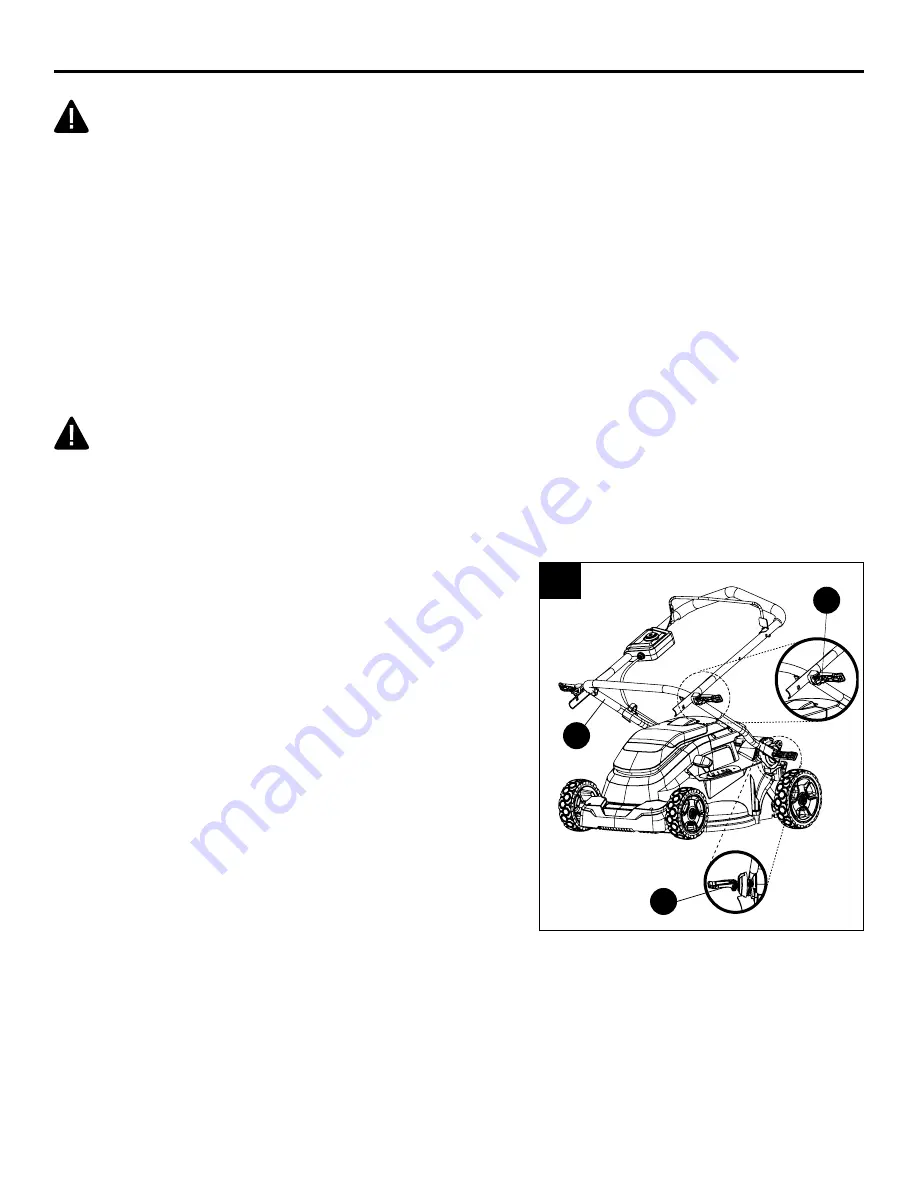
1. Unfolding and adjusting handle assembly
a. To raise handle assembly:
• Open the lower handle locks (J).
• Pull up and back on the lower handle (E) until it is
aligned with the slot between the lower handle locks
(J) and the mower housing.
Note:
If the lower handle is difficult to move, turn the
lower handle locks (J) counterclockwise to free the
handle.
• To secure the lower handle (E) in place, close the
lower handle locks (J).
Note:
If the lower handle is loose or does not seat
completely in the slot, turn the lower handle locks
(J) clockwise to secure the handle.
• Open the upper cam locks (AA).
• Pull up and back on the upper handle to raise it into
operating position.
• To secure the upper handle in place, close the
upper cam locks (AA).
Note:
If the upper handle is loose or separated from
the lower handle, tighten the knobs on the upper cam
locks by turning them clockwise.
1a
E
AA
J


