15
OPERATING INSTRUCTIONS
13. Screw Driving
a. Try to use modern screws for easy driving and improved grip.
b. Set the mode selector (D) to driving mode
for best performance. Set the torque-
adjustment to the most suitable setting. If in doubt, start with a low setting and gradually
increase the setting until the most. Do not change the torque setting when the tool is
running.
c. It is advisable to drill a pilot hole first. The pilot hole will act as a guide for the screw and
will also make tightening the screw less difficult.
d. Keep sufficient pressure on the drill to prevent the bit turning out of the screw head. The
screw head can easily become damaged, making it difficult to drive it home or remove it.
CARE AND MAINTENANCE
All maintenance should only be carried out by a qualified service technician.
Cleaning
Before cleaning or performing any maintenance, remove the battery pack. For safe and proper
operation, always keep the tool and its ventilation slots clean.
Always use only a soft, dry cloth to clean your ratchet wrench; never use detergent or alcohol.
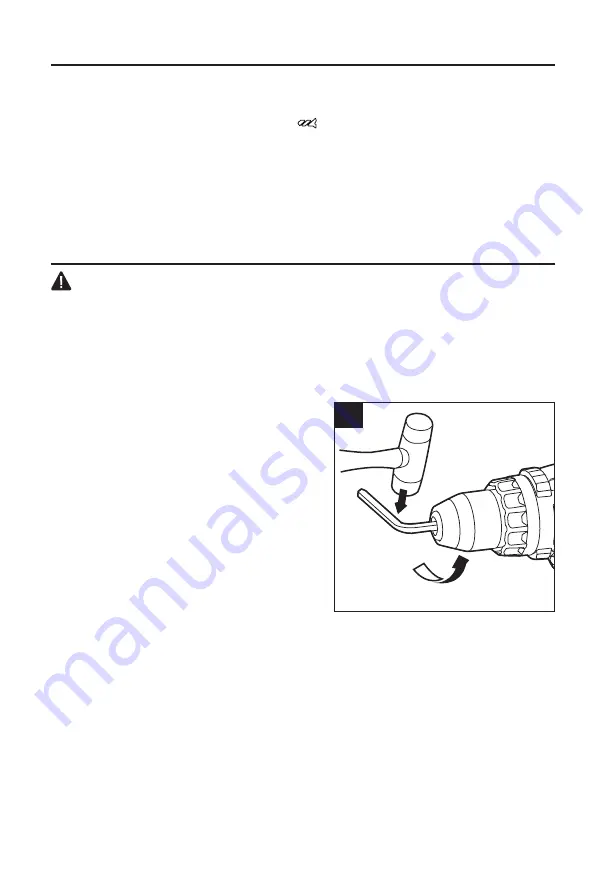
14. Chuck Removal
The chuck can be removed and replaced.
a. Lock the variable-speed trigger switch by
placing the direction-of-rotation selector (F) in
the center position.
b. Open the chuck jaws.
c. Use a screwdriver (not included) to remove
the chuck screw by turning it in a clockwise
direction.
d. Insert a 5/16-in. or larger hex key (not included)
hex key into the chuck of the hammer drill and
securely tighten the chuck jaws around the hex
key.
e. Tap the hex key sharply with a mallet in a
counterclockwise direction. This will loosen the chuck for easy removal.
NOTICE:
The chuck screw has left handed threads. Attach a new chuck to the spindle and
tighten the chuck screw.
14


