background image

PH19461


¿Preguntas, problemas, piezas faltantes?

 Antes de volver a la tienda, llame a nuestro 

Departamento de Servicio al Cliente al 1-888-3KOBALT (1-888-356-2258), de lunes a 

domingo de 8 a.m. a 8 p.m., hora estándar del Este.

ADJUNTE SU RECIBO AQUÍ

Número de serie

Fecha de compra

ARTÍCULO #1518741/1518746/1518747

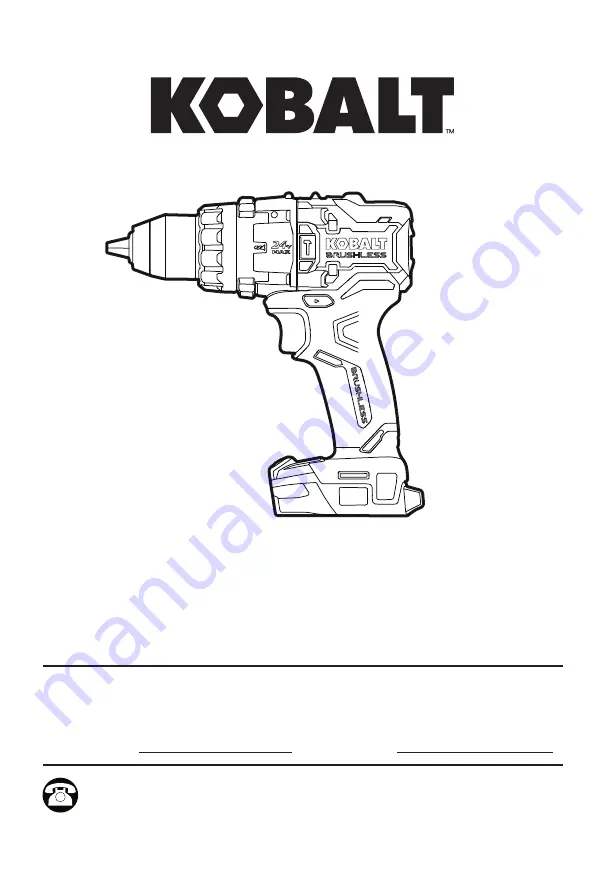
TALADRO PERCUTOR/DESTORNILLADOR 

SIN ESCOBILLAS

MODELO #KXHD,124B-03

Summary of Contents for 1518741

Page 1: ...to your retailer call our customer service department at 1 888 3KOBALT 1 888 356 2258 8 a m 8 p m EST Monday Sunday ATTACH YOUR RECEIPT HERE Serial Number Purchase Date Español p 17 ITEM 1518741 1518746 1518747 BRUSHLESS HAMMER DRILL DRIVER MODEL KXHD 124B 03 ...

Page 2: ...ating Instructions 9 Care and Maintenance 16 Troubleshooting 16 Warranty 17 PRODUCT SPECIFICATIONS COMPONENT SPECIFICATION Rated voltage 24V d c No load speed 0 550 0 2000 min Chuck capacity 1 2 in Maximum torque 1200 in lbs Operating temperature 4 F 20 C 113 F 45 C Charging temperature 41 F 5 C 104 F 40 C ...

Page 3: ...rigger switch K Double end bit F Direction of rotation selector forward center lock reverse WARNING Remove the tool from the package and examine it carefully Do not discard the carton or any packaging material until all parts have been examined If any part of the tool is missing or damaged do not attach the battery to use the tool until the part has been repaired or replaced Failure to heed this w...

Page 4: ...cer birth defects or other reproductive harm Some examples of these chemicals are Lead from lead based paints Crystalline silica from bricks cement and other masonry products Arsenic and chromium from chemically treated lumber Your risk from these exposures varies depending upon how often you do this type of work To reduce your exposure to these chemicals Work in a well ventilated area Work with a...

Page 5: ... tool Work Area Safety Keep work area clean and well lit Cluttered or dark areas invite accidents Do not operate power tools in explosive atmospheres such as in the presence of flammable liquids gases or dust Power tools create sparks which may ignite the dust or fumes Keep children and bystanders away while operating a power tool Distractions can cause you to lose control Electrical Safety Power ...

Page 6: ...g parts Loose clothes jewelry or long hair can be caught in moving parts If devices are provided for the connection of dust extraction and collection facilities ensure that these are connected and properly used Use of dust collection can reduce dust related hazards Do not let familiarity gained from frequent use of tools allow you to become complacent and ignore tool safety principles A careless a...

Page 7: ...curs flush with water If liquid contacts eyes additionally seek medical help Liquid ejected from the battery may cause irritation or burns Do not use a battery pack or tool that is damaged or modified Damaged or modified batteries may exhibit unpredictable behavior resulting in fire explosion or risk of injury Do not expose a battery pack or tool to fire or excessive temperature Exposure to fire o...

Page 8: ...tempting to use the hammer drill familiarize yourself with all of its operating features and safety requirements Helpful tool not included Phillips screwdriver WARNING Do not allow familiarity with the hammer drill to cause carelessness Remember that one careless moment is enough to cause severe injury Before attempting to use any tool be sure to become familiar with all of the operating features ...

Page 9: ...n Therefore always remove the battery pack when the tool is not in use or when carrying the hammer drill at your side 2 Direction of Rotation Selector Forward Center Lock Reverse The direction of bit rotation is reversible and is controlled by a selector F located near the variable speed trigger switch E With the hammer drill held in the normal operating position pointing away from you a Position ...

Page 10: ...ifferent variable speed ranges A gear selector D is located on the top of the hammer drill to select either 1 Low or 2 High speed Setting 1 will deliver lower speeds and increased power and torque Use setting 1 for heavy duty work or driving screws Setting 2 will deliver higher speeds and reduced power and torque Use setting 2 for drilling wood and wood composites and for using abrasive and polish...

Page 11: ...he job and the type of bit fastener and material you will be using In general use greater torque for larger screws If the torque is too high the screws may be damaged or broken Torque adjustment is not available for the drilling or hammer mode CAUTION Do not change the torque setting when the tool is running 8 LED Worklight The LED worklight G located on the base of the hammer drill will illuminat...

Page 12: ...ight hand The handle can be locked in the two positions shown in Fig 10 To install the auxiliary handle a Remove the battery pack b Loosen the auxiliary handle by turning the handle counterclockwise c Align the raised portion on the auxiliary handle with the grooves on gear box of the hammer drill then slide the auxiliary handle onto the tool as shown d Hand tighten the handle by turning the handl...

Page 13: ...ts a Remove the battery pack b Open the chuck jaws c Remove the drill bit WARNING Do not hold the chuck body with one hand and use the power of the hammer drill to tighten or loosen the chuck jaws on the drill bit The chuck body could slip in your hand or your hand could slip and come in contact with the rotating bit This could cause an accident resulting in serious personal injury 12 Drilling WAR...

Page 14: ...ntered edges on the back side of the hole Metal Drilling a For maximum performance use high speed steel bits for drilling metal or steel b When drilling metals use light oil on the drill bit to keep it from overheating The oil will prolong the life of the bit and increase the drilling action c Begin drilling at a very low speed to prevent the bit from slipping off the starting point d Maintain a s...

Page 15: ...d out by a qualified service technician Cleaning Before cleaning or performing any maintenance remove the battery pack For safe and proper operation always keep the tool and its ventilation slots clean Always use only a soft dry cloth to clean your ratchet wrench never use detergent or alcohol 14 Chuck Removal The chuck can be removed and replaced a Lock the variable speed trigger switch by placin...

Page 16: ...WARRANTY For 5 years from the date of purchase the tool is warranted for the original purchaser to be free from defects in material and workmanship This guarantee does not cover damage due to abuse normal wear improper maintenance neglect unauthorized repair alteration or expendable parts and accessories expected to become unusable after a reasonable period of use This warranty is limited to 90 da...

Page 17: ...estro Departamento de Servicio al Cliente al 1 888 3KOBALT 1 888 356 2258 de lunes a domingo de 8 a m a 8 p m hora estándar del Este ADJUNTE SU RECIBO AQUÍ Número de serie Fechadecompra ARTÍCULO 1518741 1518746 1518747 TALADRO PERCUTOR DESTORNILLADOR SIN ESCOBILLAS MODELO KXHD 124B 03 ...

Page 18: ... 25 Cuidado y mantenimiento 31 Solución de problemas 33 Garantía 33 ESPECIFICACIONES DEL PRODUCTO COMPONENTE ESPECIFICACIONES Voltaje nominal 24 V CC Velocidad sin carga 0 550 0 2000 min Capacidad del mandril 1 2 pulg Torsión máxima 1200 libras pulg Temperatura de funcionamiento 20 C 4 F a 45 C 113 F Temperatura de carga 5 C 41 F a 40 C 104 F ...

Page 19: ...ruptor tipo gatillo de velocidad variable K Broca doble F Selector de dirección de rotación adelante bloqueo central atrás ADVERTENCIA Retire la herramienta del paquete y examínela con cuidado No deseche la caja ni ningún material de embalaje hasta después de examinar todas las piezas Si falta alguna pieza o si está dañada no coloque la batería para usar la herramienta hasta que se repare o reempl...

Page 20: ...tos congénitos u otros daños reproductivos Algunos ejemplos de estos productos químicos son los siguientes Plomo de pinturas con base de plomo Sílice cristalina de ladrillos cemento y otros productos de mampostería Arsénico y cromo de la madera tratada con químicos El riesgo que corre debido a la exposición a estos químicos varía según la frecuencia con que realiza este tipo de trabajo Para reduci...

Page 21: ...éctrica que aparece en las advertencias hace referencia a la herramienta eléctrica que se conecta a la línea principal con cable o a la herramienta eléctrica que funciona a batería inalámbrica Seguridad en el área de trabajo Mantenga el área de trabajo limpia y bien iluminada Las áreas oscuras o desordenadas propician los accidentes No utilice herramientas eléctricas en atmósferas donde exista rie...

Page 22: ... apagado antes de conectar la herramienta a la fuente de alimentación o al paquete de baterías o antes de levantarla o transportarla Transportar herramientas eléctricas con el dedo en el interruptor o enchufar herramientas eléctricas que tienen el interruptor encendido aumenta las posibilidades de accidentes Retire todas las llaves de ajuste o llaves inglesas antes de encender la herramienta eléct...

Page 23: ...garre secas limpias y libres de aceite y grasa Los mangos y las superficies de agarre resbaladizos no permiten manipular ni controlar la herramienta de forma segura en situaciones inesperadas Uso y cuidado de herramientas a batería Recargue la herramienta únicamente con el cargador especificado por el fabricante Un cargador adecuado para un tipo de paquete de baterías puede causar un riesgo de inc...

Page 24: ...en contacto con un cable energizado puede energizar las piezas de metal expuestas de la herramienta eléctrica y provocar una descarga eléctrica al operador Asegure la pieza de trabajo Las piezas de trabajo pueden sostenerse de forma más segura con dispositivos de sujeción mejor que con las manos Siempre espere hasta que la herramienta eléctrica se detenga completamente antes de colocarla hacia aba...

Page 25: ...condiciones de operación Por lo tanto siempre retire el paquete de baterías de la herramienta cuando no la use o cuando la transporte junto a usted 2 Selector de dirección de rotación adelante bloqueo central atrás La dirección de rotación de la broca es reversible y se controla mediante el selector F ubicado cerca del interruptor tipo gatillo de velocidad variable E Con el taladro percutor sosten...

Page 26: ... de velocidad variable diferentes En la parte superior del taladro percutor se encuentra un selector de engranaje D para seleccionar velocidad 1 baja o 2 alta La configuración 1 ofrece velocidades más bajas y mayor potencia y torsión Use la configuración 1 para trabajo pesado o para apretar tornillos La configuración 2 tiene velocidades más altas y potencia y torsión reducidos Use la configuración...

Page 27: ...o 7 Torsión ajustable El embrague de torsión ajustable B se puede configurar en cualquiera de las 24 configuraciones de torsión cuando la herramienta está en el modo atornillado Regule la fuerza de torsión girando el embrague de torsión A mayor configuración de torsión mayor fuerza produce el taladro percutor para girar un objeto La configuración correcta depende del trabajo y del tipo de broca su...

Page 28: ... a Alinee la pestaña de la presilla para cinturón I con el orificio en la base del taladro percutor b Apriete el tornillo J con firmeza con un destornillador Phillips no se incluye c Para retirar la presilla para cinturón use un destornillador Phillips para aflojar el tornillo que sujeta la presilla para cinturón con el taladro percutor 10 Mango auxiliar Este taladro percutor está equipado con un ...

Page 29: ...lice una llave inglesa para apretar o aflojar las mordazas del mandril ADVERTENCIA Asegúrese de colocar la broca para taladro de forma derecha dentro de las mordazas del mandril No coloque la broca en forma diagonal dentro de las mordazas del mandril y luego las apriete como se muestra en la Fig 11b Esto puede hacer que la broca para taladro salga disparada del taladro percutor lo que puede produc...

Page 30: ...a que hace el orificio g Si la broca se atasca en la pieza de trabajo o si el taladro percutor se para detenga la herramienta inmediatamente Retire la broca de la pieza de trabajo y determine la causa del atasco h Para detener el taladro percutor suelte el interruptor tipo gatillo de velocidad variable y permita que la herramienta se detenga por completo Taladrado en madera a Para obtener un máxim...

Page 31: ...e En materiales duros como el concreto aplique mayor presión f Comience perforando a una velocidad muy baja para evitar que la broca se deslice del punto de inicio 13 Para atornillar a En lo posible use tornillos nuevos para facilitar la tarea y mejorar el agarre b Coloque el selector de modo D en función atornillado para obtener el mejor rendimiento posible Configure el ajuste de torsión más adec...

Page 32: ... tipo gatillo de velocidad variable coloque el selector de dirección de rotación F en la posición central b Abra las mordazas del mandril c Use un destornillador no se incluye para retirar el tornillo del mandril girándolo en dirección de las manecillas del reloj d Coloque una llave hexagonal de 5 16 pulg o más no se incluye en el mandril del taladro percutor y apriete las mordazas del mandril con...

Page 33: ... tiene garantía contra defectos de fabricación en los materiales y la mano de obra durante 5 años a partir de la fecha de compra para el comprador original Esta garantía no cubre daños por maltrato desgaste normal mantenimiento inadecuado negligencia reparación o alteración no autorizada ni piezas o accesorios desechables cuya inutilidad es esperable después de un período de uso razonable La vigen...

Page 34: ......

Page 35: ......

Page 36: ......

Reviews: