12
ASSEMBLY INSTRUCTIONS
5
4. Mount sandpaper (not provided) onto the
sanding pad following the appropriate instructions.
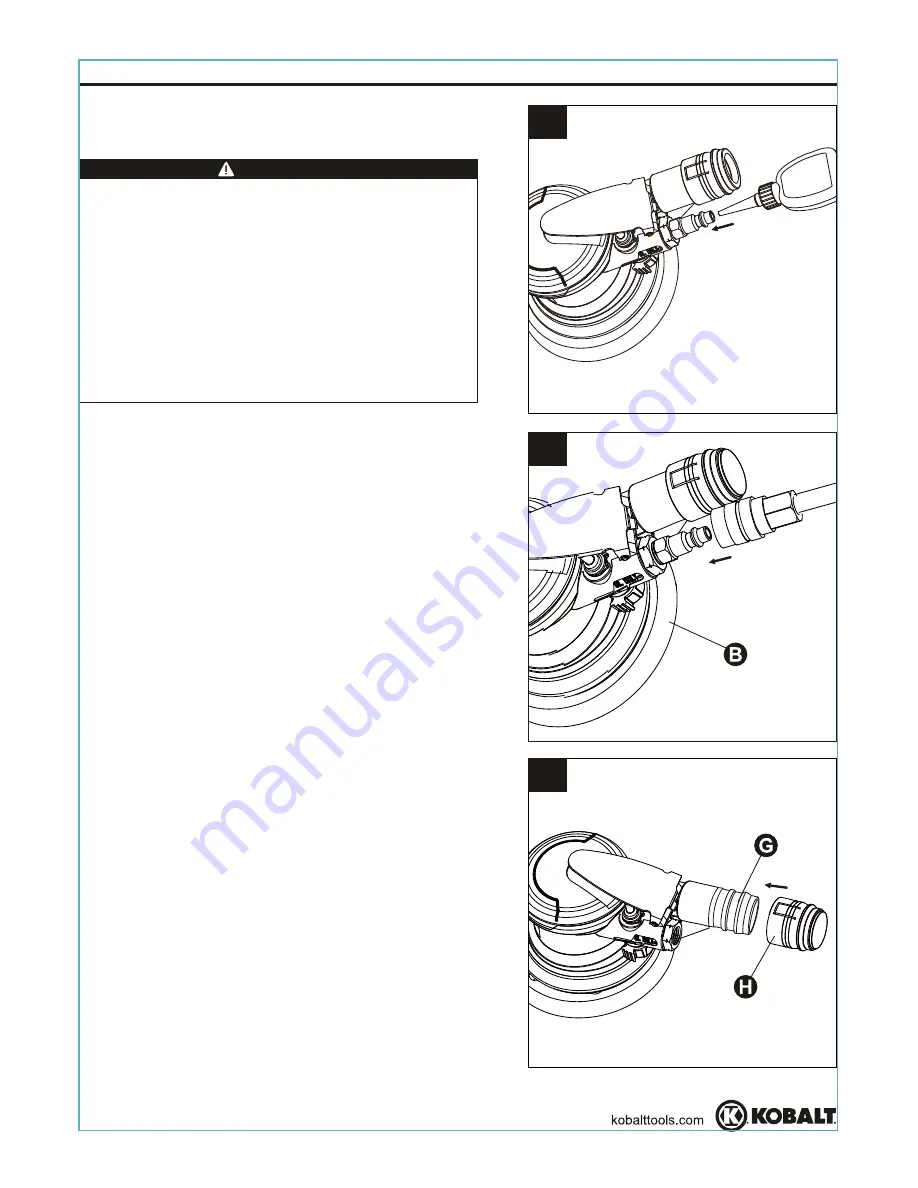
5. Place 2 – 3 drops of air tool oil (not included)
into the male air plug before each use, as shown
in Fig. 4.
WARNING
Use only sandpaper with an RPM rating
equal to or greater than the tool itself.
Always make sure all attachments are
properly mounted and secure before using
the tool. Loose attachments can break or fly
off, causing serious injury to the operator or
bystanders in the work area. Always follow
all manufacturers’ specifications for proper
attachment and use.
t
NOTE:
Proper lubrication is EXTREMELY
important to assure proper tool performance
and avoid tool damage. ALWAYS lubricate the
ool before each use if not using an in-line oiler.
7. Connect the air supply hose to the male plug as
shown in Fig. 5, making sure it is completely seated
and secure. Set the working pressure at 90 PSI for
best tool performance.
NOTE:
To operate correctly, this tool requires
airflow of at least 6.4 cubic feet per minute (CFM)
at 90 pounds per square inch (PSI) at the tool.
8. This tool features a vacuum adapter (G) with
revolving tube attachment (H) to prevent tangling
when used with a dust-collecting vacuum system
as shown in Fig. 6. To connect it, remove the plastic
protective cap (I)
from the revolving attachment;
be
sure to save the cap.
If NOT using a dust-collection system, make sure the plastic protective cap is securely
in place on the revolving attachment to prevent blowing dust.
6. Make sure compressor air supply hose has
correct fittings installed at each end: male coupler
goes to compressor, 1/4 in. female coupler matches
up to 1/4 in. male plug installed on the tool.
4
6


