background image

Settings

5. Settings 

If you click the button for TV 
Settings, you have numerous 
options to configure your TV 
Viewing 

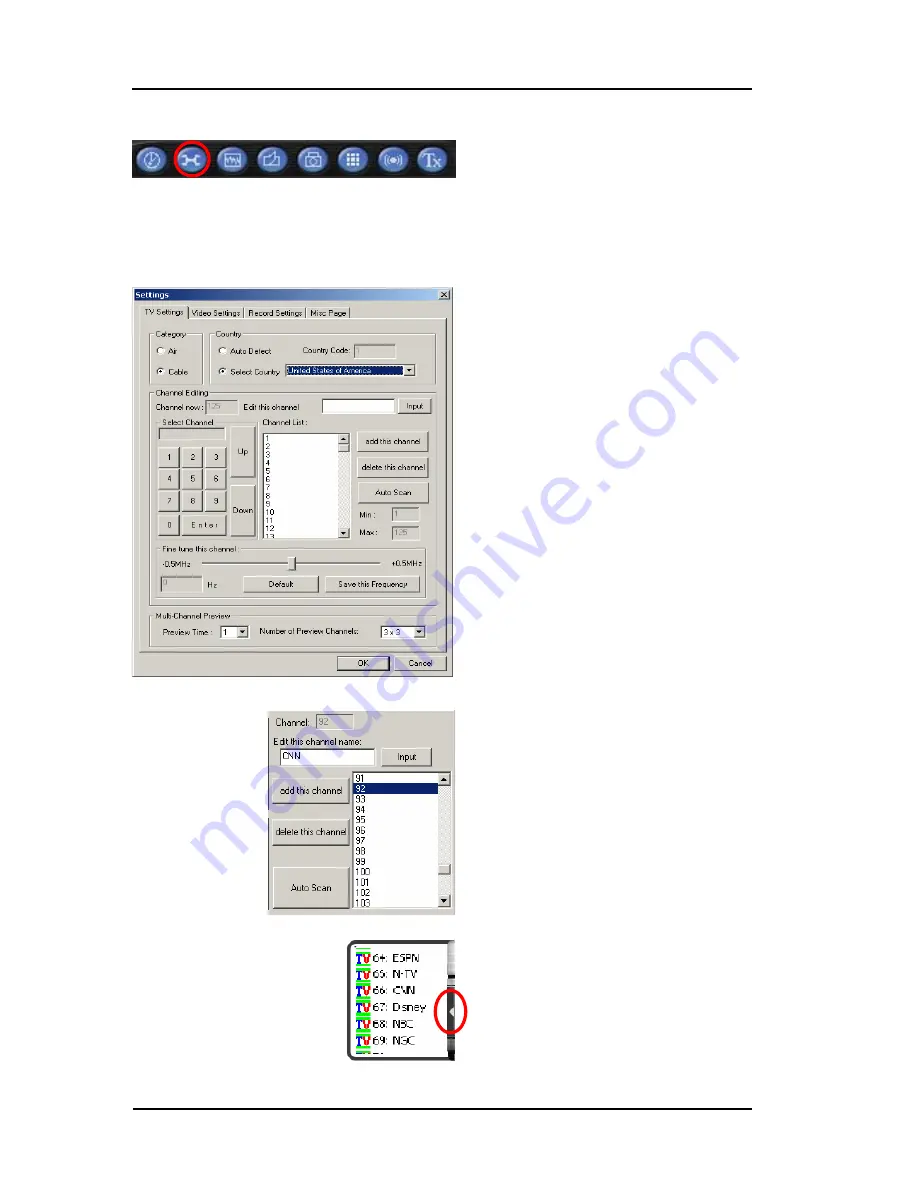
5.1. TV Settings Dialog Box  

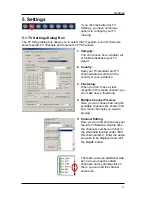
The TV Setup dialog box allows you to select the TV system, scan for channels, 
select specific TV channels and rename the TV Channels.


1. Category:  

You can choose here, whether Air 
or Cable broadcasts your TV 
signal. 
 

2. Country: 


Sets your TV standard and TV 
channel table according to the 
country of your residence. 
 

3. Finetuning: 


When you don’t have a clear 
reception of the tuned channel, you 
can make here a finetuning. 
 

4.  Multiple Channel Preview: 


Here you can choose how long the 
available channels are shown, and 
how much channels you want to 
preview. 
 

5. Channel Editing:


Here you can edit and rename your 
favorite TV Stations. Double click 
the channel’s number and click in 
the white field located under “Edit 
this channel name”. Enter the name 
you wish to be displayed and click 
the “

Input

” button. 


The mark opens an additional side 
bar, here you see the edited 
channels, and by double-click on 
them, you can edit the channel 
names too. 


13 

Summary of Contents for Mercury TV Card

Page 1: ...Mercury TV Card User Manual P N 400108013860 Ver 1 04 148 0 Date 2003 08 15 ...

Page 2: ...any means electronic or mechanical without prior written permission of Kobian Pte Ltd Windows is a trademark of Microsoft Corporation All other brand names are registered trademarks of their respective companies FCC Statement This equipment has been tested and found to comply with the limits for a Class B computing device in accordance with the specifications set forth in Subpart J of Part 15 of t...

Page 3: ...3 5 Driver Installation for Windows 2000 Windows XP 9 3 6 Settings for Sound Card Owners 10 4 The TV Application 11 4 1 Installation of the TV Application 11 4 2 Launching the TV Application 11 4 3 Choosing your Video Source 11 5 Settings 13 5 1 TV Settings Dialog Box 13 5 2 Video Settings Dialog Box 14 5 3 Record Settings Dialog Box 15 5 4 Misc Page Dialog Box 16 6 Additional Settings 17 6 1 Sche...

Page 4: ... The Record Button 20 7 2 The Time Shift Function 20 8 The Remote Control 21 8 1 Accelerator Keys Summary 22 9 The Gallery 23 9 1 The Function Buttons 23 9 2 FM Radio only for FM Models 24 10 Technical Support 25 10 1 Troubleshooting 25 ...

Page 5: ...rding 1 2 Features Philips 713X Chipset Plug Play compliant PCI card 125 channel cable antenna ready TV tuner Composite video and S Video input Multiple Channel Preview Teletext Real time recording Time Shift Function Scheduler Technology Capture still images TV screen scalable up to full size Listen to FM radio Compatible with current Windows Versions Windows 98SE ME 2000 XP depends on the TV Bro...

Page 6: ... available busmaster capable PCI slot v 2 1 Pentium III 500 MHz or faster PC MPEG 1 real time encoding PIII 800MHz or AMD Athlon 800 or higher MPEG 2 real time encoding P4 1 6GHz or AMD Athlon 1 6 or higher DVD real time encoding P4 2GHz or AMD Athlon 2GHz or higher 128 MB RAM minimum 256 MB RAM recommended VGA Card with DirectX 8 1 Support Windows 98 SE Windows ME Windows 2000 Windows XP CD ROM o...

Page 7: ...trol 2 Audio Out Use the packaged audio cable to connect to your sound card 3 S Video In To connect external devices like VCR or Camera 4 Audio In To connect external audio devices 5 Composite Video In To connect external devices like VCR or Camera 6 Antenna In TV Use these connections to connect your cable or home antenna 7 Antenna In FM Use these connections to connect your cable or home antenna...

Page 8: ...the PCI slots are listed in your motherboard manual 5 Carefully remove the card from its packaging and pick it up by the edges with one hand while your other hand is touching a metal part of the PC This will ensure that your body is completely discharged via your computer without damaging the TV card 6 Align the holder at the rear of the TV card in the expansion slot in such a way that the card s ...

Page 9: ...hardware component in the system and tells you so in an Add new Hardware Wizard window Installation of your TV Card If you have not already done so place the Installation CD into your CD ROM drive and click Next in the window Select now the Search for the best driver for your device Recommended item and click Next 5 ...

Page 10: ... option CD ROM Drive and then click Next Once Windows finds the driver you will see a message Simply click Next to continue After installing the driver Windows informs you that it has done so successfully Click Finish This completes the installation of the drivers and you can now start installing the application program 6 ...

Page 11: ...sence of a new hardware component in the system and tells you so in an Add new Hardware Wizard window If you have not already done so place the Installation CD into your CD ROM drive Select now the Automatic search for a better driver Recommended item and click Next Installation of your TV Card 7 ...

Page 12: ...and install them automatically After installing the driver Windows informs you that it has done so successfully Click Finish This completes the installation of the drivers and you can now start installing the application program Installation of your TV Card 8 ...

Page 13: ...Installation Screen Here please select Driver Installation If the Autostart program does not appear automatically when you insert your Installation CD go to Start Run and type D Setup exe if D is your CD Rom drive In the next window please select Install Tv Card Drivers After that the installation of the Driver is finished Note The Setup Program currently supports only Windows 2000 Windows XP for ...

Page 14: ... Other settings are required for recording see instructions below 3 Select the Options Properties menu item 4 Set the Adjust volume for option to Recording Confirm your choice by clicking OK 5 Now enable the check box below the Line In slider and move the slider itself to its middle position By checking the check box you define the Line In input of your sound card as a recording input source These...

Page 15: ...ppear automatically when you insert your Installation CD start it manually by running the InstallCD exe file located on the Installation CD 4 2 Launching the TV Application When starting your TV Software program for the first time a dialog box will appear to choose the correct country settings When you click the Ok Button the software will scan for available TV channels The software provides all n...

Page 16: ...l buttons Here you are able to click with your mouse on the channel numbers to switch to different channels Alternatively you can use the num block of your keyboard For additional information of shortcuts to use with your keyboard please refer to Page 22 Chapter 8 1 The Info Panel shows you useful information about which channel you have tuned in In addition with the both arrows up down you can sw...

Page 17: ...y of your residence 3 Finetuning When you don t have a clear reception of the tuned channel you can make here a finetuning 4 Multiple Channel Preview Here you can choose how long the available channels are shown and how much channels you want to preview 5 Channel Editing Here you can edit and rename your favorite TV Stations Double click the channel s number and click in the white field located un...

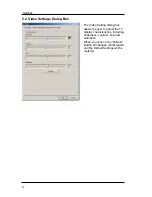
Page 18: ...Setting dialog box allows the user to adjust the TV display characteristics including brightness contrast hue and saturation When you click on the Default Button all changes will disregard and the Default Settings will be restored Settings 14 ...

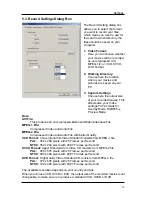
Page 19: ...d Audio and Video Interleave File MPEG 1 File Compressed Video and Audio File MPEG 2 File Compressed Video and Audio File with better Quality VCD Format Conventional CD Video Standard consists from MPEG 1 file PAL 352 x 288 pixels with 25 Frames per Second NTSC 352 x 240 pixels with 29 97 Frames per Second SVCD Format Upper Standard from Video CD consists from MPEG 2 file PAL 480 x 576 pixels with...

Page 20: ...en the Box is checked the Temporary recorded files won t be deleted after stop the Time Shift Mode see page 20 for additional description of the Time Shift Mode Snapshot Settings Here you can define how much snapshots are taken when you click the Snapshot Button see page 18 for additional description of the Snapshot function Settings 16 ...

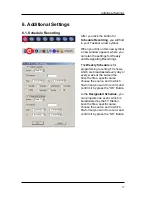
Page 21: ...ings The Weekly Schedule is for programming recurring TV shows which are broadcasted every day or every week at the same time Give the file a specific name choose the source and in which file format you want to record and confirm it by press the OK Button In the Designated Schedule you can program one event which is broadcasted by the TV Station Give the file a specific name choose the source and ...

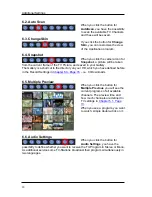
Page 22: ...ich you have defined before in the Record Settings in Chapter 5 3 Page 15 i e C Downloads 6 5 Multiple Preview When you click the button for Multiple Previous you will see the current programs of all available channels The preview time and how much channels are defined in TV settings in Chapter 5 1 Page 13 When you see a program you want to watch simple double click on it 6 6 Audio Settings When y...

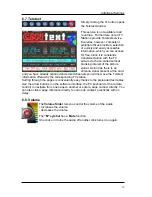
Page 23: ... and you have already scanned and stored channels you will now see the Teletext information offered by the corresponding TV station Surfing through the pages is conveniently easy thanks to the preloaded text tables Use the arrow buttons on the software interface the PC keyboard or the remote control to navigate from one page to another or enter a page number directly You can also click a page refe...

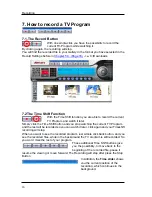
Page 24: ...ime Shift button and you stop watching the current TV Program and the rest will be recorded so you can watch it later click again and your Timeshift recording will stop When you want to see the recorded program just simple click back button and you see the recorded files while in the background the TV program is still recorded So you won t miss the rest of your program These additional Time Shift ...

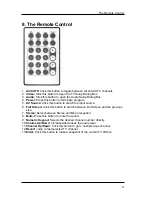
Page 25: ...t source 6 Full Screen Click this button to switch between Full Screen and the previous size 7 Stereo Select between Stereo and Mono reception 8 Mute Press this button to mute the sound 9 Numeric Keypad Selects the desired channel number directly 10 Volume Up Down Increases decreases the audio level 11 Channel Up Down Click this button to go to next previous channel 12 Recall Jump to last selected...

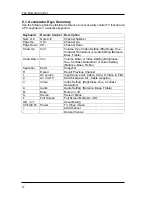
Page 26: ...Audio Setting Balance Bass Treble Arrow Down Vol Volume Down or Video Setting Brightness Hue Contrast Saturation or Audio Setting Balance Bass Treble Spacebar Enter Snapshot R Recall Recall Previous Channel I AV source Input Source Air Cable AV in S Video in FM C Air CATV Switch between Air Cable reception V Video Video Setting Brightness Hue Contrast Saturation A Audio Audio Setting Balance Bass ...

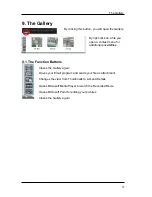
Page 27: ...onal possibilities 9 1 The Function Buttons Closes the Gallery again Opens your Email program and sends your file as attachment Changes the view from Thumbnails to List and Details Opens Microsoft Media Player to watch the Recorded Movie Opens Microsoft Paint for editing your pictures Closes the Gallery again The Gallery 23 ...

Page 28: ...r to listen to FM Stereo Simply click on the FM Radio button and you begin listening to FM Stereo on your computer Auto Scan You have here the same Auto Scan possibilities like in the TV Application Note For further details please refer to the On Line Help of the software FM Radio 24 ...

Page 29: ...atching TV A 1 This could have to do with the bandwidth on the PCI bus Place the car closest to the PCI busmaster slot or place it closest to the AGP slot but try to avoid PCI slot 1 1 There are some BIOS setting that you can change to get better performance It should be noted that you might not have all these settings There are also a number of various bios setups available you should consult the...

Page 30: ...est if switching this option helps Q Why I don t hear any sound but see a TV picture A First make sure that the audio out from the TV Card is connected to the line in on your sound card Next make sure that your Windows mixer settings are set correctly You can check for this by double clicking on the speaker icon next to the clock in the bottom right hand corner of the screen Make sure all the appr...

Reviews: