


69
www.kodak.com/go/support
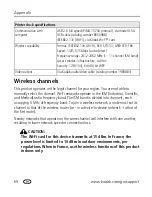
Appendix
Wireless channels
This product operates on the legal channel for your region. You are not able to
manually select the channel. Wi-Fi networks operate in the ISM (Industrial, Scientific,
and Medical) radio frequency band. The ISM band is divided into channels, each
occupying 5 MHz of frequency band. To join a wireless network, a node must set its
channel to that of the wireless router (or - in a device-to-device network - to that of
the first node).
Nearby networks that operate on the same channel will interfere with one another,
resulting in lower network speed or connection loss.
CAUTION:
The Wi-Fi card for this device transmits at 15 dBm. In France, the
power level is limited to 10 dBm in outdoor environments, per
regulations. When in France, use the wireless functions of this product
indoors only.
Communication with
computer
USB 2.0 full speed (PIMA 15740 protocol), via model U-5A
USB cable (catalog number 8650988)
IEEE802.11b (Wi-Fi), via Kodak Wi-Fi
®
card
Wireless capability
Format: IEEE802.11b (Wi-Fi), RCR STD-33, ARIB STD-T66
Speed: 1/2/5.5/11Mbps (auto-detect)
Frequency range: 2412-2462 MHz (1 - 11 channel ISM band)
Access modes: Infrastructure, Ad Hoc
Security: 128 (104), 64 (40) bit WEP
Video output
Via Kodak audio/video cable (catalog number 1983881)
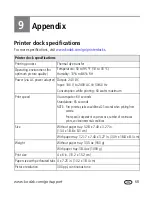
Printer dock specifications


