background image

2-20

A-61627 June  2010 

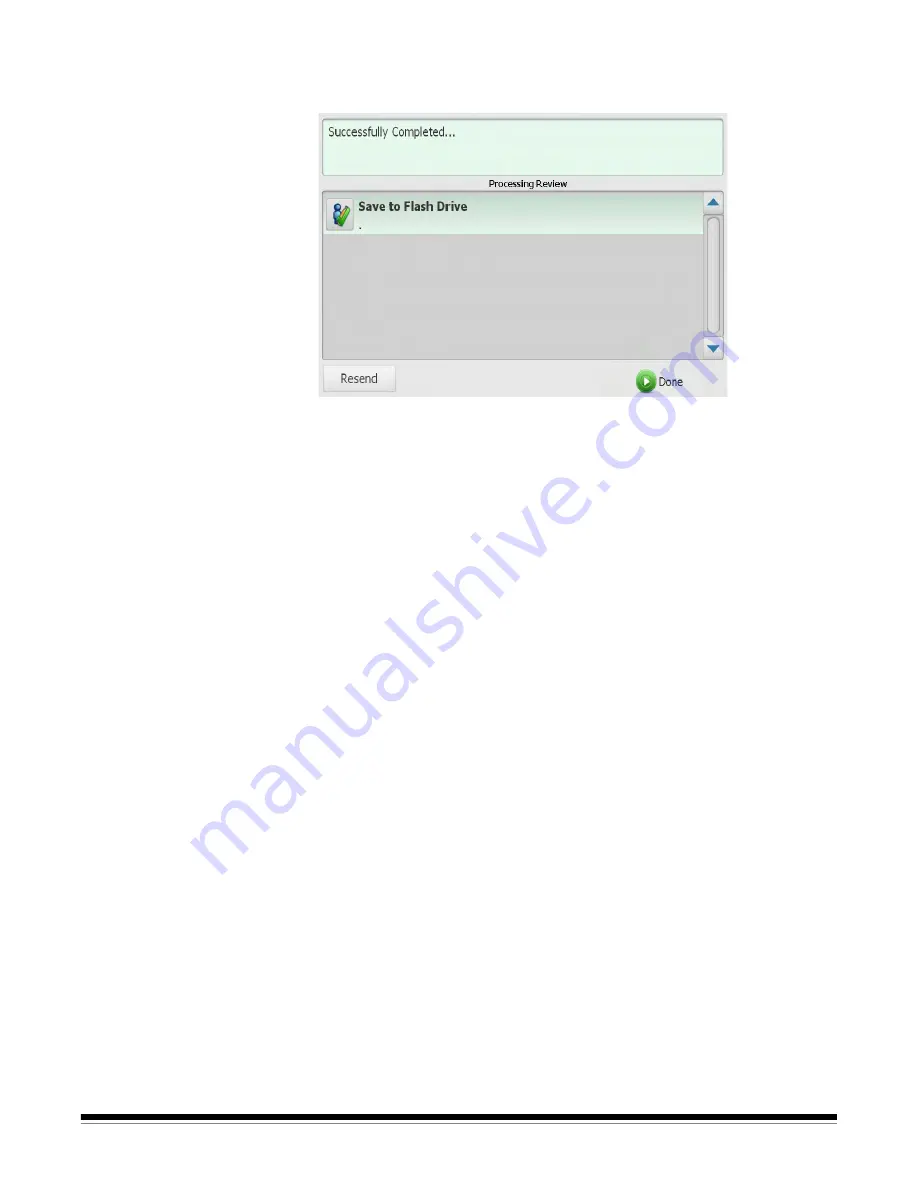
Resend without 
scanning documents 
again

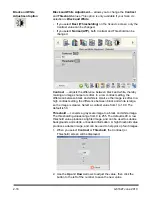
At the end of a scan session you have the option to 

Resend

 your 

destination and scan settings without scanning the documents again. 

If you select 

Resend,

 the main screen will be displayed with your 

original destination and scan settings. From this screen you can 
change settings and resend the previously scanned document without 
scanning it again. 

If you select 

Done

,


the message: 

Do you want to remove your 

current selections? 

will be displayed. 

Select 

No

 to keep your destination and scan settings for the next 

scan job.

Select 

Yes

 and your destination and scan settings will be set to the 

Scan Station default values.

If you ignore this screen, the Scan Station will reset to the walk up 
screen after two minutes.

Summary of Contents for 8738056 - Scan Station 500

Page 1: ......

Page 2: ...dak recommended cleaning procedures Do not use air liquid or gas spray cleaners These cleaners displace dust dirt and debris to other locations within the scanner which may cause the Scan Station to malfunction Material Safety Data Sheets MSDS for chemical products are available on the Kodak website at www kodak com go msds When accessing the MSDSs from the website you will be required to provide ...

Page 3: ...ference in which case the user may be required to take adequate measures Japan This is a Class A product based on the standard of the Voluntary Control Council for interference by information Technology Equipment VCCI If this is used in a domestic environment radio disturbance may arise When such trouble occurs the user may be required to take corrective actions Taiwan WARNING This is a Class A pr...

Page 4: ... models will be noted Supporting documentation This User s Guide provides information and procedures on how to use the Scan Station 500 and how to create your personal configuration file using the Configuration Organizer Maintenance Reference Guide for the Kodak Scan Station 500 A 61629 provides easy visual steps for maintaining the Scan Station User s Reference Guide for the Kodak Configuration O...

Page 5: ...scanning documents Output tray extender pull this extender out when scanning documents longer than 11 inches 28 cm Output tray panel covers the transport when not in use When opened collects the scanned documents The Scan Station cover cannot be opened when the output tray panel is closed Stop Logout button press to cancel the current operation or return to the previous screen At the end of a scan...

Page 6: ...n module and rollers provides smooth document feeding and separation of various sizes thicknesses and textures of documents Imaging guides for optimum image quality keep the imaging guides clean There are two guides one upper and one lower Multifeed detection sensor detects if more than one document enters the paper path at a time Paper present sensor detects the presence of documents in the input...

Page 7: ...ects the Scan Station 500 to the network USB ports connects peripheral devices i e keyboard mouse and other accessories to the Scan Station Security lock port connects a security lock to the Scan Station You can purchase a standard security lock at an office supply store Refer to the instructions provided with the security lock for installation procedures Flatbed connector Power port Modem port US...

Page 8: ...the default settings of the Scan Station you are a walk up user Scanning is easy but you may not have access to your personal email address book or custom scan settings the way an Advanced user does An Advanced user is someone who wants to create custom scan settings using the Kodak Configuration Organizer software save these settings to a USB drive and take them to the Scan Station for one touch ...

Page 9: ...ready to use blue indicator light is on and constant and the application is displayed on the touch screen 2 Adjust the side guides by sliding them in and out to accommodate the document size 3 Be sure the output tray panel is down 4 Adjust the output tray by pulling out the extender if needed ...

Page 10: ...inks and correction fluids on the paper must be dry before scanning is started Using the Scan Station 1 Place the documents you want to scan in the input tray of the Scan Station Be sure the front side of your document s is positioned against the input tray and the top of the document s is inserted into the input tray first see below Two sided documents are scanned in one pass NOTES Depending on h...

Page 11: ...cument s to More than one email address printer network folder etc can be selected at a time NOTE If you select a destination that you do not want select the item again to uncheck it 4 If you want to change the scan settings touch the Settings button and make the desired changes 5 Press Go The Processing Review screen will be displayed NOTE The message Please wait lamps are warming up may be displ...

Page 12: ...ecord to record a message select Review to play the message you recorded or select Delete to delete the recorded message Fax Notification displays the Send Notification Status to window which allows you to send a fax status notification to a printer an email address or both If the fields are left blank no fax notification will be sent 6 Review your list of destinations and check uncheck additional...

Page 13: ...scanned NOTE Depending on how your Scan Station is configured the message Do you have more pages to scan may be displayed This allows you to continually add pages to your scan session until you select No on the message or the 30 second timeout period has been reached When all pages have been scanned the Status screen will display a status as it sends your document to each selected destination ...

Page 14: ...ination group s When you select a destination type the middle portion of the screen will be filled in with the defined destinations for that group For example if you select an Email icon all of the email addresses associated with this Email group will be displayed From this list you can select as many addresses as desired If an email address is not in the list select Custom A keyboard will be disp...

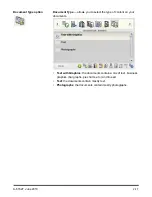
Page 15: ... available tasks which group together scan settings and destinations Email displays a list of available email address es Network folder displays a list of available network folders FTP displays a list of available FTP addresses Printer displays a list of available printers Fax displays a list of fax destinations My USB drive if you inserted a USB drive touch this icon to use your desired settings ...

Page 16: ...ct an icon the values associated with that scan setting will be displayed in the list These settings do not need to be changed unless the document that you are scanning requires something different than the default For more information about the icons and functionality of the Settings screen see the next section ...

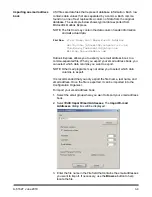
Page 17: ...ol panel Settings Shortcuts option Settings Shortcuts six Settings Shortcuts are provided at installation These can be used to quickly select a group of commonly used settings to make scanning faster and easier For example if you frequently scan black and white documents to create text searchable PDF files select the Black and White Document OCR Quality Settings Shortcut This changes all the scan ...

Page 18: ...he format receipts_20080117_092219 tif and is placed in a folder called 2008 1 Select Folder Name The keyboard will be displayed Enter the folder name where your scanned documents will be placed when scanning to a network folder FTP location or USB drive destination If you leave the Folder Name blank when scanning to a network folder FTP location or USB drive destination the file will be created i...

Page 19: ...r a file name for each page scanned If JPEG or Single Page TIFF is selected as the File Type you will be prompted for each page and each side scanned Add Date Time Stamp by default the date and time are appended to each file name the Scan Station creates If you uncheck this option only the file name prefix and the file name extension will be used to create the file name ...

Page 20: ...s scanning of mixed document sets with varying quality such as faint text shaded backgrounds or color backgrounds to be scanned using a single setting thus reducing the need for document sorting When Best is selected only Contrast can be adjusted on the Black and White Adjustments screen Normal ATP Adaptive Threshold Processing separates the foreground information in an image e g text graphics lin...

Page 21: ... a long time to download and may not be deliverable to the recipient i e TIFF Uncompressed will be a large file PDF Searchable Image Text and PDF Image only creates a document or multiple documents that contain both text and image data or image data only Selecting either File Type will display the following screen NOTE If you select PDF Image Only the Language option is not available ...

Page 22: ...sword that will be used to encrypt the file before the file can be delivered The password will be sent in a separate email when Email is one of the destination selections JPEG this option is only available if your Scan As selection is Color or Grayscale JPEG creates multiple files one for the front and back of a page If JPEG is selected you can select Draft Good Better Best or Superior quality TIF...

Page 23: ...ed Face Down or Two Sided If you are scanning one sided documents be sure to place the document with the side you want to scan facing the input tray Resolution option Resolution dots per inch allows you to select the scanning resolution This setting has no effect on PDF files Choices are 75 100 150 200 240 300 400 and 600 Higher resolutions produce better quality images but larger file sizes ...

Page 24: ...llows you to select the type of content on your documents Text with Graphics the documents contain a mix of text business graphics bar graphs pie charts etc and line art Text the documents contain mostly text Photographs the documents contain mostly photographs ...

Page 25: ...hite is small so the image is softer In a high contrast setting the difference between black and white is large so the image is clearer Select a contrast value from 1 to 100 The default is 50 Threshold converts a grayscale image to a black and white image The thresholding values range from 0 to 255 The default is 90 A low threshold value produces a lighter image and can be used to subdue backgroun...

Page 26: ...ck and white documents to either TIFF or PDF The default is 1 Document images that fall below the percentage will be discarded Use Multifeed Ultrasonic Detection multifeed ultrasonic detection aids in document scanning by detecting documents that may go through the feeder overlapped Multifeeds can happen due to stapled documents adhesives on documents or electrostatically charged documents Check t...

Page 27: ... scan settings From this screen you can change settings and resend the previously scanned document without scanning it again If you select Done the message Do you want to remove your current selections will be displayed Select No to keep your destination and scan settings for the next scan job Select Yes and your destination and scan settings will be set to the Scan Station default values If you i...

Page 28: ...t matches your search criteria NOTE If LDAP has been configured by your administrator a More button will be displayed Click More to see if additional matches were found 4 Click the desired names network folders or tasks you want to add to your group 5 When finished click Done Using Settings Shortcuts Settings Shortcuts are a way for you to create personalized groups of Scan settings to make scanni...

Page 29: ...il group 3 8 Importing an email address book 3 9 Setting up a USB drive password 3 11 Testing your configuration file 3 12 The Kodak Scan Station 500 User Configuration Organizer allows you to create configuration files which contain your destination and scan setting preferences After you create your personal configuration file and save it to a USB drive you can carry your preferred settings to a ...

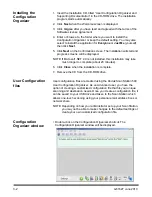
Page 30: ...talled this installation may take much longer to complete about 20 minutes 6 Click Close when the installation is complete 7 Remove the CD from the CD ROM drive User Configuration files User configuration files are created using the Kodak Scan Station 500 User Configuration Organizer As an Advanced user you have the option of creating a customized configuration file that fits your unique scanning ...

Page 31: ...on type NOTE Adding a printer group or item to a printer group can only be done by the administrator Rename Group allows you to rename the selected group Delete Group deletes the selected group and all items within that group Add Item allows you to add a new entry to the selected group type i e add an email address to an email group add another task to a task group etc Item Properties allows you t...

Page 32: ...ssword displays the Configuration Password dialog box which allows you to enter a password for the configuration file If you use this option you will be prompted to enter the password before accessing the information in the file E mail Address displays the E mail address dialog box which allows you to enter an email address where notification will be sent if an email or fax could not be delivered ...

Page 33: ...rrent settings select the Settings button The scan settings will be displayed where you can customize these settings for your personal use For a description of the scan settings refer to the section entitled Settings screen in Chapter 2 Icon Description Saves the configuration file to the USB drive or hard drive Adds a new item to the current group Searches for an item Renames the selected item De...

Page 34: ...ove or rename destination groups and items as desired See the next section Setting up destination groups for more information and procedures 5 If desired select Settings and change one or more scan settings The current scan settings appear at the bottom of the window Refer to Settings screen in Chapter 2 for more information 6 Select File Save The Save Configuration To dialog box will be displayed...

Page 35: ...n the Configuration Organizer window 2 Select the email group you want to add an address es to and select Edit Add Item The Add dialog box will be displayed 3 Enter the name and address and click OK NOTES If you do not want the email address placed in alphabetical order uncheck Add to list alphabetically You can also rename items and delete items from a group by using the Edit Rename Item and Edit...

Page 36: ...e displayed 3 Make the desired change in the Description field and click OK The new group name will be displayed on the main Configuration Organizer window Deleting an email group When you delete an email group all email addresses within the email group will also be deleted 1 Access the Destination screen and select the email group you want to delete 2 Select Edit Delete Group The following messag...

Page 37: ...which data columns you want to export NOTE Other mail programs may not allow you to select which data columns to export It is recommended that you only export the first name last name and email address Once the file is exported it can be imported into the Configuration Organizer To import your email address book 1 Select the email group where you want to import your email address book 2 Select Edi...

Page 38: ...cting a CSV file and selecting column locations a preview will be displayed showing the results of the file Column Location selections If the column selections are changed the preview will reflect these changes For example if the three File Column Location values are 1 2 and 3 the preview would display the following The First Name and Last Name are combined to form the email address display name T...

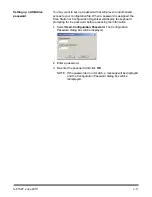
Page 39: ...tation or Configuration Organizer will display the keyboard prompting for the password before accessing the information 1 Select User Configuration Password The Configuration Password dialog box will be displayed 2 Enter a password 3 Re enter the password and click OK NOTE If the passwords do not match a message will be displayed and the Configuration Password dialog box will be redisplayed ...

Page 40: ... necessary use the Browse button to help you locate a folder 4 Click Save 5 When finished exit the Configuration Organizer and remove your USB drive from the PC 6 Test your USB drive by inserting it into the USB port on the Scan Station When the Scan Station recognizes a valid configuration file it will display new icons for your custom destination settings NOTES You can also verify any custom sca...

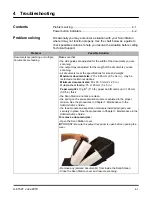
Page 41: ...e and weight Maximum document size 215 x 863 mm 8 5 x 34 in may be restricted at certain resolutions Minimum document size 50 x 63 5 mm 2 x 2 5 in Multiple sheet feeding 75 x 125 mm 3 x 5 in Paper weight 413 g m2 110 lb paper and ID cards up to 1 25 mm 0 05 in thick the Scan Station and tires are clean the spring on the pre separation module is adjusted to the proper tension See the procedures in ...

Page 42: ...ground bleed through When scanning translucent documents black bleed through may be displayed on the image To minimize this adjust the Contrast value on the Black and White Adjustments screen Unsuccessful fax delivery Verify that your return email address is configured correctly Be sure the fax number that you are sending to is correct Once the fax number is verified try again If errors persist co...

Page 43: ......

Reviews: