3-2
A-61627 June 2010
Installing the
Configuration
Organizer
1. Insert the Installation CD, titled “User Configuration Organizer and
Supporting Documentation” in the CD-ROM drive. The installation
program starts automatically.
2. Click
Next
when the Welcome screen is displayed.
3. Click
I Agree
after you have read and agreed with the terms of the
Software License Agreement.
4. Enter or browse to, the folder where you want to install the
Configuration Organizer or keep the default setting. You may also
select to install the application for
Everyone
or
Just Me
(yourself),
then click
Next
.
5. Click
Next
on the Confirmation screen. The installation will start and
progress screens will be displayed.
NOTE: If Microsoft .NET 2.0 is not installed, this installation may take
much longer to complete (about 20 minutes).
6. Click
Close
when the installation is complete.
7. Remove the CD from the CD-ROM drive.
User Configuration
files
User configuration files are created using the
Kodak
Scan Station 500
User Configuration Organizer. As an Advanced user, you have the
option of creating a customized configuration file that fits your unique
scanning and destination needs. Once you create a configuration file, it
can be saved to your USB drive and taken to the Scan Station which
allows one-touch scanning using your personal email address book or
network share.
NOTE: Depending on how your administrator set up your Scan Station,
you may not be able to make changes to the default settings or
create your own customized configuration file.
Configuration
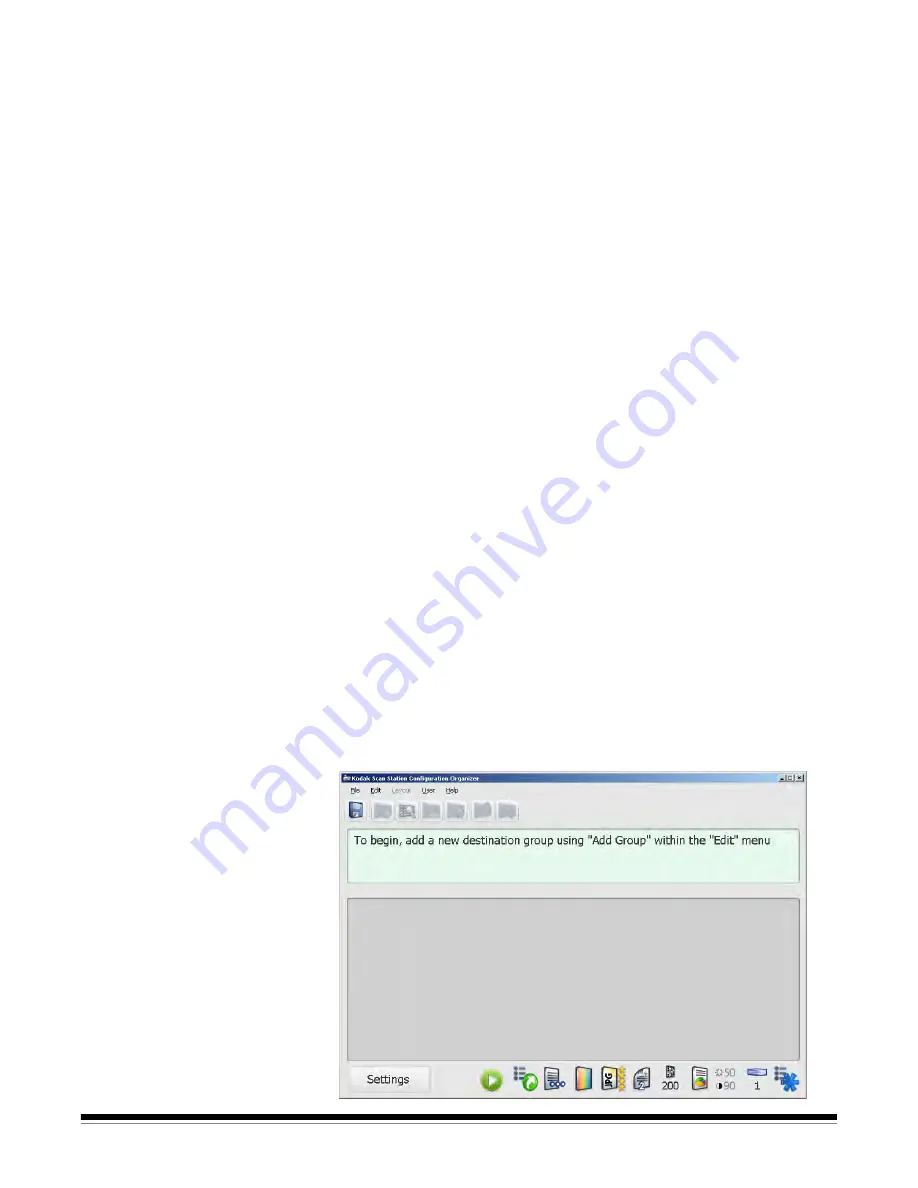
Organizer window
• Double-click on the Configuration Organizer shortcut. The
Configuration Organizer window will be displayed.


