Setting Up the Printer
July 2006
4J2007
1-3
6.
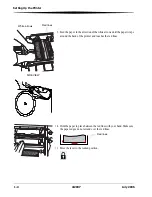
Attach the paper flanges provided with the printer to each end of the
paper roll.
a.
Line up the lugs on the blue paper flange with the notches on the left
side of the paper roll.
b.
Place the blue paper flange on the left side of the paper roll.
c.
Place the red paper flange on the right side of the paper roll.
NOTE: Be sure to line up the lugs on the blue paper flange with the notches
on the left side of the paper roll. If you do not attach the paper flange
properly, the paper roll will not fit into the printer.
7.
Gently set the paper roll into the printer according to the blue and red
arrows on the label.
8.
Remove the label.
Lugs
Notches
Blue paper flange
Red paper flange
Label
Summary of Contents for 8800
Page 1: ...KODAK Photo Printer 8800 User Guide ...
Page 4: ......
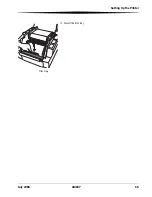
Page 9: ...Setting Up the Printer July 2006 4J2007 1 5 12 Install the trim tray Trim tray ...
Page 16: ......
Page 18: ......
Page 22: ......
Page 25: ......


