Setting Up the Printer
1-15
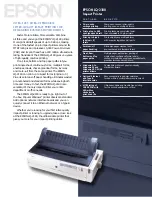
4. Attach the paper flanges and spacers to each end of the paper
roll:
a. Locate the green flange and the green spacer.
b. Orient the flange and spacer so that the labels face the
same direction.
c. Align the lugs on the flange with the corresponding
notches on the spacer, then place the spacer over the
flange hub.
d. Insert the flange-spacer assembly into the notched end of
the paper roll.
e. Repeat steps a-c for the gray flange and spacer, then insert
the gray flange-spacer assembly into the other end of the
paper roll.
NOTE: If the paper flanges and spacers are improperly assembled
or improperly attached to the roll, the paper roll will not fit
into the printer.
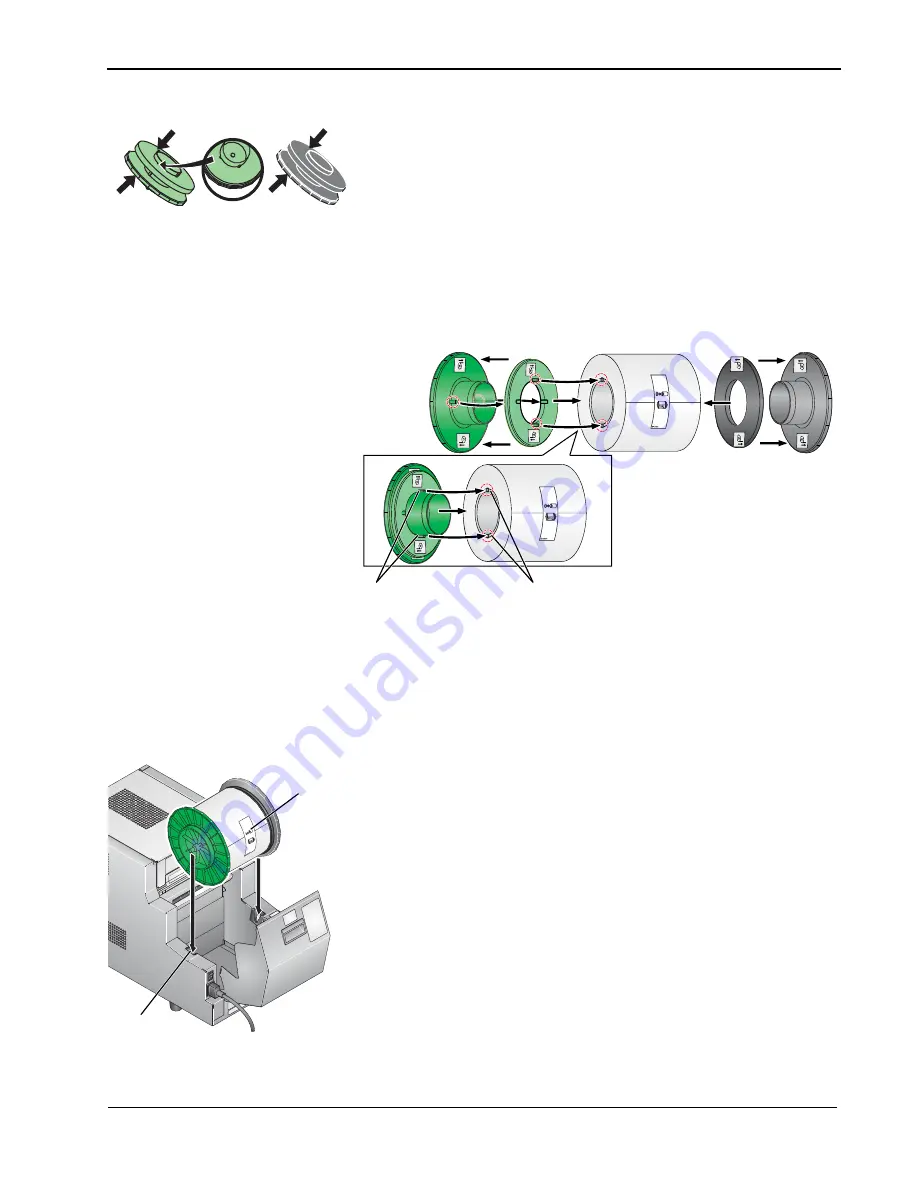
5. Carefully lower the paper roll into the slots. Match the geared
flange (green) with the geared slot (green) on the printer.
6. Remove the label from the paper roll.
NOTE: Verify that the paper unrolls from the top of the roll.
Notches
Lugs
(green flange)
Slot
Label
(green)
Summary of Contents for Apex 7015
Page 1: ...KODAK 7015 Photo Printer 7015 Photo Printer User s Guide ...
Page 22: ......
Page 38: ......
Page 42: ......