2-10
November 2014
Setting Up the Printer
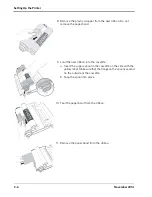
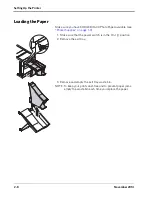
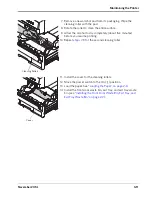
7. Squeeze the tabs at the end of the spool to remove the flanges.
Save the flanges from the used paper roll.
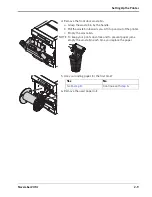
8. Remove the plastic wrapper from the new paper roll. Do not
remove the tape from the new paper roll.
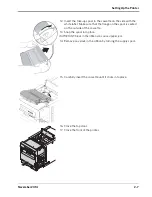
9. Squeeze the tabs on the yellow flange and align the lugs on the
flange with the notches in the new paper roll. Insert the yellow
flange into the roll.
10. Squeeze the tabs on the black flange and insert the flange into
the other end of the paper roll.
NOTE: If you do not attach the flanges properly, the paper roll will
not fit into the printer.
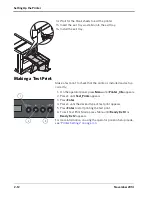
11. Match the coloured flanges with the slots of the same colour
on the printer, then carefully lower the paper roll into the slots.
12. Remove the tape from the paper roll.
Summary of Contents for D4600
Page 1: ...November 2014 D4600 Duplex Photo Printer User s Guide ...
Page 34: ......
Page 52: ...5 14 November 2014 Troubleshooting 9 Close the top door 10 Close the front of the printer ...
Page 54: ......
Page 57: ...Safety and Regulatory Information November 2014 A 3 CAUTION SHOCK HAZARD DO NOT OPEN ...
Page 60: ......

