background image

12

www.kodak.com/go/support

4

Installing the software

Installing the software

IMPORTANT: 

Install EasyShare software before connecting the printer to the computer.

1

Close all software applications that are open on your computer (including 
anti-virus software).

2

Place the Kodak EasyShare software CD into the CD-ROM drive.

3

Load the software:

Windows OS—

if the install window does not appear, choose Run from the Start 

menu and type

 d:\setup.exe

 where 

d

 is the drive letter that contains the CD.

Mac OS X—

double-click the CD icon on the desktop, then click the Install icon.

4

Follow the on-screen instructions to install the software.

Select Complete to automatically install the most commonly used applications. 
Select Custom to choose the applications you wish to install.

IMPORTANT: 

To use the photo printer with a computer, you must install the printer driver. 
If you choose Custom, make sure the photo printer is selected. The printer 
driver is automatically installed if you choose Complete.

Add the printer for Mac OS X:

a

Open the finder window, then click the Applications button. If you don’t see the 

Applications button, open the Applications folder on your operating drive.

b

Open the Utilities folder, then double-click Print Center.

c

Click Add Printer.

d

Select the photo printer, then click Add.

The photo printer is added to your computer.

Summary of Contents for EasyShare 350

Page 1: ...Kodak EasyShare photo printer 350 User s Guide www kodak com For interactive tutorials www kodak com go howto ...

Page 2: ...stman Kodak Company 2006 All screen images are simulated The Bluetooth word mark and logos are owned by the Bluetooth SIG Inc and any use of such marks is under license Kodak EasyShare and XtraLife are trademarks of Eastman Kodak Company P N 4J4961_en ...

Page 3: ...odak com go support i Front top side view 1 Cartridge status light 5 Paper tray cover 2 Paper status light 6 Paper tray 3 On Off button light 7 Paper tray door 4 Bluetooth button light 8 USB device connector 4 5 6 1 2 3 7 8 ...

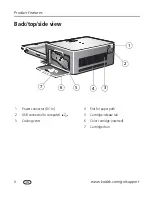
Page 4: ...go support Product features Back top side view 1 Power connector DC in 4 Slot for paper path 2 USB connector to computer 5 Cartridge release tab 3 Cooling vents 6 Color cartridge inserted 7 Cartridge door 2 7 6 1 3 5 4 ...

Page 5: ...th wireless technology device 7 Printing from a Bluetooth wireless technology enabled device 7 3 Printing from a PictBridge enabled device 11 Printing from a PictBridge enabled camera 11 4 Installing the software 12 Installing the software 12 5 Printing from a computer 15 Connecting to a computer 15 Canceling printing 17 6 Care and maintenance 18 General care 18 Cleaning the paper feed roller 19 T...

Page 6: ...go support Table of contents 8 Appendix 35 Photo printer specifications 35 Important safety instructions 37 Upgrading your software and firmware 37 Additional care and maintenance 38 Warranty 38 Regulatory compliance 41 ...

Page 7: ...re the top and back of the photo printer are not blocked When connecting power or USB cables keep the cables clear of the paper path to the front and rear of the photo printer Avoid areas where ventilation ducts open doors or frequent passersby might expose the photo printer and paper to high levels of dust and debris Airborne dirt particles can affect picture quality Allow enough space on all sid...

Page 8: ...on handle the cartridge by the spool ends Keep the cartridge away from direct sunlight and out of high temperature environments such as a vehicle parked in the sun Handling and storing the paper To avoid fingerprints on the paper handle it by the edges Do not touch the glossy side of the paper To store paper remove the tray and close the cover and door to keep out dust and debris Store paper flat ...

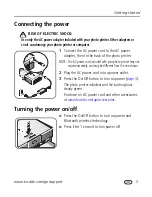
Page 9: ...ter NOTE The AC power cord included with your photo printer may not require assembly and may be different from the one shown 2 Plug the AC power cord into a power outlet 3 Press the On Off button to turn on power page 3 The photo printer initializes and the button glows steady green Purchase an AC power cord and other accessories at www kodak com go accessories Turning the power on off Press the O...

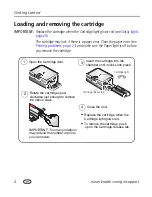
Page 10: ...ke sure the Paper light is off before you remove the cartridge 1 2 3 Cartridge release tab Open the Cartridge door Insert the cartridge into the chamber until it clicks into place 4 Close the door Rotate the cartridge spool clockwise just enough to remove the ribbon slack IMPORTANT Too many rotations may reduce the number of prints you can make To remove the cartridge push Cartridge light Replace ...

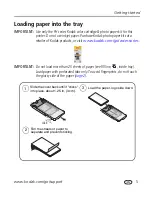
Page 11: ... a retailer of Kodak products or visit www kodak com go accessories IMPORTANT Do not load more than 25 sheets of paper see fill line inside tray Load paper with perforated tabs only To avoid fingerprints do not touch the glossy side of the paper page 2 2 1 Slide the cover back until it clicks into place about 1 25 in 3 cm Fan the sheets of paper to separate and prevent sticking 3 Load the paper lo...

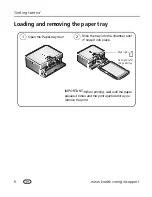
Page 12: ...oving the paper tray 1 Open the Paper tray door Slide the tray into the chamber until it snaps into place 2 Paper light IMPORTANT When printing wait until the paper passes 4 times and the print ejects before you remove the print Red light refill the paper tray ...

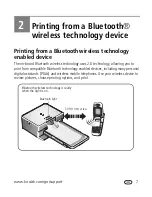
Page 13: ... wireless technology uses 2 0 technology allowing you to print from compatible Bluetooth technology enabled devices including many personal digital assistants PDAs and wireless mobile telephones Use your wireless device to review pictures choose printing options and print 30 ft 10 m or less Bluetooth wireless technology is ready when the light is on Bluetooth light ...

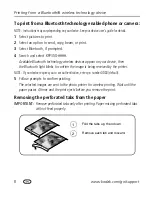
Page 14: ...s devices appear on your device then the Bluetooth light blinks to confirm the image is being received by the printer NOTE If your device requires you to set authentication enter pin number 0000 default 5 Follow prompts to confirm printing The selected images are sent to the photo printer for wireless printing Wait until the paper passes 4 times and the print ejects before you remove the print Rem...

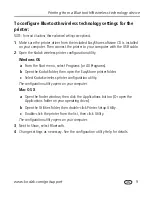
Page 15: ...s OS a From the Start menu select Programs or All Programs b Open the Kodak folder then open the EasyShare printer folder c Select Kodak wireless printer configuration utility The configuration utility opens on your computer Mac OS X a Open the finder window then click the Applications button Or open the Applications folder on your operating drive b Open the Utilities folder then double click Prin...

Page 16: ...may want to turn off the photo printer s Bluetooth wireless technology This will prevent unwanted prints from being printed and will prevent media waste To turn the Bluetooth wireless technology off Press the Bluetooth button Press again to turn it on To turn the default to always off Press and hold the Bluetooth button for 5 seconds Repeat to turn the default to always on ...

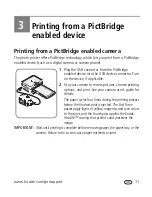
Page 17: ...on the device if applicable 2 Use your camera to review pictures choose printing options and print See your camera user s guide for details The paper cycles four times during the printing process before the finished print is ejected The first three passes apply layers of yellow magenta and cyan colors to the print and the fourth pass applies the Kodak XtraLifeTM coating that protects and preserves...

Page 18: ...n 4 Follow the on screen instructions to install the software Select Complete to automatically install the most commonly used applications Select Custom to choose the applications you wish to install IMPORTANT To use the photo printer with a computer you must install the printer driver If you choose Custom make sure the photo printer is selected The printer driver is automatically installed if you...

Page 19: ...ormation on the software applications included on the Kodak EasyShare software CD click the Help button in the EasyShare software Uninstalling the software To remove the printer driver or EasyShare software from your computer use the following procedure Windows OS 1 Open the Control Panel From the Start menu select Settings then select Control Panel On Windows XP operating systems depending on you...

Page 20: ...are Mac OS X 1 Double click the operating drive for your system 2 Select Library then select Printers 3 Open the Kodak folder then open the photo printer folder 4 Double click the photo printer uninstaller program 5 Follow the on screen instructions ...

Page 21: ...stalling the software page 12 2 Turn the photo printer off 3 Plug the labeled end of the USB cable included into the labeled USB port on your computer See your computer documentation for details 4 Plug the other end of the USB cable into the USB connector on the back of the photo printer 5 Turn on the photo printer NOTE On Windows operating systems a new hardware wizard runs when the printer is co...

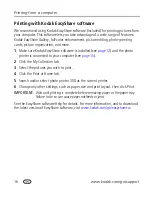
Page 22: ...led see page 12 and the photo printer is connected to your computer see page 15 2 Click the My Collection tab 3 Select the pictures you wish to print 4 Click the Print at Home tab 5 Search and or select photo printer 350 as the current printer 6 Change any other settings such as paper size and print layout then click Print IMPORTANT Wait until printing is complete before removing paper or the pape...

Page 23: ... current printer 5 Change any other settings as needed then click OK or Print Depending on your application and operating system you may first need to return to the main menu and select Print from the File menu IMPORTANT Wait until printing is complete before removing paper or the paper tray Failure to do so can cause paper misfeeds or jams Canceling printing Windows 2000 XP OS 1 Double click the ...

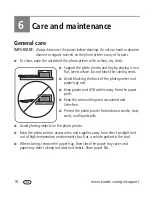
Page 24: ...cooling vents Avoid blocking the back of the photo printer and paper tray exit Keep power and USB cables away from the paper path Keep the surrounding area vacuumed and litter free Protect the photo printer from tobacco smoke dust sand and liquid spills Avoid placing objects on the photo printer Keep the photo printer accessories and supplies away from direct sunlight and out of high temperature e...

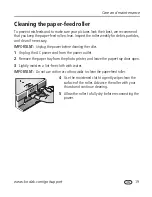
Page 25: ...plug the power before cleaning the roller 1 Unplug the AC power cord from the power outlet 2 Remove the paper tray from the photo printer and leave the paper tray door open 3 Lightly moisten a lint free cloth with water IMPORTANT Do not use cotton or cotton swabs to clean the paper feed roller 4 Use the moistened cloth to gently wipe clean the surface of the roller Advance the roller with your thu...

Page 26: ...ing the AC power cord for the region to which you are traveling 1 Turn off the photo printer Disconnect all cables 2 Remove the Paper tray from the photo printer close the Paper tray cover and the Paper tray door on the photo printer 3 Repack the photo printer in the original packing box or use the optional photo printer travel bag Purchase an AC power cord photo printer travel bag and other acces...

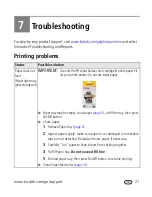
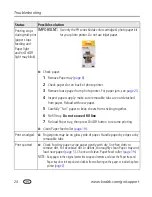
Page 27: ...dge photo paper kit for your photo printer Do not use inkjet paper Paper tray may be empty Load paper page 5 re fill the tray then press On Off button Check paper 1 Remove Paper tray page 6 2 Inspect paper supply make sure paper is not damaged or removable tabs are not detached Reload with new paper if necessary 3 Carefully fan paper to keep sheets from sticking together 4 Re fill Paper tray Do no...

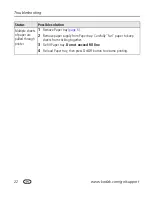
Page 28: ...led through printer 1 Remove Paper tray page 6 2 Remove paper supply from Paper tray Carefully fan paper to keep sheets from sticking together 3 Re fill Paper tray Do not exceed fill line 4 Re load Paper tray then press On Off button to resume printing Status Possible solution ...

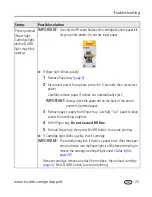
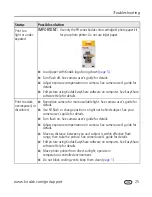
Page 29: ...paper slot on the back of the photo printer for jammed paper 3 Remove paper supply from Paper tray Carefully fan paper to keep sheets from sticking together 4 Re fill Paper tray Do not exceed fill line 5 Re load Paper tray then press On Off button to resume printing If Cartridge light blinks quickly check cartridge IMPORTANT The cartridge may lock if there is a paper error Clear the paper error an...

Page 30: ...fan paper to keep sheets from sticking together 6 Re fill tray Do not exceed fill line 7 Re load Paper tray then press On Off button to resume printing Clean Paper feed roller page 19 Print smudged Fingerprints may be on glossy side of paper Handle paper by edges or by removable tabs Print spotted Check for dirty paper wipe paper gently with dry lint free cloth to remove dirt For excessive dirt or...

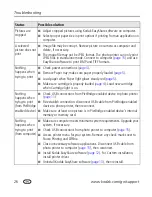
Page 31: ...lored Reposition camera for more available light See camera user s guide for details Use fill flash or change position so light not behind subject See your camera user s guide for details Turn flash on See camera user s guide for details Adjust exposure compensation on camera See camera user s guide for details Move so distance between you and subject is within effective flash range then take the ...

Page 32: ...tridge when Cartridge light is on Nothing happens when trying to print from PictBridge enabled device Check USB connections from PictBridge enabled device to photo printer page 11 Re establish connection disconnect USB cable from PictBridge enabled device to photo printer then reconnect Make sure at least one picture is in PictBridge enabled device s internal memory or memory card Nothing happens ...

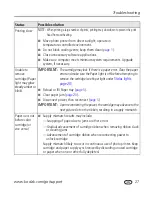
Page 33: ...ore attempting to remove the cartridge see Paper light under Status lights page 28 Reload or fill Paper tray page 5 Clear paper jam page 23 Disconnect power then reconnect page 3 IMPORTANT Upon reconnecting the power the cartridge may advance to the next picture slot on the ribbon resulting in a supply mismatch Paper runs out before color cartridge or vice versa Supply mismatch results may include...

Page 34: ...30 ft 10 m Device does not find printer On device turn wireless technology on then repeat the discovery process Device does not use OPP Object Push Profile FTP File Transfer Protocol or BPP Basic Printer Profile profile On Off light Light status Cause Action solution Light off Power off Connect power then press On Off button to turn power on Light glows steady Photo printer ready for printing None...

Page 35: ... cartridge may lock if there is a paper error Clear the paper error and make sure the Paper light is off before attempting to remove the cartridge see Paper light under Status lights page 28 Light off Cartridge properly installed and working normally None required Light glows steady red Cartridge depleted or uninstalled Load new cartridge page 5 then press On Off button Cartridge incorrectly loade...

Page 36: ... status Cause Action solution IMPORTANT The color cartridge may lock in place if there is a paper error Do not attempt to remove the cartridge without first clearing the paper error Make sure the Paper light is off before attempting to remove the cartridge see Paper light under Status lights page 28 Light off Paper tray properly loaded with ample supply of paper None required Cartridge light Light...

Page 37: ...y loaded Remove Paper tray check that paper is properly loaded and re load Press On Off button to resume printing Paper did not feed removable tabs may be missing or sheets may be stuck together Check paper supply Reload with new paper then press On Off button Paper feed roller may be dirty Clean roller Paper light Light status Cause Action solution ...

Page 38: ...rint paper may be damaged or missing removable tabs Remove loose paper Check the paper supply Reload with new paper then press On Off button Light blinks concurrently with Cartridge light corrupt or invalid image file None required Light blinks alternating with Cartridge light incorrect cartridge and or paper loaded Use only the PH series Kodak color cartridge photo paper kit for your photo printe...

Page 39: ... www kodak com go howto Software Get information on EasyShare software www kodak com go easysharesw or click the Help button in the EasyShare software Get help with the Windows operating system and working with digital pictures www kodak com go pcbasics Other Get support for Kodak docks cameras software accessories more www kodak com go support Get information on Kodak EasyShare photo printers www...

Page 40: ...02 713 14 45 Philippines 1 800 1 888 9600 Brazil 0800 891 4213 Poland 00800 4411625 Canada 1 800 465 6325 Portugal 021 415 4125 China 800 820 6027 Russia 8 495 929 9166 Denmark 3 848 71 30 Singapore 800 6363 036 Ireland 01 407 3054 Spain 91 749 76 53 Finland 0800 1 17056 Sweden 08 587 704 21 France 01 55 1740 77 Switzerland 01 838 53 51 Germany 069 5007 0035 Taiwan 0800 096 868 Greece 00800 441407...

Page 41: ...power adapter all other countries Consumption while printing 60 watts maximum Print speed Bluetooth PictBridge enabled device 120 seconds USB connection to computer 90 seconds NOTE Printer may slow down when thermal head needs to cool Print speed is dependent on picture size number of continuous prints and environmental conditions Print options Color black white sepia Size Without paper tray 2 7 x...

Page 42: ...perforated tabs 4 x 7 25 in 10 2 x 18 4 cm Picture resolution 300 ppi continuous tone Compatible input devices USB 2 0 port PictBridge enabled camera Bluetooth version 2 0 wireless technology enabled OBEX OPP FTP BPP profiles Photo printer specifications ...

Page 43: ...s product there are no user serviceable parts inside Refer servicing to qualified service personnel Do not expose this product to liquid moisture or extreme temperatures Kodak AC adapters and battery chargers are intended for indoor use only The use of controls adjustments or procedures other than those specified herein may result in exposure to shock and or electrical or mechanical hazards Upgrad...

Page 44: ...ct a dealer of Kodak products for more information The photo printer and the AC power adapter contain a small amount of lead in the circuit board Disposal of this material may be regulated due to environmental considerations Disposal of the color cartridge is not regulated and should not be subject to state or local landfill incineration or recycling requirements For more disposal or recycling inf...

Page 45: ...tain remanufactured materials If it is necessary to replace the entire Product it may be replaced with a remanufactured Product Remanufactured Products parts and materials are warranted for the remaining warranty term of the original Product or 90 days after the date of repair or replacement whichever is longer Limitations This warranty does not cover circumstances beyond Kodak s control This warr...

Page 46: ...ranty is expressly disclaimed Your rights Some states or jurisdictions do not allow exclusion or limitation of incidental or consequential damages so the above limitation or exclusion may not apply to you Some states or jurisdictions do not allow limitations on how long an implied warranty lasts so the above limitation may not apply to you This warranty gives you specific rights and you may have o...

Page 47: ...tion which can be determined by turning the equipment off and on the user is encouraged to try to correct the interference by one or more of the following measures 1 reorient or relocate the receiving antenna 2 increase the separation between the equipment and the receiver 3 connect the equipment to an outlet on a circuit different from that to which the receiver is connected 4 consult the dealer ...

Page 48: ...y cause undesired operation Canadian DOC statement DOC Class B Compliance This Class B digital apparatus complies with Canadian ICES 003 Observation des normes Class B Cet appareil numérique de la classe B est conforme à la norme NMB 003 du Canada Australian C Tick Waste Electrical and Electronic Equipment labeling Korea Class B ITE In the European Union do not discard the product as unsorted muni...

Page 49: ...oduct based on the standard of the Voluntary Control Council for Interference from Information Technology Equipment VCCI If this is used near a radio or television receiver in a domestic environment it may cause radio interference Install and use the equipment according to the instruction manual ...

Reviews: