Setting Up Your Printer
38
Kodak ESP 9 Printer User Guide
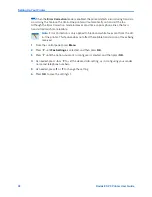
When the
Error Correction
mode is enabled, the printer detects errors during transmis-
sion. Using this feature, the All-in-One printer will automatically re-transmit the fax.
Although the Error Correction mode increases send time on poor phone lines, the fax is
transmitted much more reliably.
1
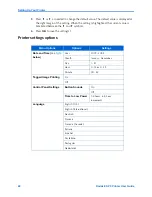
From the control panel, press
Menu
.
2
Press
until
Fax Settings
is selected, and then press
OK
.
3
Press
until the option you want to configure is selected, and then press
OK
.
4
As needed, press
or
to set the desired sub-setting, as in configuring your sender
name and telephone numbers.
5
As needed, press
or
to change the setting.
6
Press
OK
to save the setting(s).
Note:
Error Correction is only applied to black-and-white faxes sent from the All-
in-One printer. This feature does not affect the reliable transmission of faxes being
received.
Summary of Contents for ESP 9 ALL-IN-ONE PRINTER - SETUP BOOKLET
Page 17: ...All in One Printer print copy scan fax 9 User Guide ...
Page 28: ...Getting Help 4 Kodak ESP 9 Printer User Guide ...
Page 82: ...Copying 58 Kodak ESP 9 Printer User Guide ...
Page 130: ...Troubleshooting 106 Kodak ESP 9 Printer User Guide ...
Page 146: ...Glossary 122 Kodak ESP 9 Printer User Guide ...
Page 148: ...If you need to call Customer Support 124 Kodak ESP 9 Printer User Guide ...
Page 157: ... 1K3289 1K3289 1K3289 B ...

