4-6
A-61670 August 2014
NOTE:
For the rear printer:
The detent positions are located on the
underside of the printer rail, therefore, they are not easily visible.
4. Close the front printer access cover and reinstall the output tray, or reinstall
the rear printer access door.
Moving the ink
cartridge between the
front and rear print
carrier (i5850
Scanner only)
When using the front and rear printers, you can only print using one printer at a
time. When you want to change from the front to the rear printer (or vice
versa), do the following:
1. Access the front or rear printer area to remove the ink cartridge. See the
procedures in “Accessing the front printer” and “Accessing the rear printer”
earlier in this chapter.
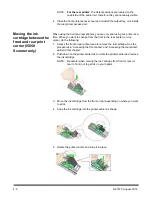
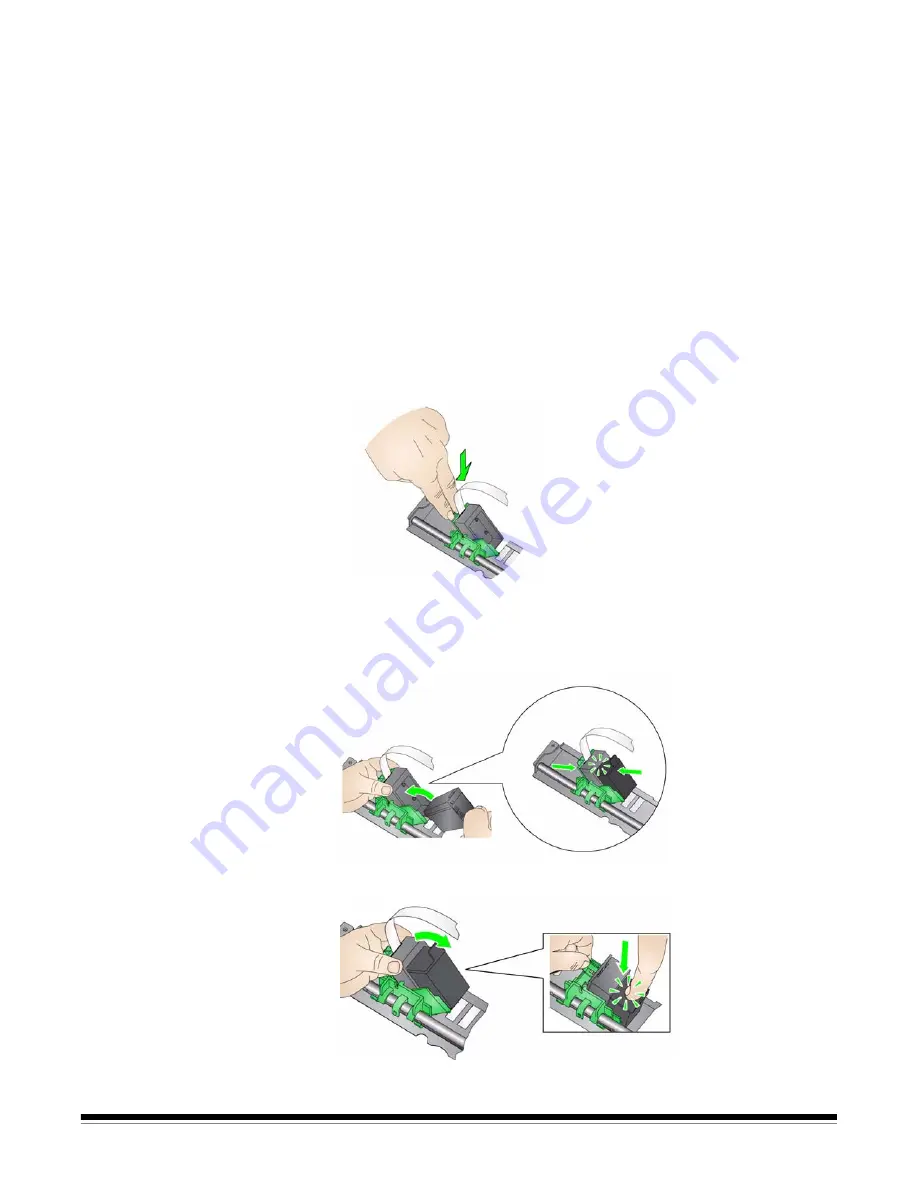
2. Push down on the printer carrier tab to rotate the printer carrier and remove
the ink cartridge.
NOTE: Be careful when moving the ink cartridge from front or rear (or
rear to front) not to get ink on your hands.
3.
Move the ink cartridge from the front or rear depending on where you want
to print.
4.
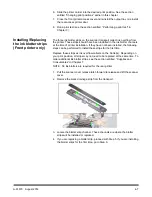
Snap the ink cartridge into the printer carrier as shown.
5.
Rotate the printer carrier and snap it in place.


