light coming from objects outside the actual picture area strikes the lens, it considerably reduces the brilliance of the
picture. This applies not only to photographs taken against the light -- when the lens hood becomes indispensable --
but also to sunshine in general.
The Retinette models use a clip-on lens hood which grips the lens mount by means of spring cheeks.
The Shutter
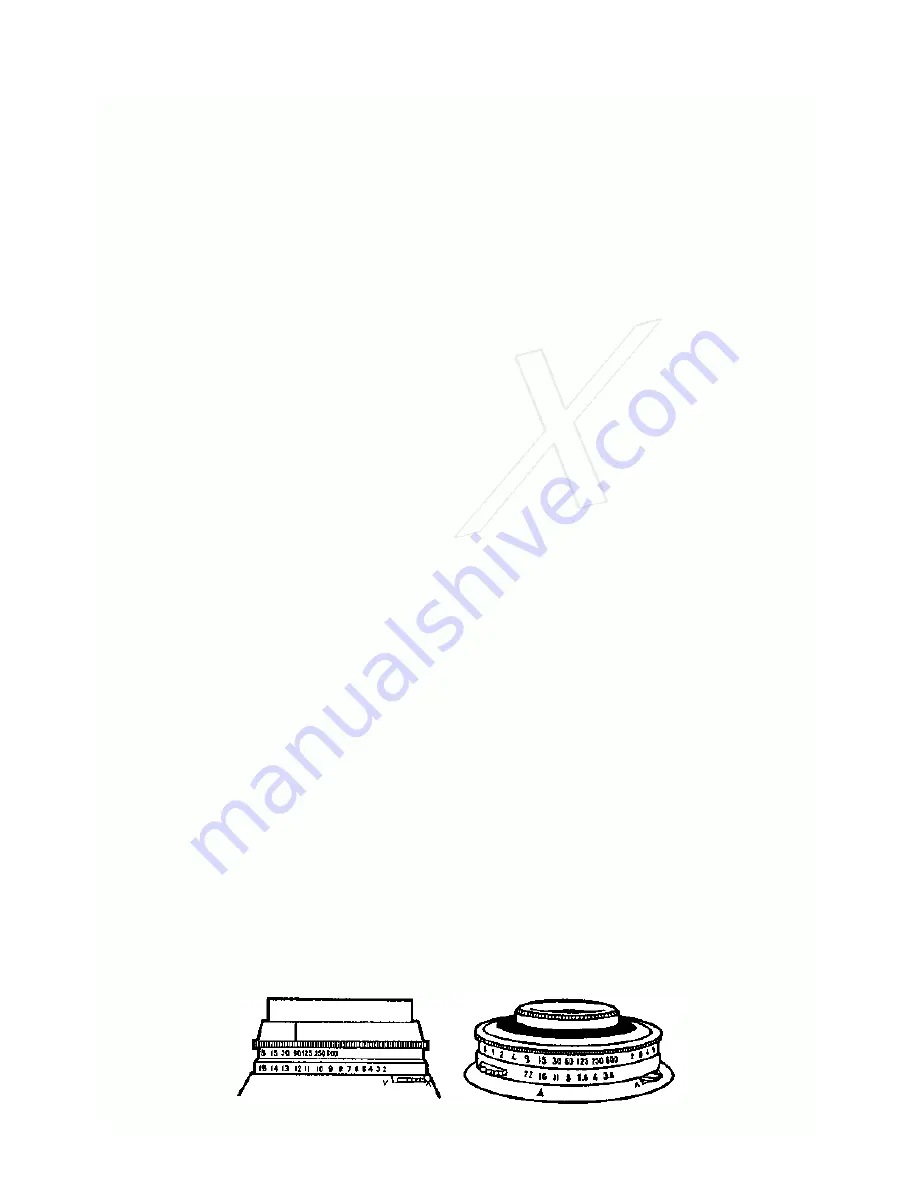
THE COMPUR-RAPID shutters of the Retinettes carry speeds of 1, 1/2, 1/4, 1/8, 1/15, 1/30, 1/60, 1/125, 1/250 and
1/500 sec. and a B setting for time exposures. These speeds are marked as whole numbers thus 1/2 sec. is marked
as 2, 1/125 sec. as 125, and so on.
To set the shutter speed, rotate the milled ring to bring the required speed opposite the index mark. The shutter
speed scale rotates with the speed setting ring. For some of the speeds the light value setting may have to be re-
adjusted (see page 10).
THE EARLIER COMPUR-RAPID shutter (without light values) is set by turning the milled ring so as to bring the red
dot on it opposite the required speed. The speeds themselves are marked in the same way.
LIGHT VALUES. The shutter also carries a scale of numbers engraved in red on the same ring as the shutter speed
scale and on models II and IIB on the same ring as the aperture scale. These numbers run from 2 to 18 and
represent light values for correct exposure. Each light value represents a range of shutter speed-aperture
combinations, but is covered by a single setting. The latest exposure meters are now also calibrated in light values;
the reading can thus be transferred directly to the shutter.
To set the light value on the Retinette and Retinette I, push back the sickle-shaped lever behind the light value scale
on the shutter rim and move it sideways to set the red dot to the required light value. Note, however, that only
settings from 3½ to 18 are possible in spite of the fact that the scale shows figures down to 2. On the Retinette II
and IIB the light values are engraved on the same ring which carries the lever and are set opposite a red arrow head
on the shutter speed ring.
You can now choose any shutter speed or aperture without changing the exposure. If you alter the shutter speed,
the aperture will automatically set itself to the correct value, or if you change the aperture, the shutter speed adjusts
itself automatically to keep the effective exposure constant.
To change the shutter-aperture combination just move the speed setting ring until the index mark points to the
required aperture or shutter speed respectively. Keep the aperture lever pressed against the speed setting ring to
avoid changing the light value setting. Incidentally, intermediate light values can also be set, e.g., 5½, 6½. etc., for
really accurate work.
The shutter may be used in the conventional way too; In this case the shutter speed has to be adjusted first and
then the aperture.
FOR TIME EXPOSURES on either type of Compur-Rapid shutter set the index of the milled ring to B (brief time). On
releasing, the shutter will remain open as long as the release button is pressed down and closes as soon as the
pressure on the release is removed.
The green figures on the exposure scale are for calculating time exposures. With the shutter speed ring set to B, and
the light value scale to one of the lower values up to 6, the green figures indicate the length in seconds of the
exposure required and which stop to use. If, for example, the light value is set to 3 any of the following
combinations may be used: 4sec. at f5.6; 8sec. at f8; 15 sec. at f11; or 30 sec. at f16. In that case, re-set the
aperture by means of the light value lever, and expose for the required number of seconds.
For such time exposures the camera must be mounted on a firm support such as a tripod.
It is safest to release the shutter with the help of a cable release to avoid shaking the camera. This release screws
into the bush in the centre of the body release of the camera.
For long time exposures -- where the shutter is to remain open for longer than you can conveniently keep the
release depressed -- use a cable release with a lock. To make the exposure set the shutter to B, and press the cable
release plunger with the locking plate lifted. The shutter will now remain open until the locking plate is depressed.
On cable releases with locking screws, tighten the screw on pressing the plunger and undo the screw to close the
shutter.
THE LIGHT VALUE SHUTTER


