background image

A-61601  February 2010

5-11

Replacing the feed module 
and tires

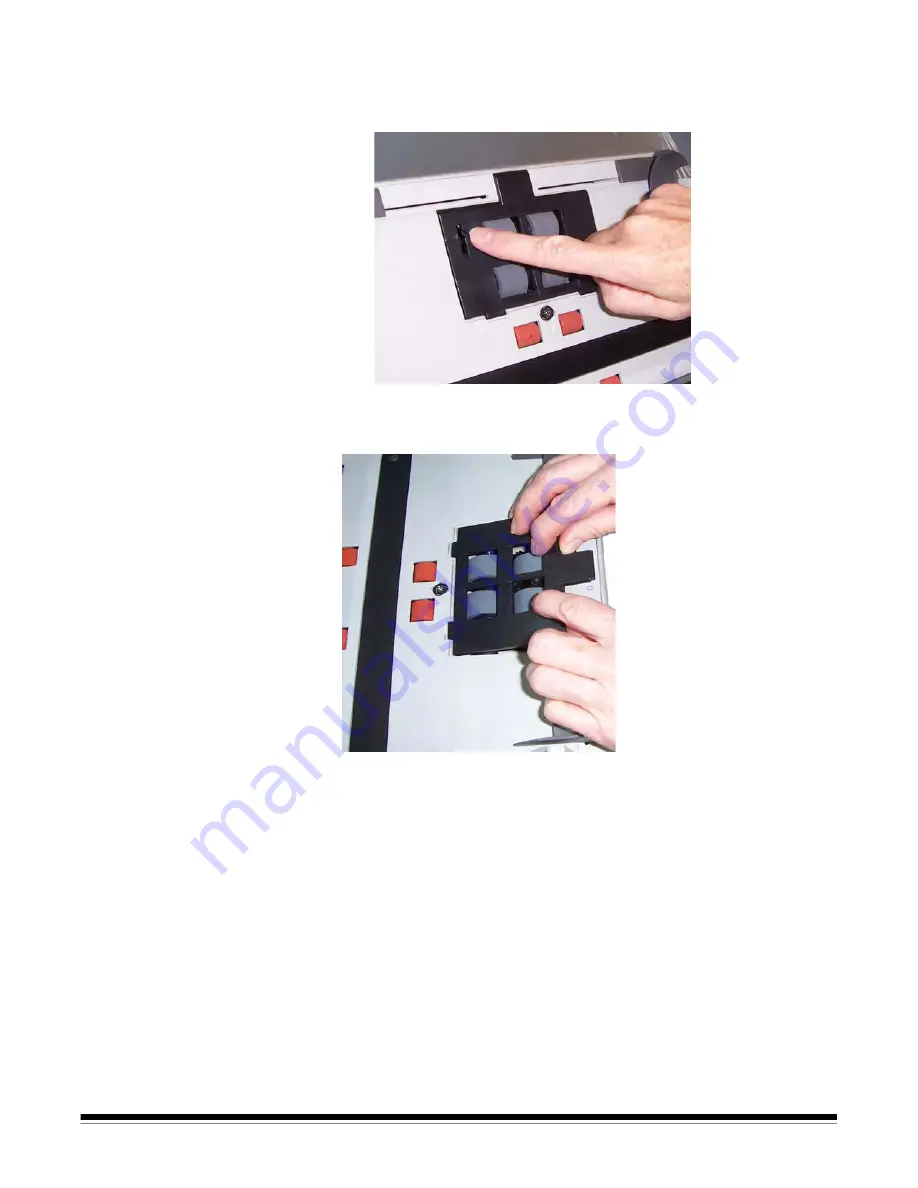
NOTE: The paper present sensor is located to the right of the feed 

module. Be careful not to damage the paper present sensor 
when removing or cleaning around the feed module. 

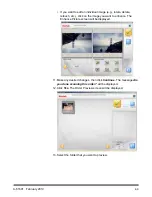
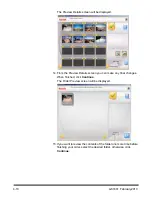
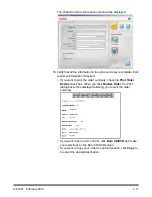
1. Push against the raised edge of the feed module cover and lift it up 

and out of position.

Summary of Contents for S1220 - Photo Scanning System

Page 1: ......

Page 2: ...This product contains portions of imaging code owned and copyrighted by Pegasus Imaging Corp Tampa FL www pegasustools com ALL RIGHTS RESERVED ...

Page 3: ...liquid or gas spray cleaners These cleaners displace dust dirt and debris to another location within the scanner which may cause the scanner to malfunction Material Safety Data Sheets MSDS for chemical products are available on the Kodak website at www kodak com go msds When accessing the MSDSs from the website you will be required to provide the catalog number of the consumable you want the Mater...

Page 4: ...between the equipment and receiver Connect the equipment into an outlet on a circuit different from that to which the receiver is connected Consult the dealer or an experienced radio TV technician for additional suggestions Any changes or modifications not expressly approved by the party responsible for compliance could void the user s authority to operate the equipment Where shielded interface ca...

Page 5: ...INTRODUCTION 1 1 INSTALLATION 2 1 SCREEN DESCRIPTIONS 3 1 SCANNING PHOTOS 4 1 MAINTENANCE 5 1 ACHIEVING GOOD QUALITY IMAGES 6 1 TROUBLESHOOTING 7 1 APPENDICIES A B ...

Page 6: ...tware included with the system also supports general document scanning on the Kodak s1220 Photo Scanning System Supporting documentation In addition to this User s Guide the following documentation is also available These documents are also available on the Installation CD Installation Guide provides a step by step procedure for installing the scanner Reference Guide provides easy visual steps for...

Page 7: ...n photos e g badly torn or very fragile photos severely curled photos etc bound albums scrapbooks and documents up to 302 x 461 mm 11 92 x 18 15 inches CAT No 179 6747 What s in the box Before you begin open the box and check the contents Kodak s1220 Photo Scanner Output tray Pre separation pad for use in document scanning Optional output tray kit USB 2 0 cable Power supply AC power cord bundles U...

Page 8: ...s1220 Photo Scanning System Input tray holds up to 25 photos or 75 documents Function window Scroll button and Start button are available for use with document scanning when using Smart Touch functionality on the system LED Indicator illuminates or flashes indicating scanner status Steady green ready to scan Flashing green preparing to scan Steady red scanner not communicating with the PC Flashing...

Page 9: ...ment Gap release lever allows you to manually adjust the space between the feed module and separation module for photos that require special handling e g photos that are badly torn Feed module rollers and separation module provides smooth feeding and separation of various sizes thicknesses and textures of photos Paper path sensor tracks the movement of paper and photos through the scanner Scanner ...

Page 10: ...onnects the optional flatbed accessory to the scanner Security lock port connects a security lock to the scanner similar to the security lock port used for a laptop You can purchase a standard security lock at an office supply store Refer to the instructions provided with the security lock for installation procedures Power switch Power port USB port Flatbed port Security lock port ...

Page 11: ... provided to install your scanner NOTE If you have already performed all of the steps in the Installation Guide skip this section Power down any scanners attached to the PC before installing the s1220 Photo Scanning Software application Install the software before connecting the scanner to the PC Be sure you have administrator rights The s1220 Photo Scanning System application must be installed un...

Page 12: ... the drivers are part of the Kodak Driver Software installation This process can take several minutes To prevent this from happening you can click on the Skip obtaining driver software from Windows update link Windows XP If you are installing on Windows XP the screen below will be displayed as part of the new Microsoft Feature Pack for Storage 1 0 software This may be misleading because it says th...

Page 13: ...ck OK Otherwise use the Browse panel to select the desired directory or type the full pathname of the directory When finished click OK Several progress messages will be displayed NOTES If the correct version of NET Framework is not installed a message box will be displayed stating that it is being installed This installation can take several minutes If the correct version of Microsoft C redistribu...

Page 14: ...2 4 A 61601 February 2010 Attaching the standard output tray 1 Slide the standard output tray underneath the scanner platform along the center guide 2 Push it all the way back until it snaps into place ...

Page 15: ...s recommended when scanning large stacks of photos or documents To install the output tray kit 1 Remove the standard output tray from underneath the scanner by pressing down on the two tabs and pulling the output tray out of position 2 Press and hold the tilt button and rotate the scanner body to the downward position NOTE The scanner must be in the downward position when using this output tray da...

Page 16: ...tform along the center guide and push it back until it is securely in place NOTE If the clip is not installed you can install it by sliding it up into the scanner between the slots at the center of the scanner and snap it in place Once the clip is installed there is no need to remove it ...

Page 17: ...A 61601 February 2010 2 7 4 Snap the dangler onto the clip 5 Slide the standard output tray along the rail underneath the output tray extension and push it back until it is securely in place ...

Page 18: ...accessible 1 Select the appropriate AC power cord for your region from the supply of power cords packed with your scanner 2 Attach the power cord you selected to the power supply NOTE Be sure that the power cord is securely attached to the power supply 3 Plug the output power cord from the power supply into the power port on the scanner 4 Plug the other end of the power cord into the wall outlet 5...

Page 19: ...lete and you are ready to scan photos insert the USB software dongle in a USB port on your PC Wait for the USB software dongle to be recognized by your PC NOTE DO NOT LOSE THE USB SOFTWARE DONGLE THERE IS A FEE TO REPLACE THE DONGLE IT IS RECOMMENDED THAT YOU ATTACH THE DONGLE TO THE SCANNER USB CABLE Starting the application software Double click on the application shortcut on your desktop or sel...

Page 20: ...mary Creation screen 3 13 This chapter describes the screens and icons that are available when using the Kodak s1220 Photo Scanning System All screens within the Kodak s1220 Photo Scanning System provide the following icons A message area is provided on all screens below the title bar About displays the software version and copyright information Exit closes the Kodak s1220 Photo Scanning Software ...

Page 21: ...d Address optionally enter the customer name address and email address information These are not required fields Up to 58 characters are allowed in the Last First Street and City fields Up to 42 characters are allowed in the State County Country and Phone fields Up to 58 characters are allowed in the E Mail field If you enter an email address it must be a valid email address format Up to 24 numeri...

Page 22: ...screen and clears the system of all data for the current order The confirmation message Do you want to start over This will delete all the files that were scanned will be displayed Batch Scan scans batches of photos using the s1220 Photo Scanner Flatbed Scan if an optional Kodak A3 or A4 Flatbed is attached and you select this option photos will be scanned from the flatbed Image Cleaner Tool when ...

Page 23: ...ntitled Scan Settings screen Batch Information these values will be 0 until a batch has been scanned Image displays the number of the first image shown in the 16 Up Display window To displays the number of the last image shown in the 16 Up Display window Of displays the total number of photos scanned in the batch Total Images displays the total number of scanned images in the current order Moves t...

Page 24: ...isplayed 16 Up Display window displays up to 16 images at a time Scanning Completed displays the Order Preview screen Start Over goes back to the Customer Order Information screen and clears the system of all data for the current order The confirmation message Do you want to start over This will delete all the files that were scanned will be displayed Batch Scan allows you to scan another batch of...

Page 25: ...you to rescan and replace the last batch of scanned images Auto Rotate when selected the s1220 Photo Scanning Software will make every attempt to properly automatically rotate images to the correct orientation This option works most effectively for photos with faces therefore some photos may still need to be rotated manually For two sided scans the back side image is automatically rotated with the...

Page 26: ...not what you desired Mode select one of the following batch scan modes Photo Face Up captures the side of the photo that is face up in the input tray This is the recommended mode for photos Photo Face Down captures the side of the photo that is face down in the input tray Two Sided Photo Face Up captures both sides of the photo as two separate image files labeled A and B Resolution allows you to s...

Page 27: ...ession best image quality Creates a smaller file size than Superior compression Select Best if you want standard size reprints of scanned image files Superior minimum compression superior image quality Creates a file that is 5 to 10 times larger than Best compression which will impact performance Select Superior if you want to reprint enlargements of scanned image files Transport timeout allows yo...

Page 28: ...ns e g Rotate 90 degrees the changes will be displayed in the Enhanced Image window When you are finished a message will be displayed asking if you want to save the changes Return goes back to the Scan Images screen Start Over goes back to the Customer Order Information screen and clears the system of all data for the current order The confirmation message Do you want to start over This will delet...

Page 29: ...if a flatbed is attached Enhances the colors contrast brightness etc in the scanned image This option applies to black and white and color images scanned with color mode Removes the red eye in the scanned image This option applies to black and white and color images scanned with color mode Rotates the image 90 degrees to the left counter clockwise Rotates the image 90 degrees to the right clockwis...

Page 30: ...lay window displays the folder s of scanned photos You can click on a folder to view the contents Continue displays the Order Summary and Creation screen Start Over goes back to the Customer Order Information screen and clears the system of all data for the current order The confirmation message Do you want to start over This will delete all the files that were scanned will be displayed This Order...

Page 31: ...sage Do you want to start over This will delete all the files that were scanned will be displayed Retouch Folder automatically enhances the colors contrast brightness etc of all the black and white or color images scanned with color mode within the selected folder Auto Rotate when selected the s1220 Photo Scanning Software will make every attempt to properly automatically rotate images to the corr...

Page 32: ...lays the total number of scanned images in this customer order Order Summary Creation screen When you click Continue on the Order Preview screen the Order Summary and Creation screen is displayed This screen allows you to finalize your order Display window displays the information previously entered on the Customer Order Information screen It also provides the number of photos scanned If desired y...

Page 33: ...s and DVDs Refer to the section entitled Application configuration in Chapter 7 for more information Burn Files tab Destination Drive allows you to select the CD DVD drive where you want to write your images to media Files to Burn defaults to the customer order folder when the completed customer order fits on one of the selected media CD DVD If more than one media is needed then each folder in the...

Page 34: ... a burn Cancelling a burn in progress may result in an unusable CD DVD There may be a delay after selecting Burn while the media spins up before burning starts Return click this button to return to the Order Summary screen Format Disk tab Eject when finished if checked will automatically eject the CD DVD when formatting is complete Quick Format check this option if you want to format the disk more...

Page 35: ...g box will be displayed allowing you to copy your order to another location such as a USB drive or network drive NOTE To optionally create a new folder enter a new folder name into the text box below the Make New Folder button then click Make New Folder ...

Page 36: ... scanner can be tilted to an upward and downward position it is strongly recommended that you scan your photos in the downward position 1 Be sure the scanner is on and ready to scan green indicator light is on and constant 2 Press and hold the tilt button and rotate the scanner away from you to place your scanner in the downward position IMPORTANT When using the tilt feature be sure the scanner co...

Page 37: ...you are scanning a batch of photos If space is limited and you want to close the input tray you can easily feed photos one at a time 5 Adjust the output tray to accommodate your scanning needs The standard output tray can be positioned so it lies flat on the table This position works well for scanning a few photos at a time The output tray can be extended to accommodate photos up to 14 inches in l...

Page 38: ...he following Take your photos and place them face down on the table Take your first batch from the top of this stack and place them face up in the scanner For example if your stack has 9 photos you would place them face down on the table so that photo 1 is facing the table and the back of photo 9 is on the top of the stack If you take the first 5 photos on the top of this stack 9 8 7 6 5 and place...

Page 39: ...r Select Batch Scan When the stack is completely scanned and the scanner has stopped place another stack in the scanner and select Batch Scan When you are using this method the scanner should be allowed to stop after each batch is scanned otherwise the photos will not be in the desired order Photo Prior versions This version 1 XXXX_09 jpg XXXX_01 jpg 9 XXXX_01 jpg XXXX_09 jpg ...

Page 40: ...ken photos that are copyrighted cannot be scanned without written permission from the owner Two sided photo scanning If you have a batch of photos where both sides of some photos need to be scanned group these photos together and scan them in a separate batch This will save time deleting unwanted blank images If you need to rescan a two sided photo select the side you want to rescan If you have a ...

Page 41: ...cument Imaging s1220 Photo System s1220 Photo Scanner A splash screen will be displayed while the system initializes then the Customer Order Information screen will be displayed 2 Enter up to 51 alphanumeric characters in the Order field to identify this order You must make an entry in this field 3 If desired enter the last name first name phone street city state county country zip post code and e...

Page 42: ...ion entitled Getting your photos ready to scan earlier in this chapter 6 Select Image Cleaner Tool if you want the scanner to attempt to eliminate any streaks in the image after scanning 7 Click Settings if you want to change any of the default scan settings i e mode resolution sharpen images etc NOTE You can change the settings anytime before starting a Batch or Flatbed scan 8 Click Batch Scan or...

Page 43: ...e flatbed and click Flatbed Scan Use the rotate arrows on each displayed image to rotate as desired or select Auto Rotate for the s1220 Photo Scanning Software to make every attempt to automatically rotate images to the correct orientation This option works effectively for photos with faces therefore some photos may still need to be rotated manually If you want to enhance the colors contrast brigh...

Page 44: ... click on the image you want to enhance The Enhance Picture screen will be displayed 11 Make any desired changes then click Continue The message Are you done scanning this order will be displayed 12 Click Yes The Order Preview screen will be displayed 13 Select the folder that you want to preview ...

Page 45: ...rom the Preview Details screen you can make any final changes When finished click Continue The Order Preview screen will be displayed 15 If you want to review the contents of the folder one more time before finishing your order select the desired folder otherwise click Continue ...

Page 46: ...f you want to print the order summary check the Print Order Details check box When you click Finalize Order the Print dialog box will be displayed allowing you to print the order summary If you want to burn a CD or DVD click Burn CD DVD and make your selections on the Burn CD DVD screen If you want to Copy your order to another location click Copy to to select the desired destination ...

Page 47: ...1220 Photo Scanning Software Unless you changed the default at installation scanned images can be found at C Scanned_Pictures These images can be handled in a variety of ways uploaded to a photo management system burned to CD DVD printed emailed etc When the order is finalized an xml file will also be created that contains information about that customer order The xml file can be found within the ...

Page 48: ... module and tires 5 8 Replacing the pre separation pad 5 10 Replacing the feed module and tires 5 11 Adjusting the pre separation roller tension 5 13 Supplies and consumables 5 14 Opening the scanner cover 1 Before opening the scanner cover be sure the input tray is in the open position and if the optional output tray and or dangler are attached remove them 2 Press and hold the scanner cover relea...

Page 49: ...se household cleaners Allow surfaces to cool to ambient temperature before use Do not use cleaners on hot surfaces Use adequate ventilation Do not use cleaners in confined areas NOTES Before beginning cleaning procedures disconnect the electrical power Wash your hands with soap and water after performing maintenance procedures Cleaning the rollers 1 Open the scanner cover 2 With a roller cleaning ...

Page 50: ...d lift it out of position 2 Manually rotate and wipe the separation module tires with a roller cleaning pad 3 Inspect the separation module If the separation module tires show signs of wear or damage replace the tires or the separation module See Replacement procedures for more information 4 Insert the separation module by aligning the tabs with the slots and snapping it into position ...

Page 51: ...remove the input tray To remove the input tray gently push the input tray to the left or right to release the pin from the slot and lift it out of position Be careful not to damage the paper present sensor when removing or cleaning around the feed module 1 Pull against the raised edge of the feed module cover and lift it up and out of position ...

Page 52: ...lly rotate and wipe the feed module tires with a roller cleaning pad 4 Inspect the feed module If the feed module tires show signs of wear or damage replace the tires or the feed module See the Replacement procedures for more information 5 Using a vacuum or cleaning pad remove dust and debris from the feed module area ...

Page 53: ...on until it snaps into place Vacuuming the scanner Before cleaning the imaging area it is suggested that you vacuum the inside of the scanner to remove any dust and debris Cleaning the imaging area 1 Wipe the upper and lower imaging area using a Step 1 Brillianize Detailer wipe Be careful not to scratch the imaging area when cleaning 2 Wipe the upper and lower imaging area again using the Step 2 B...

Page 54: ...n scan the transport scanning sheet 5 After the transport cleaning sheet is scanned turn it over adhesive side facing the input tray and scan it again 6 Open the scanner cover and wipe the imaging area with a lint free cloth included with the Brillianize Detailer wipes 7 Close the scanner cover with both hands 8 Check your image quality 9 If necessary repeat this procedure until all residue is rem...

Page 55: ...t procedures can cause the life of the consumables to vary You should change the tires if you notice an increase in multiple feeds stoppages or a decrease in feeder performance that is not resolved by following the cleaning procedures NOTES Before beginning replacement procedures disconnect the electrical power Certain paper types such as carbonless paper or newsprint failure to clean regularly an...

Page 56: ... 3 Remove the separation roller from the separation module housing 4 Remove each tire by sliding the tire off the core 5 Install each new tire by gently pulling it over the core IMPORTANT Do not overstretch the tire it may tear 6 Reinstall the separation roller in the separation roller housing Be sure the separation roller snaps into place 7 Reinstall the separation module by aligning the tabs wit...

Page 57: ...de tabs which protrude slightly from the back of the separation module 3 Push down on the side tabs until the pre separation pad protrudes slightly from the front of the separation module 4 Grasp the pre separation pad and pull it out of the separation module 5 Discard the worn pre separation pad 6 Align the side tabs of a new pre separation pad with the slots on the separation module 7 Push the p...

Page 58: ... NOTE The paper present sensor is located to the right of the feed module Be careful not to damage the paper present sensor when removing or cleaning around the feed module 1 Push against the raised edge of the feed module cover and lift it up and out of position ...

Page 59: ...nd pushing it toward the left to fit it into position Be sure the gears are aligned and it snaps into place then go to Step 8 If you are replacing the tires continue with Step 3 3 Remove one core assembly by lifting up and out of position 4 Remove each tire by sliding the tire off the core 5 Install each new tire by gently pulling it over the core IMPORTANT Do not overstretch the tire it may tear ...

Page 60: ...ing the tabs in the slots and pushing the feed module cover down until it snaps into place Adjusting the pre separation roller tension If you are experiencing multi feeds or document jams it may be necessary to adjust the pre separation roller tension 1 Remove the separation module from the scanner by following the steps described previously in Replacing the separation module and tires 2 Locate th...

Page 61: ...ers are subject to change Description CAT No Kodak Feed Rollers for i1200 i1300 Series Scanners qty 12 148 4864 Kodak Separation Module for i1200 i1300 Series Scanners 173 6115 Kodak Feed Module for i1200 i1300 Series Scanners 826 9607 Kodak Digital Science Roller Cleaning Pads qty 24 853 5981 Kodak Digital Science Transport Cleaning Sheets qty 50 169 0783 Brillianize Detailer Wipes for Kodak Scan...

Page 62: ...ust cover and shake it free of dust in a location away from the scanner Use the scanner in an area where the relative humidity is at least 50 Dry environments leads to static which promotes the accumulation of dust Handling Photographs Be sure your photos are clean before scanning them Scanning dirty photos may cause more dirt and dust to accumulate in the scanner To minimize dirt and dust build u...

Page 63: ...tively through the scanner If possible stacks of photos may be safely uncurled before scanning NOTE Photos that are severely curled can either be rotated 90 degrees so the curl is not in the direction of the transport or scanned from the Kodak A3 or A4 Flatbed Accessory Fanning photos for reliable feeding fan the photos before scanning Always place a blank placeholder top sheet on top of the stack...

Page 64: ...particles 3 After wiping the glass re inspect for any visible dust particles 4 Close the scanner cover and evaluate the subsequent scans If streaking or other problems remain it may be necessary to do a more thorough cleaning You can Wipe the imaging area with Brillianize Detailer wipes These wipes provide an excellent alcohol free cleaning process This two step process includes a wet de static wi...

Page 65: ... streaks in your images The best method to obtain streak free images is to keep the scanner imaging area clean The Photo Scanning System software provides an option called Image Cleaner tool When this option is checked the software will attempt to remove any streaks that may occur in a scanned image from the dust in the scanner In most cases corrections are either undetectable or very hard to dete...

Page 66: ... is not in the direction of the transport This may eliminate or minimize the banding NOTE It is suggested that you feed photos top first to minimize banding in light areas at the top of photos Place a blank placeholder top sheet on top of the stack of photos being scanned This top sheet can reduce banding and also protects the top photo from tire marks as the last photo before the top sheet is fed...

Page 67: ...djusted for the length of the photos you are scanning all photos meet the specifications for size weight and type as outlined in Appendix A Specifications the scanner and tires are clean the spring on the pre separation module is adjusted to the proper tension See the procedures in Chapter 5 Maintenance the feed module and pre separation module are installed properly and securely in place See the ...

Page 68: ...s ready to scan in Chapter 4 Scanning Photos Images are not being cropped correctly Images are not being cropped correctly from the batch scanner Rescan and adjust the side guides for the width of the photos you are scanning Images are not being cropped correctly from the flatbed Try placing a contrasting background behind the photograph and rescan Roller marks appear on the photo after scanning C...

Page 69: ...tically load a message may be displayed asking for the WIBU installation disk Select that you have the software disk and choose the CD drive with the s1220 Photo Scanning System Installation CD This will complete the WIBU software installation Application issues The Kodak s1220 Photo Scanning System has a fixed screen size of 1024 x 768 You may want to change the taskbar properties by unselecting ...

Page 70: ...be modified Additional guidance for changing specific parameters may be found in the PrintScan ini file PrintScan ini folder location Windows XP C Documents and Settings All Users Application Data kds_Kodak s1220 Photo System Windows Vista and Windows 7 C ProgramData kds_Kodak s1220 Photo System NOTE These folders may be hidden If so you may need to go into the Windows operating system to display ...

Page 71: ...1220 Photo Scanning System Refer to Chapter 2 Installation 1002 Error Code 1002 Could not read image processing defaults from s1220 Profile Continuing with default settings Verify that a valid s1220 Profile file exists Reinstall the Kodak s1220 Photo Scanning System Refer to Chapter 2 Installation 1003 Error Code 1003 s1220 Driver version incorrect Refer to s1220 Photo Scanner User s Guide Chapter...

Page 72: ...e burner has had time to spin up and the media is writable and has not been closed finalized 4008 Create File System Error Verify the selected files and folders will fit on the CD DVD media 4009 Error adding file Verify a file with that name does not already exist on the CD DVD media and that the media has sufficient free space for the files 4010 Error adding folder Verify a folder with that name ...

Page 73: ...t find a Kodak scanner Be sure that the s1220 Scanner is attached turned on and the green LED is on and steady If the error persists contact Kodak Service 9005 Please check if scanner is available to STW Verify that the s1220 Scanner is connected and powered on If the error persists contact Kodak Service 9006 9007 9008 9010 Could not connect to the scanner Please retry If this error persists pleas...

Page 74: ...hone number for your country 2 When calling please have the following information ready A description of your problem The scanner serial number Computer configuration Software application you are using Code Problem Remedy E 0 USB cable is not connected or the device drivers have not recognized the scanner Be sure the USB cable is securely connected to the scanner and PC or un install and re instal...

Page 75: ...per batch continuous feeding of photos is supported document feeder capacity of up to 75 sheets handling weights up to 34 413 g m 9 110 lb paper ID card thickness up to 1 25 mm 0 05 in Recommended Daily Volume 1 500 photos Illumination Dual Fluorescent cold cathode Electrical requirements 100 240 V international 50 60 Hz Scanner Dimensions Height 246 mm 9 7 in not including input tray Width 327 7 ...

Page 76: ...canner 1 for the USB software dongle Supported operating systems All operating systems must support USB 2 0 with administrator privileges for installation Microsoft Windows XP Service Pack 3 Windows Vista Service Pack 2 Windows Vista 64 bit Service Pack 2 Windows XP 64 Service Pack 2 Windows 7 32 bit Windows 7 64 bit Microsoft NET Framework 2 0 included on the Installation CD NOTE Depending on how...

Page 77: ...omponent including breakage of a connector cover glass pins or seal c from service modification or repair not performed by Kodak or a service provider authorized by Kodak or by tampering use of counterfeit or other non Kodak components assemblies accessories or modules d by misuse unreasonable handling or maintenance mistreatment operator error failure to provide proper supervision or maintenance ...

Page 78: ...rs seeking services for Kodak Scanners covered under this Limited Warranty must obtain a Return Material Authorization number RMA by calling 800 822 1414 and within ten 10 business days from the date of issuance of the RMA must return the Kodak Scanner to the address designated in the RMA at the end user s own expense and risk in compliance with Kodak s current Packaging and Shipping Guidelines An...

Page 79: ... box to ensure proper receipt and credit of the defective product Depot service If the Kodak Scanner is not eligible for Advance Exchange or On Site Service an eligible purchaser may utilize our Depot Repair Service The eligible purchaser will be instructed to ship the product to the nearest authorized Depot Repair Center Product must be shipped at the eligible purchaser s risk and expense to the ...

Page 80: ... Technical Assistance by Telephone Telephone technical support is available Monday Friday between the hours of 5 a m to 5 p m excluding Kodak holidays Phone 800 822 1414 For Technical Documentation and FAQ s available 24 hours a day Website www Kodak com go docimaging For Service Program Information Website www Kodak com Phone 800 822 1414 ...

Page 81: ......

Reviews: