


1 - 11
Chapter 1. Getting Started
Document and Image Lengths
Document and Image Lengths
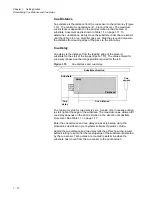
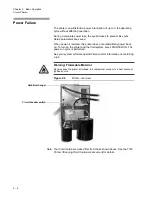
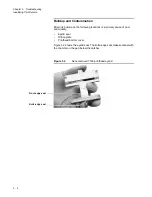
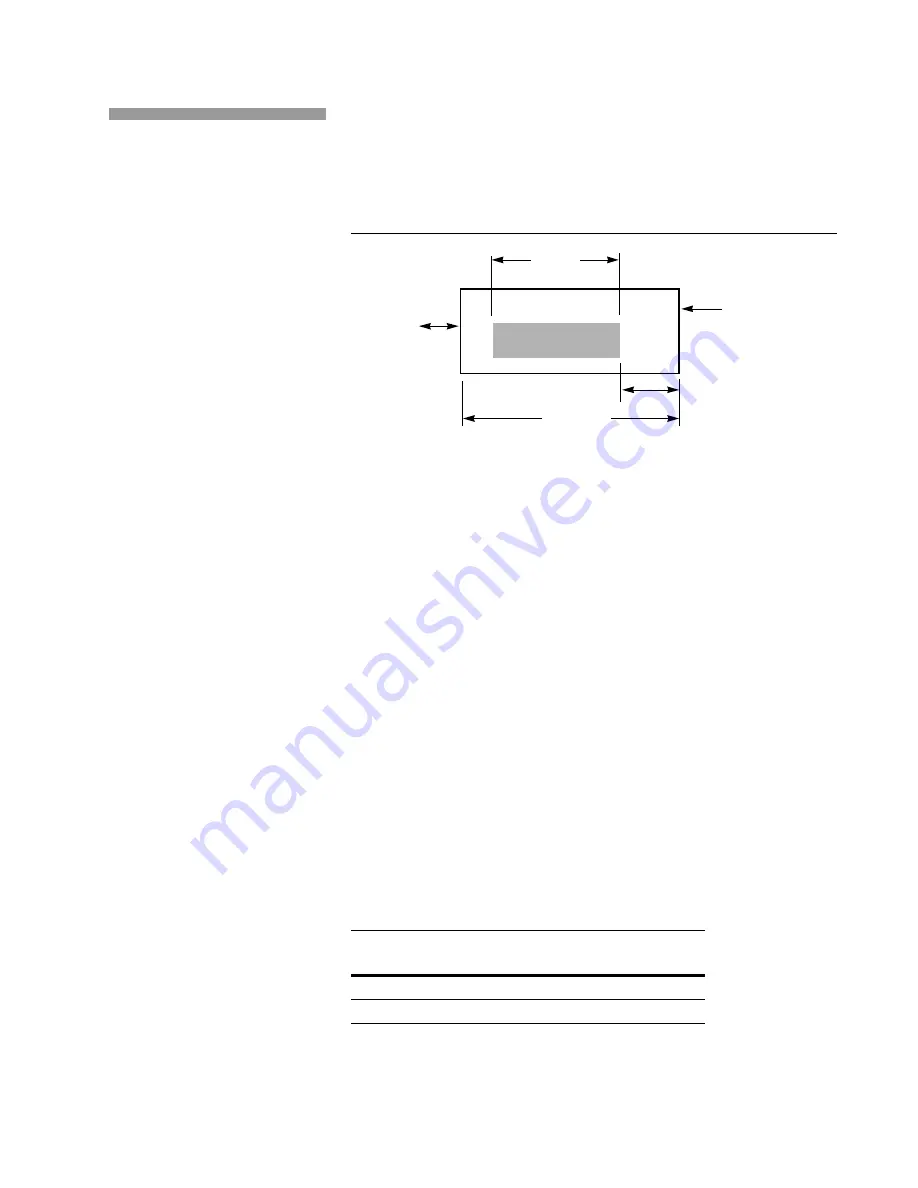
Two other parameters are required by the printer: document length and
image length. These two parameters are illustrated in Figure 1.11.
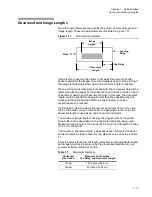
Figure 1.11
Document parameters
Image length is used by the printer to set aside the amount of buffer
space required for the image. Document length is used to stop printing if
the image is still being printed when the document length is reached.
When printing on discrete pieces of substrate, the cue sensor detects the
leading and trailing edges of the substrate and, in effect, provides a start-
of-document and an end-of-document signal. In this case, the document
length could be specified as being shorter than the substrate length to
make sure that printing stops before a sensitive area, such as a
preprinted area, is reached.
If printing on a web, the start-of-document signal may come from a cue
mark on the web or from a mechanical cue generator. In this case, the
document length is used as an end-of-document indicator.
The maximum image length is fixed by the physical size of the printer
page buffer and is dependent on the horizontal resolution being used.
Maximum image length is 136 inches (345.4 cm) at 120 dpi and 68 inches
(172.7 cm) at 240 dpi.
The maximum document length is dependent upon horizontal resolution
and is the same as those shown for cue distance and cue delay in Table
1.1.
Enter the values for document length (sometimes called substrate length)
and image length at job setup using the procedures described in your
systems software
Operator’s Guide
.
Table 1.1
Maximum distances
Horizontal
Resolution
Maximum Cue Distance,
Cue Delay, and Document Length
120 dpi
120 inches (304.8 cm)
240 dpi
60 inches (152.4 cm)
Piece
Document
Length
Cue Delay
Leading
Edge
Image
Length
Summary of Contents for VERSAMARK DP7122
Page 1: ...Kodak Versamark Inc KODAK VERSAMARK DP7122Printer Operator s Guide ...
Page 2: ......
Page 3: ...KODAK VERSAMARK DP7122 Printer Operator s Guide Block 3 Mod 11 ...
Page 8: ......
Page 24: ......
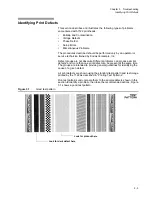
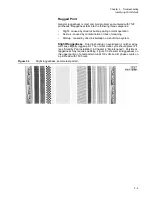
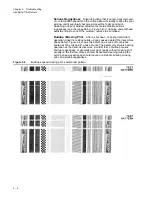
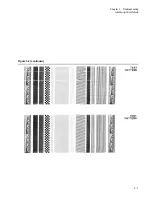
Page 37: ...3 7 Chapter 3 Troubleshooting Identifying Print Defects Figure 3 4 continued ...
Page 44: ......
Page 56: ......
Page 61: ......


