background image


Page 27 

Version 02-2012


Operation 

Compact-Light


The 

 Compact-Light stops moving when twist-grip is in the 0 position (see fig. 8 – page 

22) or when the clutch/safety stop lever (engine drive) is released – the hydraulic traction drive is 
interrupted. 


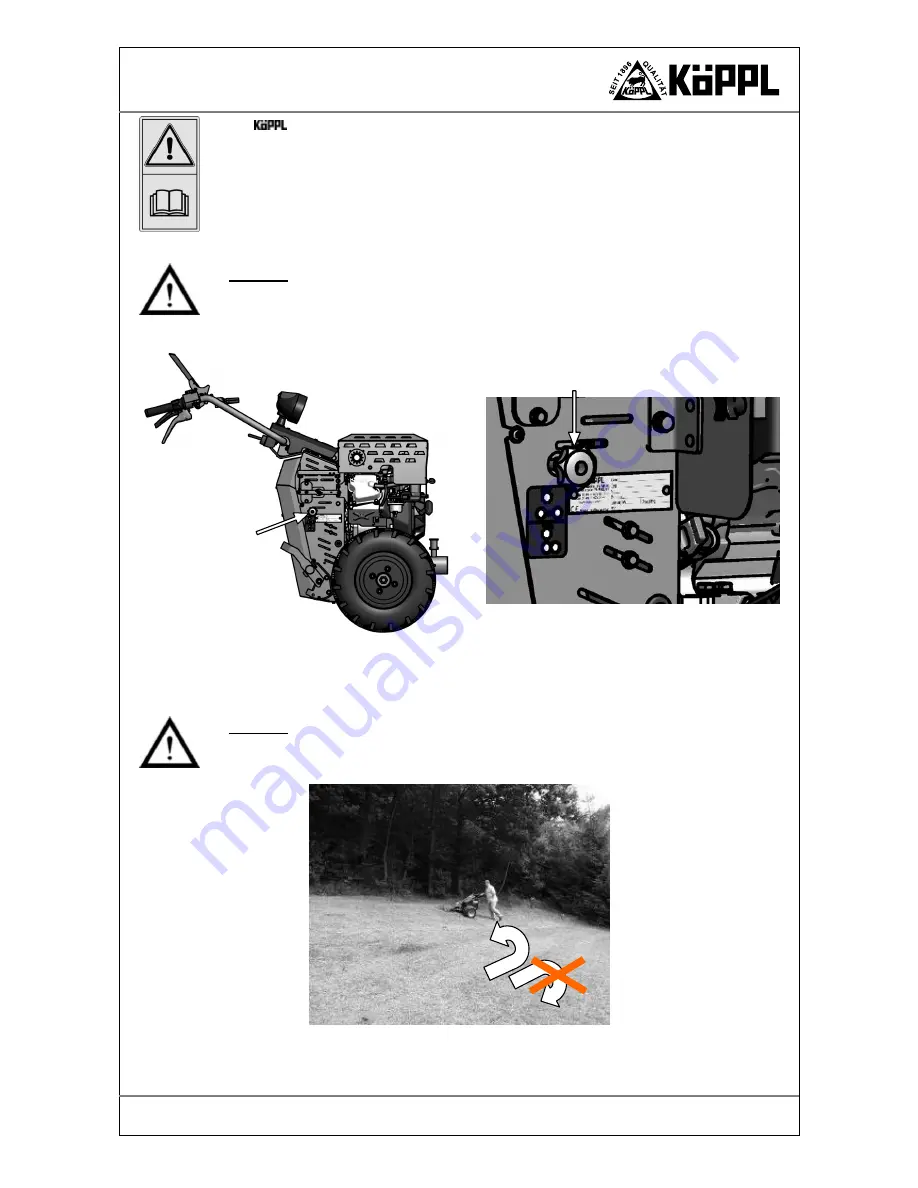
In case of failure of the hydraulics or the engine, the appliance can be pushed by opening the 
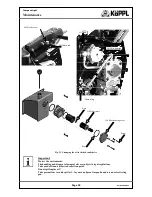
locking valve. The locking valve is located on the left on the chassis.  
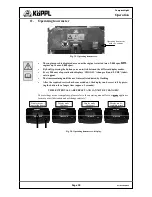
Turn the unlocking screw anticlockwise to open the valve – pushing operation. 
Turn the unlocking screw clockwise to close the valve – normal operation. 
 

Caution! 

Note that the appliance can run away uncontrolled on a slope if the locking valve is open! Check 
during operation that the unlocking screw is closed, otherwise there is a danger of the hydraulic 
system overheating, which can result in damage to the hydraulic system! 


Working with attached devices on a slope 
 
Caution! 

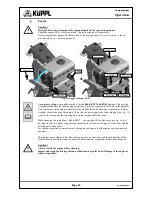
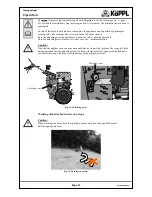
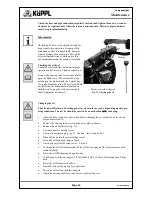
When working on a slope, bear in mind that you may only turn in an uphill direction! 
Pull the appropriate lever. 


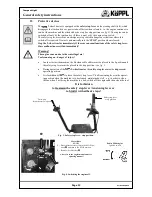
Fig. 15. Turning on a slope. 

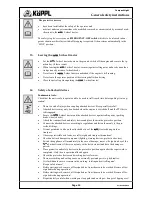
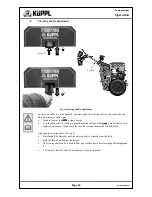
Unlocking screw 

Fig. 14. Unlocking screw. 

Unlocking screw 

Summary of Contents for CL10-2

Page 1: ...is that you read under stand and follow this operating manual and that for the attachments as well as the engine manufacturer s operating manual You may not commence with the operation before having...

Page 2: ...Page 2 Version 02 2012 Notes Compact Light Translation of the original operating manual Translation of the original operating manual...

Page 3: ...tractor 14 14 Safety of attached devices 14 15 Brakes 15 16 Engine 15 17 Tyres screwed connections 15 18 Operating devices 15 Transport 16 1 Tractor size machine dimensions 16 2 Technical data 17 3 T...

Page 4: ...ent from now on The following points distinguish our product The appliance is very well balanced you can work without effort It is equipped with an outstanding engine Maintenance costs are hence very...

Page 5: ...nly by persons who are familiar with this work and who have been instructed about the hazards The 2 wheel tractor may not be used on steep slopes Unauthorised conversions and alterations to the 2 whee...

Page 6: ...l indicates important safety information in this operating manual This symbol indicates a possibly dangerous situation Serious injuries may result from failing to follow the instructions Read the foll...

Page 7: ...e level can lead to disturbances of acoustic signals Other vehicles may not be noticed particular caution is required Depending on the attached device an increase in the sound pressure level of up to...

Page 8: ...Before starting up check the immediate vicinity children Ensure that your field of view and the lighting conditions are adequate The driver should wear tight fitting clothes Avoid loose fitting cloth...

Page 9: ...Highway Code and Article 17 paragraph 5 German Highway Code If a single axle tractor with a trailer is transported on a public road no operating permit is re quired up to a design related top speed of...

Page 10: ...25 or in uneven terrain On slopes with a gradient of over 40 or in uneven terrain the device can slip or tip over the danger zone is extended by the possible slipping or tipping area of the machine C...

Page 11: ...trailer A driving licence is not required however The driver of the vehicle must be qualified to drive it Lighting devices etc must be present The operator is responsible for the safety of third part...

Page 12: ...d Drive at a right angle to the slope never up or down the slope Never disengage the clutch and or shift gear on slopes Never leave the operator position during work Do not alter or repair supporting...

Page 13: ...stop lever Have malfunctions rectified immediately Warning The engine runs on due to the centrifugal ma Tools running on danger of injury In order to start the machine the Bowden cable shifter must b...

Page 14: ...TO drive is disengaged Secure the 2 wheel tractor and the attached devices against rolling away parking brake wheel chocks Attach the transport lock and safety device and place them in the protective...

Page 15: ...working tools are subject to wear they should be inspected at regu lar intervals and replaced if necessary 15 Brakes The appliance is braked by load holding valves Adjustment and repair work on the lo...

Page 16: ...the purpose and without attached devices When transporting on a trailer it is essential to secure the machine against slipping and roll ing away Always switch off the engine Use suitable ramps for loa...

Page 17: ...tandard Standard Standard Wheels 4 00 x 8 AS Standard Standard Standard Iron slope wheels Standard Standard Standard Weight kg without tyres and without attached device 122 128 128 Tyre type Tyre size...

Page 18: ...es have been damaged or rendered inoperable during transport Check and attach transport equipment lighting warning devices protective devices If protective devices and working tools are subject to wea...

Page 19: ...arts on the basic machine and attached devices are tight Important At temperatures under 0 C you must allow the hydraulic drive to warm up for approx 3 minutes at a low engine speed so that the oil ca...

Page 20: ...ition in front of the 2 wheel tractor with slightly bent elbows If that is not the case the steering shaft needs to be adjusted Adjusting the steering shaft See fig 6 Press lever C downwards until the...

Page 21: ...cold see the engine manufacturer s operating manual The engine can now be started with the aid of the recoil starter The throttle should be opened about halfway for the start procedure Once the engine...

Page 22: ...shown in fig 8 Reverse gear Turn the twist grip slowly towards the rear as shown in fig 8 Neutral position Place the twist grip in the 0 position noticeable by the latching point The machine stops as...

Page 23: ...ttached device takes longer than 7 seconds to come to a halt it is essential that you have the device checked at the nearest workshop as otherwise the safety requirements are no longer met If you wish...

Page 24: ...must remove the three wing nuts see fig 10 right on the starter and the two wing nuts on the steering shaft base plate When changing the spark plug Robin EX27 you can also tilt the side cover see fig...

Page 25: ...from the oper ating hour meter 2 700 rpm use with mowing bars 3 000 rpm use with flail mowers 3 300 rpm use with all purpose mowers In the case of the Rato 390 SNOW CL 13 2 SNOW engine the throttle is...

Page 26: ...ut effort in almost any terrain How to shift Twist grip Forwards Turn twist grip slowly clockwise Reverse Turn twist grip slowly anticlockwise How to steer with active steering Steering lever To steer...

Page 27: ...nticlockwise to open the valve pushing operation Turn the unlocking screw clockwise to close the valve normal operation Caution Note that the appliance can run away uncontrolled on a slope if the lock...
Page 28: ...tach and detach the desired attached devices without tools using the locking pin The mating surfaces of the rapid change flange on the basic device and on the attached device must be clean they must b...

Page 29: ...rking foot This is attached to the chassis at the bottom and is released and locked with the aid of the latch ing bolt Pull the latching bolt parking foot can be adjusted Always make sure that the lat...

Page 30: ...next interval is indicated by flashing After the required service has been carried out the display can be reset to 0 by press ing the button for a longer time approx 3 seconds THESE INTERVALS ARE PRE...

Page 31: ...tach the spark plug cap Push the choke regulator lever to ON Open the petrol tap Set the ignition switch to ON Fill up the fuel tank with fresh fuel Clean the fuel line Clean adjust or replace the spa...

Page 32: ...lever has no effect Tensioning lever is incorrectly ad justed V belt is worn Cable torn off Adjust the tensioning lever Have the V belt replaced in the work shop Replace cable Hydraulic drive Excessiv...

Page 33: ...It is essential to switch the engine off and to secure the tractor against rolling away when working on the hydraulic system Ensure absolute cleanliness when working on the hydraulic system Dirt and m...

Page 34: ...hten the bleed screw Changing the oil The oil and oil filter must be exchanged every six months or yearly depending on the oper ating conditions The service should be carried by an authorised workshop...

Page 35: ...ations Take used oil to an authorised collection point Do not spill engine oil Take precautions to catch spilt oil lay out an oilproof tarpaulin and use an oil collecting pan Fig 22 Changing the oil i...

Page 36: ...e Warning Secure the tractor against rolling away It causes crushing injuries Never reach into the crushing danger zone if parts can still move there The wheel drive is driven by a V belt These are ve...

Page 37: ...htened again afterwards The correct tension can be adjusted on the wheel drive tensioning lever If the V belt slips or no longer grips the tension can be adjusted using the adjusting screw You must un...

Page 38: ...om danger of poisoning Always close the petrol tap when the machine is parked and during transport and repairs Do not carry out any maintenance with the engine running Secure the parked 2 wheel tracto...

Page 39: ...fter cleaning with a high pressure water jet cleaner 8 Safekeeping and storage Do not park the 2 wheel tractor in damp rooms in rooms in which artificial fertilisers are stored in stables or in adjace...

Page 40: ...sed every 2 W W W W W 31 Lubricate the rapid change flange 3 O O O O 26 Check tighten screws bolts and operating parts O O O Check and lubricate shift levers 4 O O O O Check lubricate and adjust Bowde...

Page 41: ...the locking of screws and sealing compounds both adhesive and sealing surfaces must be clean and free of grease Please read the note included in the package and take note of the manufacturer s safety...

Page 42: ...ective 2006 42 EC Harmonised standards applied EN ISO 12100 1 EN ISO 12100 2 EN 12733 EN ISO 13857 EN ISO 14121 1 EN 349 EN 709 National standards and technical specifications applied Structural chang...

Reviews: