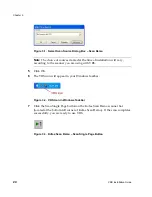
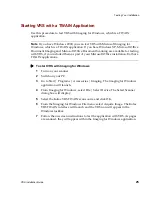
background image

Chapter 2

10

VRS Installation Guide

3

On the Devices tab of the Scanners and Cameras Properties dialog box, select 

your scanner from the list of installed devices, and then click the Properties 

button. 

4

Select the Events tab.

5

Select a device event from the list of scanner events.

6

The application associated with the event will appear in the Send to This 

Application list box.

7

At the bottom of the screen, select the Disable Device Events check box. 

8

Repeat steps 5-7 until all unnecessary device events are disabled.

Note  

Clear the Disable Device Events check box to restore a device event. 

9

Click Apply, and then select OK to exit the Events tab.

10

Click OK to close the Scanners and Cameras dialog box. 

Verify the Scanner Connection

Use this procedure to verify that your scanner is properly connected. 

X

To check the scanner connection status 

1

Right-click on My Computer. 

2

Select Manage.

3

At the Computer Management dialog box, double-click on the Device 

Manager icon. The devices on your system will appear in the right pane.

4

Double-click on the Imaging devices icon. 

Summary of Contents for VirtualReScan 3.5

Page 1: ...VirtualReScan 3 5 Installation Guide 10300408 000 Revision A...

Page 2: ...are trademarks of Pixel Translations a division of Captiva Software Corporation TWAIN is a registered trademark of the TWAIN Working Group All other product names and logos mentioned herein are the p...

Page 3: ...ecommended Requirements 3 TWAIN and ISIS Considerations 4 USB and FireWire Considerations 4 Certified Operating Systems 4 Certified Interfaces 4 Certified SCSI Scanner Controllers 4 2 Installation 5 O...

Page 4: ...Installation Guideline 29 Installation Scenarios 29 Ascent Capture 29 Other Kofax Products 29 B Configuring Non Certified Scanners 31 Overview 31 Creating a Scan Source for a Non Certified Scanner 31...

Page 5: ...application and outlines the requirements for running VRS Chapter 2 Installation includes the VRS installation sequence along with step by step procedures Chapter 3 Testing Your Installation describes...

Page 6: ...dix D VRS Non Interactive Mode explains how to disable VRS non interactive mode in connection with B we Bell Howell 8000 B C series scanners Appendix E Installing USB Drivers outlines special USB driv...

Page 7: ...e manual is intended for all potential scan operators regardless of their scanning expertise VRS Online Help VRS online help provides online assistance with your application You can access the online...

Page 8: ...updates to product release notes if any technical tips and an extensive searchable knowledgebase You can find VRS FAQs on the VRS Support pages The Kofax Web site also contains information that descri...

Page 9: ...canners including Personal Professional Low Volume Mid Volume and High Volume Personal Professional and Low Volume scanners are designed to support low to moderate throughput Mid Volume and High Volum...

Page 10: ...ware that you may experience less than optimal image quality when using a non certified scanner with VRS Not every scanner can be used with VRS To be configured as compatible with VRS a non certified...

Page 11: ...Processing Engine AIPE only works with ImageControls based applications the AIPE capabilities in the VRS AIPE bundle will NOT work with TWAIN and ISIS applications If you need these capabilities and y...

Page 12: ...ils select the VRS Supported Configurations link from the Support area of the Kofax Web site USB and FireWire Considerations Some VRS scanners are supported by a USB or FireWire interface If your scan...

Page 13: ...nner refer to Table 1 1 on page 1 Before you start the VRS installation process gather the required materials VRS installation CD VRS certified scanner SCSI scanner controller and supporting documenta...

Page 14: ...pplication refer to page 13 Install the SCSI Scanner Controller This step describes how to install the SCSI scanner controller X To install the SCSI scanner controller 1 Shut down your PC and unplug t...

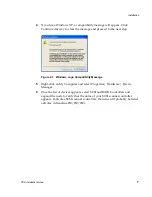
Page 15: ...igure 2 1 Windows Logo Compatibility Message 5 Right click on My Computer and select Properties Hardware Device Manager 6 Once the list of devices appears select SCSI and RAID Controllers and expand t...

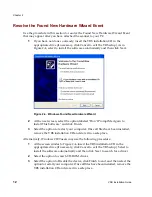
Page 16: ...ardware Wizard Event on page 12 and follow the instructions Otherwise VRS will be ready to use once your scan application is installed TWAIN Installations If you need to install the TWAIN driver for a...

Page 17: ...zard 2 Follow the on screen instructions to locate the necessary driver on the installation CD supplied with your scanner 3 Verify that the scanner is installed correctly Refer to Verify the Scanner C...

Page 18: ...ents check box 8 Repeat steps 5 7 until all unnecessary device events are disabled Note Clear the Disable Device Events check box to restore a device event 9 Click Apply and then select OK to exit the...

Page 19: ...in Figure 2 3 it has been properly connected to your system If your scanner is not listed as an imaging device check the USB FireWire cable connection or try rebooting and then check again to see if t...

Page 20: ...ompt Me Again to Install This Software and click Finish 3 Select the option to restart your computer Once all files have been installed remove the VRS installation CD and store it in a safe place Alte...

Page 21: ...installation is completed after the VRS installation To verify the recommended installation sequence refer to Overview on page 5 X To install the scan application 1 Install your ImageControls based T...

Page 22: ...in as a user with Administrative privileges Note Although Administrative permissions are required for the user who performs the VRS installation no special permissions are required to use the VRS app...

Page 23: ...is complete you should verify that any applications relying on ISIS runtime files still function properly If not you may need to reinstall the earlier version of the ISIS toolkit 3 If the Windows Sys...

Page 24: ...unning VRS 1 02 you must upgrade to VRS 2 0 before upgrading to VRS 3 5 If you are currently running Hardware VRS 1 03 1 04 or 1 05 you are required to remove all instances of Hardware VRS prior to in...

Page 25: ...tion click OK to clear the message Then click Cancel and Exit Setup from the subsequent screens to quit the VRS installation Once you have created more disk space restart the VRS installation or When...

Page 26: ...he scanner later if you plan to download a VRS Component Installer for a VRS certified scanner that does not appear on the list and then click Next For more information refer to VRS Component Installe...

Page 27: ...ppropriate selection if you want to run VRS in the background When non interactive mode is in effect you cannot see or use VRS dialog boxes while documents are being scanned See Appendix D VRS Non Int...

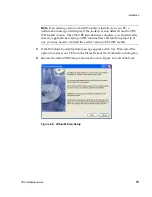
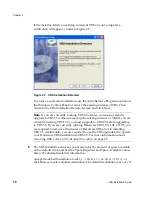
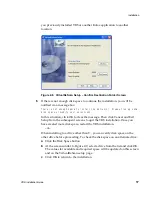
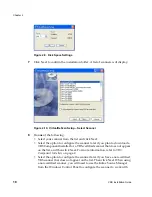
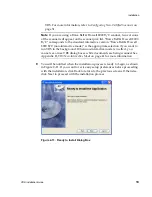
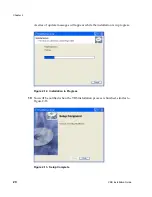
Page 28: ...A series of update messages will appear while the installation is in progress Figure 2 12 Installation in Progress 10 You will be notified when the VRS installation process is finished similar to Fig...

Page 29: ...D remove the installation CD and store it in a safe place 14 If applicable to your situation proceed with the download process for a VRS Component Installer A VRS Component Installer is required if bo...

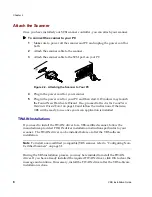
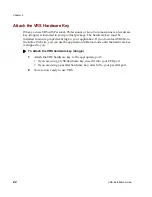
Page 30: ...ure proper licensing for your application If you download VRS from the Kofax Web site you can use the application in Demo mode until the hardware key is shipped to you X To attach the VRS hardware key...

Page 31: ...h scanners the settings associated with the VRS Source must be updated You can use the Restore Default Values RDV utility to update the settings for the VRS Source without having to reinstall VRS For...

Page 32: ...the scanner you are using with VRS 5 Click OK 6 The VRS icon will appear in your Windows taskbar Figure 3 2 VRS Icon in Windows Taskbar 7 Click the Scan Single Page button on the Kofax Scan Demo scan...

Page 33: ...installation Both are TWAIN applications X To start VRS with Imaging for Windows 1 Turn on your scanner 2 Switch on your PC 3 Go to Start Programs Accessories Imaging The Imaging for Windows applicati...

Page 34: ...ickScan Pro 1 Turn on your scanner 2 Switch on your PC 3 Start QuickScan Pro 4 Click the Scan Setup button 5 At the Scanner Selection dialog box select the scanner you will be using Figure 3 4 Selecti...

Page 35: ...are VRS prior to installing VRS 3 5 Additionally you are required to use the VRS upgrade kit to update your installation to VRS 3 5 Once you complete the procedure for removing VRS any existing VRS pr...

Page 36: ...me or High Volume production scanners 3 Kofax TWAIN Data Source 3 VRS Component Installer denoted by a CI prefix such as CI DR 6080 Note These items may be removed in any order 9 When VirtualReScan an...

Page 37: ...e all instances of Hardware VRS prior to installing VRS 3 5 Additionally you are required to use the VRS upgrade kit to update your installation to VRS 3 5 For more information about removing VRS refe...

Page 38: ...Appendix A 30 VRS Installation Guide...

Page 39: ...age Provide a TWAIN driver or an ISIS driver While VRS works best with an ISIS driver it also supports some scanners with TWAIN drivers To use a non certified scanner with VRS you should install the V...

Page 40: ...you have installed the scanner driver according to the scanner manufacturer instructions select Start Control Panel 2 Click twice to open the KSM icon shown in Figure B 1 Figure B 1 Windows Control Pa...

Page 41: ...anners VRS Installation Guide 33 Figure B 2 Kofax Source Manager 4 At the screen similar to Figure B 3 click Create Figure B 3 Kofax Source Manager KSM Dialog Box 5 The Source Properties dialog box wi...

Page 42: ...ist Kofax Adrenaline Hardware Import with image processing Kofax Adrenaline Hardware Scanning with image processing Kofax Hardware Import from disk with image processing Kofax Hardware Scanning with i...

Page 43: ...og Box 9 Select the Compatible device option 10 Select your scanner from the drop down list If your scanner does not appear on the list however click the Refresh button on the Select Scanner dialog bo...

Page 44: ...Appendix B 36 VRS Installation Guide Figure B 7 Kofax Source Manager New Source Created 12 Click Next to continue 13 Click Finish...

Page 45: ...lity allows you to reset these values to their original state while carefully preserving any custom profiles that may have been created in the meantime You can also use the utility to change the defau...

Page 46: ...the RDV installation is complete 3 A shortcut to the RDV program is added to the Kofax VRS program folder X How to create a shortcut for the RDV utility on your desktop 1 Go to C Program Files Kofax...

Page 47: ...re Default Settings Utility or If you want the most current VRS settings and have Internet access select the Download latest defaults from the Kofax Web site option This will automatically launch your...

Page 48: ...2080C a Canon DR 3060 a Canon DR 3080C a Kodak i50 or a Kodak i60 scanner you may receive an error message similar to the following when attempting to use the default scanner Missing or Corrupt ISIS...

Page 49: ...his feature is automatically set during installation of the B we Bell Howell 8000 B C scanner VRS non interactive mode can be switched back to interactive mode X To switch the B we Bell Howell 8000 B...

Page 50: ...Appendix D 42 VRS Installation Guide...

Page 51: ...tion explains the USB driver installation procedure for Visioneer 9650 scanners in a Windows XP environment X To install the Visioneer 9650 USB driver Note Do not connect your scanner until you are pr...

Page 52: ...tions provided by the manufacturer 2 Plug in the scanner 3 At the Found New Hardware Wizard initial screen select Next 4 When the Install Hardware Device Drivers screen displays select the option to S...

Page 53: ...ner 40 changing 40 Device events disabling 9 Documentation vi Dongle 22 F FireWire considerations 4 driver installation 9 installations 9 interface 4 Found New Hardware wizard 12 Fujitsu fi 4110CU USB...

Page 54: ...source 28 VRS 27 VRS component installers 28 Requirements system 3 Restore Default Values utility 23 37 S Scan application installing 13 Scan Demo removing 28 Scanner configurator 2 29 Scanner connect...

Page 55: ...V Visioneer 9650 USB driver 43 VRS component installers 2 18 21 documentation set vi hardware keys 22 installation sequence 5 6 removing 27 starting 23 testing 23 upgrading 16 using with ImageControl...

Page 56: ...Index 48 VRS Installation Guide...

Reviews: