background image

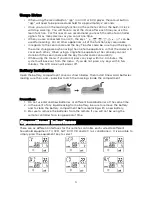
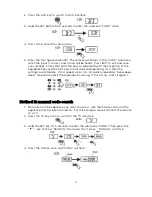
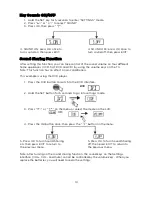
5. Aim the remote control at the TV, then click the “

” key until the screen shows 

“VOLUME”.  Press OK to return to the MANUAL state.

Note: except for A/C (air-conditioner) showing Turned On, all other home 

appliances will show “VOLUME”.  Therefore, when doing settings make sure you 

turn the A/C on, leaving it in standby.  Other appliances can remain on their 

normal operative states.

6. Check whether other keys are valid (            , EXIT, SET, equipment Key and the 

confirm key excepted). If yes, press EXIT once to return to the “SEARCH” menu, 

then press EXIT to exit. Settings are complete.  

If not, then please repeat steps 4-6.

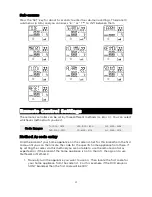
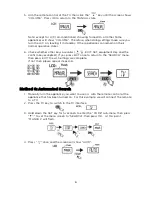
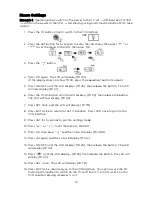
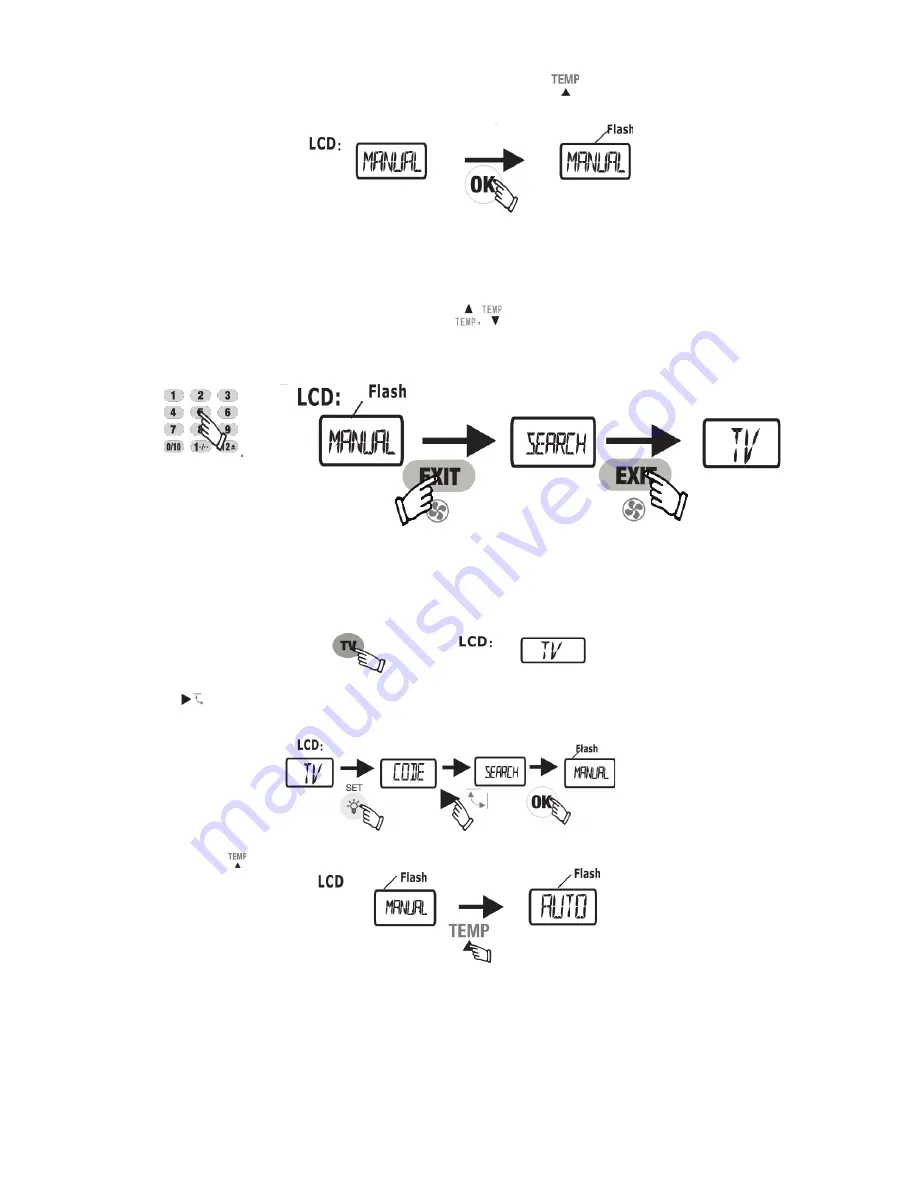
Method C: Automated Search

1. Manually turn the appliance you want to use on.  Aim the remote control at the 

appliance that has been turned on.  For this example, we will connect the remote 

to a TV.

2. Press the TV key to switch to the TV interface.

3. Hold down the SET key for 5 seconds to enter the “CODE” sub-menu, then press 

“      ” to set the menu screen to “SEARCH”, then press OK.   At this point 

“MANUAL” will flash.

4. Press “ 

” once and the screen will show “AUTO”.

6

Summary of Contents for CHUNIRMLCDA

Page 1: ...arch 6 Learning Function 7 Cancelling the learning function 8 Other Functions 9 Time Clock Function and Factory Settings 9 Set Cancel Alarm Clock Function 9 Key Sounds ON OFF 10 Sound Sharing Function 10 Macro Instructions 11 Macro Settings 12 Start Cancel Macro Instruction Settings 13 Set Cancel Key Transfer 14 Low Power Reminder 16 Kogan TV Linking Codes 16 1 6 in 1 Universal Remote with LCD Scr...

Page 2: ...al handy for future reference This remote control features an LCD screen learning functionality plus a powerful built in code base Through simple settings it can control many infra red controlled household appliances such as televisions DVD players blu ray players satellite cable PVR boxes air conditioners etc Keys and corresponding functions 2 ...

Page 3: ... code and the Key Transfer code concurrently While using the menu if you do not press any keys within 2 3 minutes the system will back out from the menu If you do not press any keys within 5 6 minutes the LCD screen will power off Battery Installation Open the battery compartment cover as shown below then install 3 new AAA batteries making sure the and polarities match the markings inside the comp...

Page 4: ... Method A code entry Find the brand of your home appliance on the code list Set for this brand from the first code until you can then locate the code for the specific home appliance from there If by setting the codes via this method you are not able to use the remote control as expected or if the brand of the home appliance is not in the list then go on to use Method B or Method C 1 Manually turn ...

Page 5: ... all valid and operating If so then the settings are complete If not repeat steps 4 5 A quickly repeating beep beep beep tone will sound if the code input is wrong If this occurs enter it again Method B manual code search 1 Manually turn the appliance you want to use on Aim the remote control at the appliance that has been turned on For this example we will connect the remote to a TV 2 Press the T...

Page 6: ...ipment Key and the confirm key excepted If yes press EXIT once to return to the SEARCH menu then press EXIT to exit Settings are complete If not then please repeat steps 4 6 Method C Automated Search 1 Manually turn the appliance you want to use on Aim the remote control at the appliance that has been turned on For this example we will connect the remote to a TV 2 Press the TV key to switch to the...

Page 7: ...function If the remote appears to be usable press EXIT to return to the SEARCH mode then press EXIT again to exit The settings should now be complete Learning Function This remote control is able to learn the functions of other household appliances that are controlled via infrared interfaces When an interface is being set all keys on the remote control with the exception of the equipment keys and ...

Page 8: ...ain Now other keys from the remote controller can be learned Learn each key as required until all keys have been learned Press the SET key once to exit from learning mode Press the EXIT key to return to the TV interface Cancelling the learning function Press SET to shift to the TV interface hold the SET key for about 5 seconds to go into Settings mode press the key to go to LEARN mode press the OK...

Page 9: ...ettings Press EXIT to go back and return to the menu 4 Press or on the menu to set the hour and minute 5 Press OK once to complete the settings 6 Press EXIT to return to normal mode Set Cancel Alarm Clock Function 1 Press SET for 5 seconds to enter SETTINGS mode 2 Press or on the menu to select ALARM mode 3 Press OK once then press to set the alarm clock 4 Press or on the menu to set the hour and ...

Page 10: ...conditioners This example is using the DVD player 1 Press the DVD button to switch to the DVD interface 2 Hold the SET button for 5 seconds to go into settings mode 3 Press or on the menu or select the mode on the LCD 4 Press the OK button once then press the button on the menu 5 Press OK to turn Sound Sharing on then press EXIT to return to the previous menu 5 Press OK to turn Sound Sharing off t...

Page 11: ...nstruction keys no matter which interface the remote is running under the same instruction codes will be sent out When a macro is triggered the top right corner of the LCD screen will display M If the timing function for the macro instruction has been turned on the screen will display TM To view which macro instructions have been equipped with timing functions you can enter the Mx ADD menu If any ...

Page 12: ... displays M1 25 then release the button The LCD will now display M1 02 7 Press SET once and the LCD will display M1 TM 8 Press EXIT twice to return to the TV interface Press VCR once to go into the VCR interface 9 Press SET for 5 seconds to go into settings mode 10 Press or to set the menu to MACRO 11 Press OK then press and the LCD will display M1 ADD 12 Press OK again and the LCD will display M1...

Page 13: ...s will not function as multi function buttons The home appliance specific buttons will be functional 5 Press EXIT to store settings and withdraw from the settings state The LCD will display M which means the multi function button settings have started 5 Press EXIT to store settings and withdraw from the settings state The M on the LCD will disappear meaning the multi function button settings have ...

Page 14: ...er at the TV When the remote controller clock reaches 19 30 the remote controller will turn the TV on and play the program on Channel 10 Set Cancel Key Transfer Transferring the function button of a home appliance to the function button of another appliance Notes 1 The button transfer code and learning code are both X999 After starting the button transfer function you may have to set a code before...

Page 15: ...once and the LCD screen will display CANCEL BUTTON TRANSFER 6 Press the OK button once and the LCD screen will display 7 Press the button on the menu and the LCD will display SAT 7 Press the button whose information was transferred The LCD will display Repeat this step to cancel the transferred button information 8 Press the OK button The LCD will display FR KEY Press the function button 6 and the...

Page 16: ...hould consider changing it over for a fresh battery when you next have the opportunity Kogan TV Linking Codes If you are using this remote to link to your Kogan com TV please compare the remote control to the table below and overleaf to find the correct remote The code is shown below the remote control image 1963 1964 1965 1966 1967 1968 16 ...

Page 17: ...1969 1970 1971 1972 1973 1974 1975 1976 1977 1978 1979 1980 If you have futher questions or concerns regarding the use of this product please contact the retailer you purchased from 17 ...

Reviews: