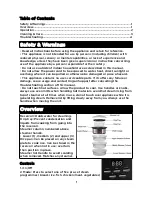
3. + / - : Set steaming time, up to 90 minutes
4. Hr / min: Change between hour and minute and set automatic start time.
5. Display: Indicate working mode and time
Operation
Before first use
Before first use of the appliance, clean completely, and also clean accessories
(steam plates, drip tray, steamer lid, etc.). Fill the reservoir with water to the
maximum indicated level, assemble all parts and begin to operate. Discard the
water boiled on this initial use.
NOTE: Never put reservoir and base in the water for cleaning.
Using food steamer
1. Place the food steamer on a stable and level surface.
2. Fill the reservoir. If the food needs steaming for 15-60 minutes, add water to
the maximum mark, but if the steaming time is less the 15 minutes, add water to
the minimum mark. If food steamer stops producing steam or steam rate drops
before the food is ready, it indicates you should add water to the reservoir.
NOTE:
1) Don’t add salt, pepper, flavouring, essence, or other liquids.
2) Always ensure the water level is between minimum and maximum levels.
3. Add the steamers, the bottom (1), bottom and middle (1 and 2), or all 3.
NOTE: During steaming with two or three steamer columns, the food of cooking
in the lower steamer column is quicker than in the upper steamer column, so
you may put the difficult-to-cook food in the lower steamer column.
4. Cover with the steamer lid.
5. Plug into the outlet: a buzz will be heard and the display will show “0:00”
after 1 second. Only the “Mode” button can be used.
NOTE: Do not operate without steamer columns and lid in place.
6. Press the “Mode” button: select your desired program and then change the
steaming time by pressing the
+
and
-
buttons.
7. The unit has automatic start function: the max delay time is 12 hours and 59
minutes. If you do not want to the steamer start operation immediately, you
may set the automatic start function by pressing “Min” and adjusting the
minutes using the
+
and
-
buttons, then “Min” to select the hours. Then, press
“On/Off” to set. The LCD will count down the time to “0:00”, where the alarm
clock icon will disappear, the indicator will turn red and stop flashing and the
appliance will begin.
NOTE: The minimum operation time of every mode is the default time: the
maximum is 90 minutes. You can cancel by pressing “On/Off” for 2 seconds.
2


