background image

18

Installation

SELECTION OF INSTALLATION EQUIPMENT

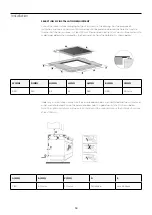
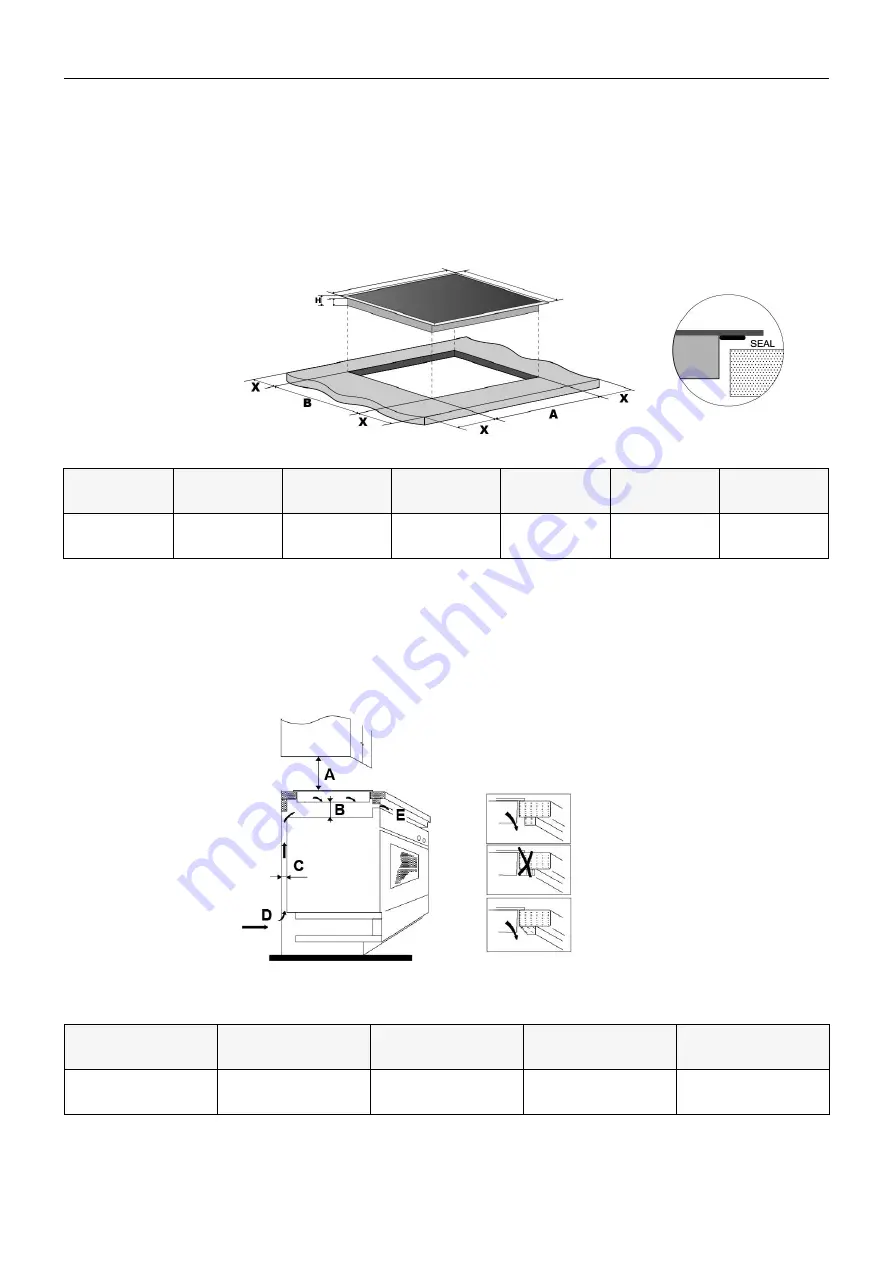
Cut out the work surface according to the sizes shown in the drawing. For the purpose of 
installation and use, a minimum of 50mm space shall be preserved around the hole. Be sure the 
thickness of the work surface is at least 30mm. Please select heat-resistant work surface material to 
avoid larger deformation caused by the heat radiation from the hotplate. As shown below:

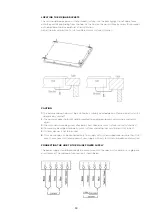
Under any circumstances, make sure the ceramic cooker hob is well ventilated and the air inlet and 
outlet are not blocked. Ensure the ceramic cooker hob is in good work state. As shown below

Note: The optimum distance between the hotplate and the cupboard above the hotplate should be 
at least 760mm.

W(MM)

D(MM)

H(MM)

L(MM)

A(MM)

B(MM)

X(MM)

590

520

55

51

560

490

50mini

A(MM)

B(MM)

C(MM)

D

E

760

50mini

20mini

Airintake

Airexit5mm

W

L

D

Summary of Contents for KACRMICCTPA

Page 1: ...INSTRUCTION MANUAL INSTALLATION MANUAL MODEL KACRMICCTPA 60cm Ceramic Cooktop...

Page 2: ...2 THIS PAGE IS INTENTIONALLY LEFT BLANK...

Page 3: ...g your New Ceramic Hob Choosing the right Cookware Using your Ceramic Hob Locking the Controls Using the Timer Cooking Guidelines Heat Settings Care and Cleaning Hints and Tips Technical Specification...

Page 4: ...4 THIS PAGE IS INTENTIONALLY LEFT BLANK...

Page 5: ...acent cabinetry closer than 4mm to the cooktop Adequate Ventilation Use of your cooktop will create heat steam and moisture Ensure that care is taken to avoid injury as a result of use and that the ro...

Page 6: ...lly not resistant to high temperatures Cut Hazard The razor sharp blade of a cooktop scraper is exposed when the safety cover is retracted Use with extreme care and always store safely and out of reac...

Page 7: ...g a fire hazard WARNING The appliance and its accessible parts become hot during use WARNING Unattended cooking on a cooktop with fat or oil can be dangerous and may result in fire NEVER try to exting...

Page 8: ...EW 1 max 1800 W zone 2 max 1200 W zone 3 max 1800 W zone 4 max 1200 W zone 5 Glass plate 6 Control panel CONTROL PANEL 1 Power regulating key 2 Timer regulating key 3 Keylock control 4 ON OFF control...

Page 9: ...time a touch is registered Make sure the controls are always clean dry and that there is no object e g a utensil or a cloth covering them Even a thin film of water may make the controls difficult to...

Page 10: ...the bottom of the pan and the surface of the cooking zone are clean and dry 3 Select a heat setting by touching the or control If you don t choose a heat setting within 1 minute the ceramic hob will...

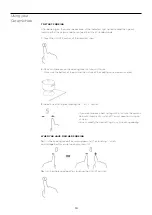
Page 11: ...THE CONTROLS Touch the keylock control The timer indicator will show Lo TO UNLOCK THE CONTROLS 1 Make sure the ceramic hob is turned on 2 Touch and hold the keylock control for a while 3 You can now s...

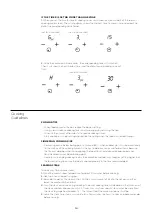
Page 12: ...g zone 2 Touch the control of the timer The minder indicator will start flashing and 10 will show in the timer display 3 Set the time by touching the or control of the timer Hint Touch the or control...

Page 13: ...mer will decrease or increase by 10 minutes 3 Touching the and together the timer is cancelled and the 00 will show in the minute display 4 When the time is set it will begin to count down immediately...

Page 14: ...t rising occasionally to the surface of the cooking liquid It is the key to delicious soups and tender stews because the flavours develop without overcooking the food You should also cook egg based an...

Page 15: ...fry the vegetables When they are hot but still crisp turn the cooking 17 zone to a lower setting return the meat to the pan and add your sauce 6 Stir the ingredients gently to make sure they are heate...

Page 16: ...beware of hot cooking zone surfaces 1 Switch the power to the cooktop off at the wall 2 Hold the blade or utensil at a 30 angle and scrape the soiling or spill to a cool area of the cooktop 3 Clean t...

Page 17: ...ke sure the touch control area is dry and use the ball of your finger when touching the controls The glass is being scratched Rough edged cookware Unsuitable abrasive scourer or cleaning products bein...

Page 18: ...rial to avoid larger deformation caused by the heat radiation from the hotplate As shown below Under any circumstances make sure the ceramic cooker hob is well ventilated and the air inlet and outlet...

Page 19: ...ic cooker hob shall not be mounted to cooling equipment dishwashers and rotary dryers 3 The wall and surrounding areas affected by heat above the work surface shall withstand heat 4 To avoid any damag...

Page 20: ...oduct complies with AS NZS 60335 2 6 2008 A1 2008 A2 2009 A3 2010 A4 2011 for electrical safety and with EN 55014 1 2006 A1 2009 for electromagnetic compatibility DISPOSAL DO NOT DISPOSE THIS PRODUCT...

Page 21: ...ia is not liable in the following situations which are not exhaustive a the Appliance is damaged by i accident ii misuse or abuse including failure to properly maintain or service iii normal wear and...

Page 22: ...22 THIS PAGE IS INTENTIONALLY LEFT BLANK...

Page 23: ...23 THIS PAGE IS INTENTIONALLY LEFT BLANK...

Page 24: ...24...

Reviews: