25
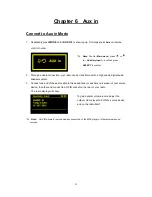
7.4 Setting Clock
1. It can be activated by pressing
MENU
<
Main menu
>
<
System settings
>
<
Time/Date
>, press
SELECT
to confirm.
Note:
here, Press
or
to a range of time
settings available, which include the functionality to
set:
<Set Time/date>: Manually set-up both Time and Date
<Auto update>: '
Update from DAB
',
‘
Update from Network
’ and ‘
No update
’
<Set format>
: ‘
Set 24 hour
’ and ‘
Set 12 hour
’
<Set timezone>:
Press
or
to your local timezone, press
SELECT
to confirm
<Daylight savings>: Press
or
to
‘
ON
’, and then press
SELECT
to confirm, it is done!
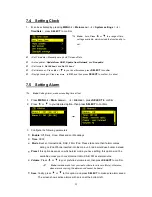
7.5 Setting Alarm
Note
: Setting Alarm, make sure setting time at first.
1. Press
MENU
<
Main menu
>
<
Alarms
>, press
SELECT
to confirm.
2. Press
or
to
your
desired option, then press
SELECT
to confirm.
3. Configure the following parameters:
Enable
: Off, Daily, Once, Weekends or Weekdays
Time
: 00:00
Mode
: Buzzer, Internet radio, DAB, FM or iPod. Please take note that if alarm comes
during no iPod/iPhone insert
ed into the main unit, radio would use buzzer instead.
Preset
: this option depends on which alarm mode you have setting, this option won
’t be
available unless you choose Internet radio, DAB, FM as alarm source
Volume
: Press
or
to your preferred volume level, then press
SELECT
to confirm.
Note
: remember d
on’t set your radio volume level to zero (Mute), otherwise,
when alarm is coming, the alarm sound cannot be heard.
Save
: finally, press
or
to this option, and press
SELECT
to make sure alarm saved.
The screen shows active alarms with an icon at the bottom left.


